How To Translate For Free Your PBX Voice Guides With Google
Translation of text has always been a challenge, given that it is necessary to have full knowledge of both languages, the origin, and the destination.
In the past, there were many drawbacks, some like:
- Pricey, since you would need to hire a professional translator for the job.
- Delayed, as we depended on the skill from the person doing the job.
- Subject knowledge, it was necessary to find an interpreter with knowledge on the subject being translated to get a wanted result.
In November of 2016, Google launched its Google Neural Machine Translation system. According to Google, this method will perfect the text translation using neural engines to translate complete sentences rather than word by word.
The system learns and improves itself through the user’s input sentences. Google has incorporated this system to the English, French, German, Portuguese, Spanish, Chinese, Japanese, and Turkish languages.
However, if you would like to translate dozens or even hundreds of texts, using the web Google translator is not good since this limits us to 5,000 characters. Moreover, in our case, a set of Voice Guides possesses 56,250 characters and more than 2,000 files with unique names.
If you wish to translate the 2,000 voice guides that VitalPBX has with the web application, it will take too much time, as we would need to copy and paste the 2,000 texts.
The good news is that we have a faster and more efficient way to mass-translate, thanks to Google’s Translate API access. It gives us the means to translate a set of Voice Guides for VitalPBX in minutes.
How much does it cost?
“On May 26, 2011, Google announced that the Google Translate API for software developers had been deprecated and would cease functioning. The Translate API page stated the reason as “substantial economic burden caused by extensive abuse” with an end date set for December 1, 2011. In response to public pressure, Google announced in June 2011 that the API would continue to be available as a paid service.”
The previous statement shouldn’t worry you, as Google allows us to translate up to half a million (500,000) characters per month for free. It is more than enough to make eight translations of every voice guide from VitalPBX.
If you wish to learn more about Google Translate, you can read more on the following link, https://en.wikipedia.org/wiki/Google_Translate.
Translate VitalPBX's Voice Guides
We will give you a walkthrough for Windows alongside this blog article. You can translate the Voice Guides for VitalPBX from English to your desired language supported by Google Translate within minutes.
The only requirement that this software requires is a valid API Key from Google Translate. Don’t worry, we will be showing you how to do this.
1.- Obtaining Google's Translate API Key
To obtain Google’s Translate API Key, you must follow the following steps:
1.1.- The Google Cloud Console Account
It is necessary to have a Google Cloud Console account and a payment method to proceed.
- Access the Google Cloud’s platform console and log in. If you don’t have an account, you can register to open one.
- Open the left-hand side navigation menu on the console and select Billing.

- Click on the button “Create Account.” Keep in mind that if this is not your first billing account, you must first open the billing account list. For this, click on the “Manage Billing accounts” button.
 An account with no Billing Account

An account with an existing Billing Account
- When creating your new Billing Account, enter the name for the billing account and follow the steps shown on the screen. These steps may vary between countries and billing methods.
- Click on Submit and Enable Billing.
1.2.- Create a project

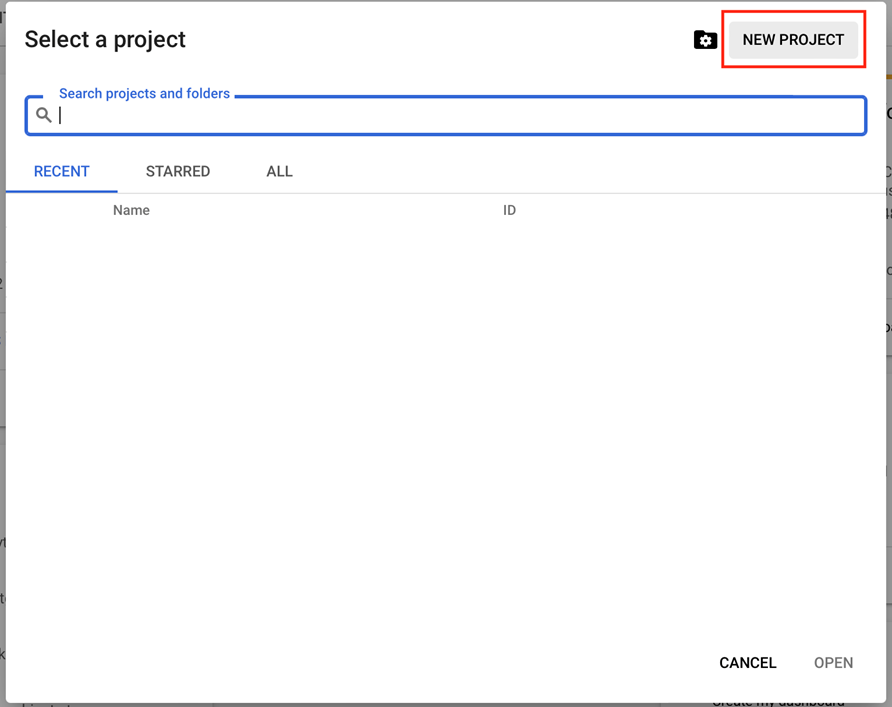
Go to the upper ‘blue’ bar, and there you will find a drop-down menu with your projects, as well as the option to create a new project. Click on the “New Project” button.


Now, give your project a name, and click on the Create Button.

With this, you will have your project created and selected.
1.3.- Activate the Google Translate API
Before you can use the Google Translate API with your project, you need to activate it. Go to the left-hand side navigation menu and select API & Services.

Now, you will see the statistics of the APIs you have enabled. If you have just created the project from scratch, you will have zero data at the moment.

Click on the “+ Enable APIs and Services” link on the top, so we can enable the API we are looking for.
This will take us to a search where we need to search for the Google Translate API. Type down “Translate” on the search bar and select the “Cloud Translate API” from the results.

Now you will be taken to the “product” page for the Cloud Translation API. Here, you click on the “Enable” button to activate the API on our project.

1.4.- Create a new API Key for Google Translate
Now, we can go back to the navigation menu on the left-hand side and select “Credentials.”

Next, we click on the “+ Create Credentials” link at the top of the page.

We will now see the API Key we are going to use.

1.5.- How to Restrict our Google Translate API Key and Limit its Usage
To control the cost of Google Cloud while using the API for Cloud Translation, we can do two things. First, we can restrict from where you can use an API Key or limit the use we can have for the service itself.
If you click on the “Restrict Key” link on the previous screenshot, you will be taken to the API Key restriction page.

2.- Translate Application
Now, we will install the application for your VitalPBX system for a quick translation setup. You can download it at this link.
Once installed, you need to enter your API key to work.
2.1.- How the translate application works.
Below, you will see the window for the translate application.

To use the application, you must first enter the API Key we just created and then click on “Save Settings.”
The other fields available are:
- Source, this is the origin language to translate.
- Target, this is the destination language we are translating to.
- Text to translate, here you can input the text you want to translate.
- List of Text Files, on the “data” folder where you installed the application, comes a file that has all the voice guide texts for VitalPBX in English. This makes it easier to translate the guide’s text to any other language.
- Translate all list, when you press this button, we will be asked to which directory you wish to save the translations. These translations are saved in a .csv file so you can use them with our TTS software.
- Translate text, this will translate any custom text you will have on the “Text to translate” field.
- Menu, here, you can open the settings to enter the API key and save the Source and Target Language selection.
It doesn't get much easier than this
As you can see, here we have tested the translation technology, which has advanced in the last couple of years. And even though Google is one of the leaders in this field, there are other options that are quite good and offer this type of service, like:
- Microsoft Azure
- DeepL
- Among others.
However, in this blog article, we decided to use Google due to its fidelity and ease of integration.
In another article, we will be seeing how we can use these translations with a TTS (Text to Speech) software we made, so you can create your own voice guides.
Sources
https://en.wikipedia.org/wiki/Google_Translate
https://neliosoftware.com/es/blog/como-obtener-una-api-key-de-google-translate/


