
Exciting Product Updates to Enhance Your Communication Systems: 4.1.0 R2
We’re thrilled to share a series of updates and improvements

VitalPBX One is the all-in-one solution designed to improve your business's collaboration and communication to new levels
Ideal for any size and type of business.
Get features that cover all your call center needs
Manage multiple PBX's on the same server
Experience a fully featured Switchboard, Recording Manager, Call Center Statistics, Call Account, and Call Center Dialer, system,
The add-ons module allows you to install new modules in order to expand the PBX capabilities and add new features.
Communicate anywhere with VitXi, our full WebRTC client exclusively for your VitalPBX installation.
With VitalPBX Connect, you can make and receive business calls on your smartphone.
An advanced windows softphone for call center which integrates presence, chat, video call, BLF, and much more.
We can help with everything from implementation assistance to upgrades and production down emergencies.
VitalPBX has the set of tools to allow you to communicate no matter where you are located. Take advantage of these functionality to make your business safe and connected.
You can install VitalPBX in just one server and manage multiple PBXs with the same numbering plan but separated at an administrative level.
With VitalPBX you can enjoy a variety of features without extension fees to increase your business productivity.
Take your Call Center to the next level with powerful PBX Software. With VitalPBX you can easily have all your Call Center needs fulfilled.
Our team is ready to assist you with any inquiries you may have. By reaching out to us via email, we can provide you with comprehensive information tailored to your specific needs. Get in touch today and discover the possibilities that await with VitalPBX for your business!
VitalPBX is the graphic user interface between you and the complex world of modern communications
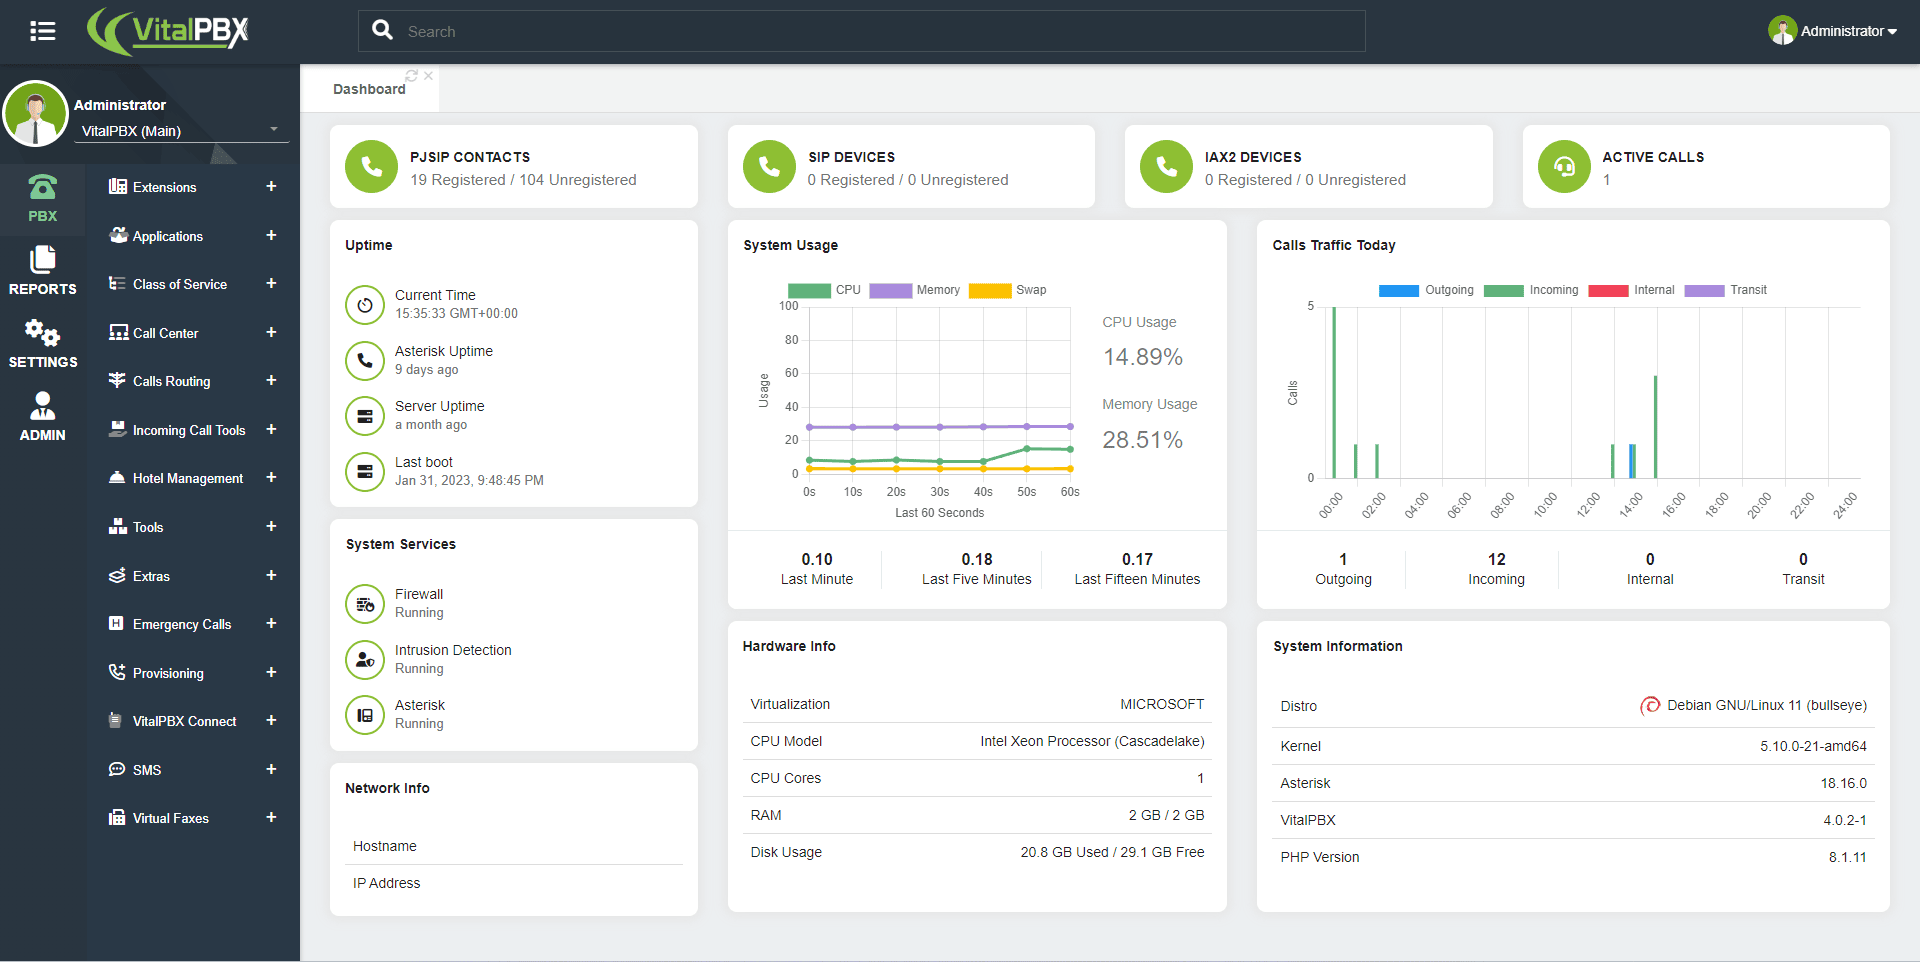
VitalPBX is a unified communications PBX system based on Asterisk and Linux (Debian 11). VitalPBX provides a robust and scalable platform, which will allow you to manage your PBX in an easy and intuitive way.
Installation Worldwide
Countries
Modules
Community Members
We’re thrilled to share a series of updates and improvements

The VitalPBX team is thrilled to announce the rollout of

PBX System Recognized for Industry Innovation Miami, Florida, 02/27/24 —
To obtain a 15-day trial of any of our plans, send us an email to sales@vitalpbx.com.
Yes, it is possible to migrate between plans, either from a monthly to yearly installment, or between whole plans.
You can download VitalPBX from the download section on our website, and install on any Virtual Machine, Dedicate Hardware, or VPS Service Provider like Amazon AWS, Google Cloud, Digital Ocean, among others. https://vitalpbx.com/pbx-system-download/.
Additionally, every add-on on VitalPBX, including the commercial add-ons, can be installed even without a license. This will allow to test and use the modules with all of their features for an unlimited amount of time. Learn more about our add-ons, https://community.vitalpbx.org/installing-vitalpbx-add-ons/.
Yes. VitalPBX is a complete Multi-Tenant solution. This means that you can install VitalPBX in just one server and manage multiple PBXs with the same numbering plan but separated at an administrative level. This saves you money on servers and makes it easier for you to manage your clients.
If you want more information go to VitalPBX Multi-Tenant PBX.
Yes. We have several solutions.
Our soft phone, VitalPBX Connect, you can install on Android or iOS.
VitXi WebRTC, that you can access from any browser, whether you are accessing from Windows, Mac, Linux, Chromebook, or even from your mobile device.
We also have VitalPBX Communicator which is a Call Center Oriented Soft phone for Windows.
You can see more information in the products section of our website.
This depends on the number of extensions that each Tenant has as well as the concurrent calls and if any Tenant is going to have a Call Center and call recordings.
Although we have some customers that have more than 100 Tenant per server, we recommend not having more than 100 per Server.
We cannot offer support to clients with more than 100 Tenans per server.
Yes, what changed is the name of the device in each Tenant, for example the extension 101 in Tenant A would have the device name (user) TA_101 and in Tennat B it would have TB_101 and so on.

VitalPBX provides a robust and scalable platform, which will allow you to manage your PBX in an easy and intuitive way.