In the world of business, communication is essential. And, as we all know, there are several ways to communicate nowadays. One of the most common ways is through voice communication, and SIP trunking is a widely used method for voice communication. In this blog article, we will take you through the steps to configure a BulkVS SIP Trunk and connect it to VitalPBX using IP Auth.
Setting up BulkVS
Before wide into the BulkVS portal configurations, we must sign up for a BulkVS account. After finishing the sign-up steps, consider adding credit to your account before making any configurations.
Now that our account is all set, we will navigate to “Inbound / DIDs – Purchase” to get our first DID number. To get the list of numbers, you must use the “Search Criteria” input field to localize your desired DID in a specific USA state.
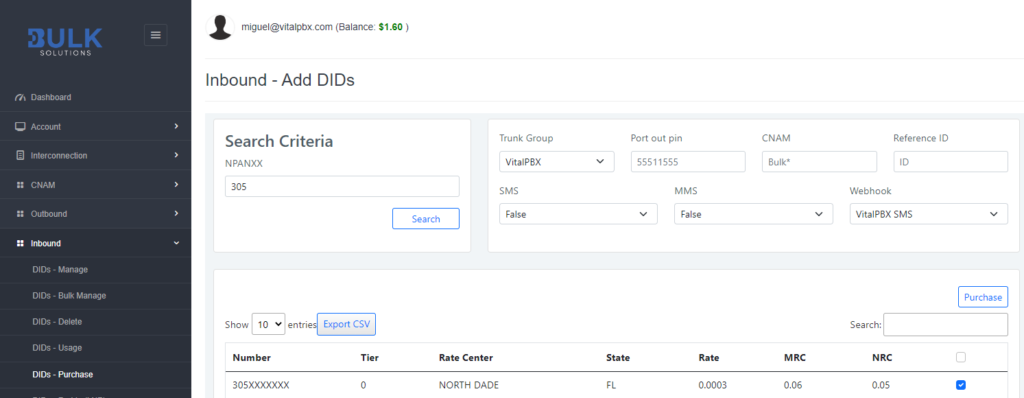
Now that we got our DID, we will create the required trunk configurations to place and receive calls from BulkVS using IP authentication.
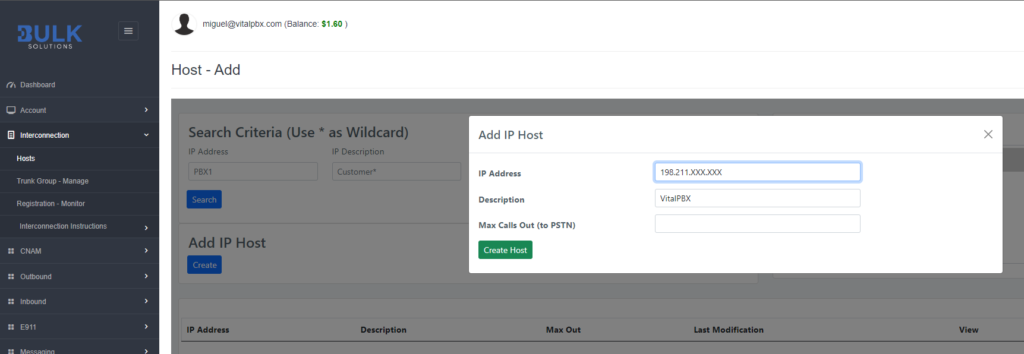
First, for outbound calls, we must navigate to “Interconnection / Hosts” and add an IP host using the public IP of our VitalPBX server.
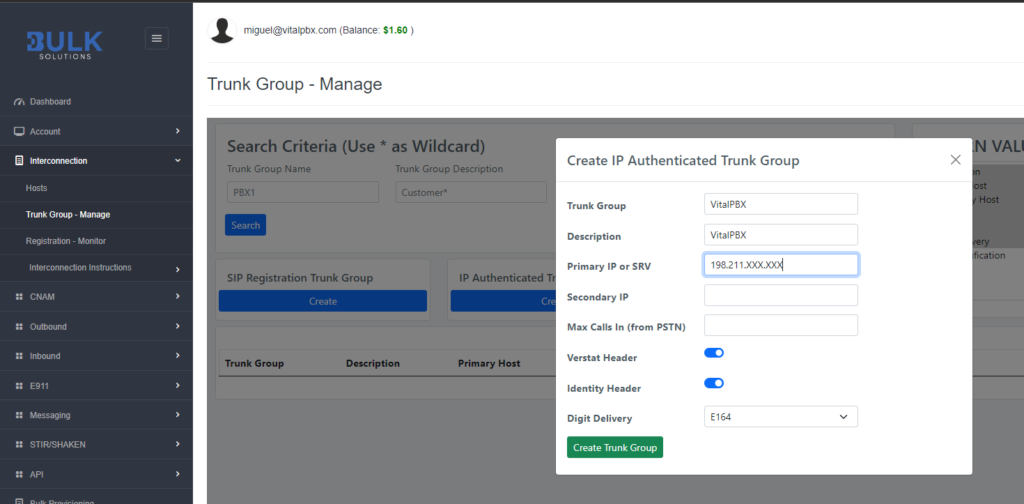
Secondly, we must navigate to “Interconnection / Trunk Group – Manage” and create an “IP Authenticated Trunk Group.” In our Trunk Group, we must configure the parameters below.
- Trunk Group: it can be any alphanumeric string.
- Description: it can be any alphanumeric string.
- Primary IP or SRV: it must be the public IP of our VitalPBX server.
- Digit Delivery: we can select between formats E164, 10-digit, and 11-digit. In our case, we will use the E164 format. Thus, the incoming calls will reach our VitalPBX server using the pattern “+1XXXXXXXXXX,” for instance.
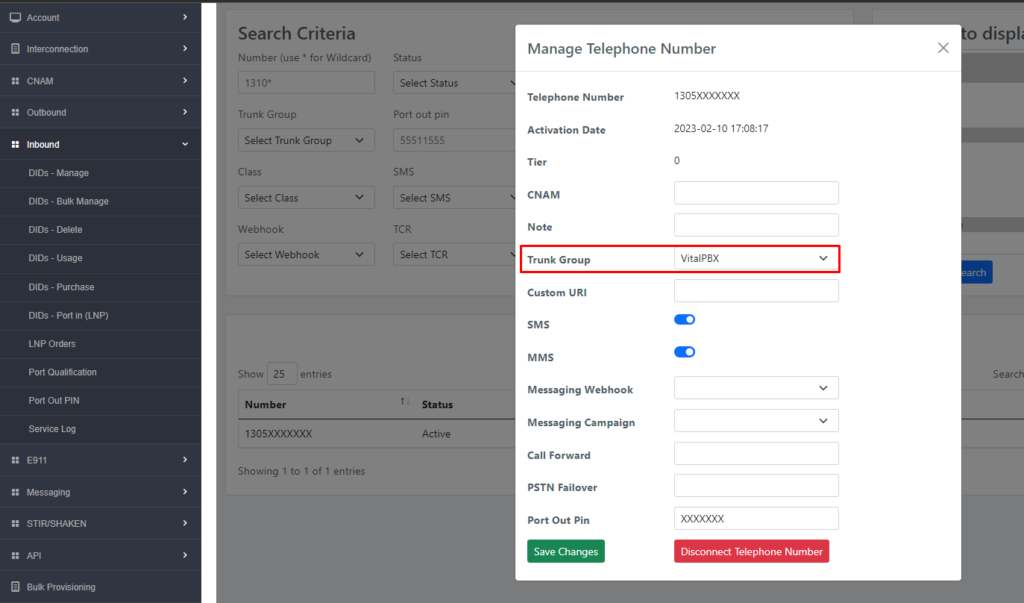
Finally, to receive calls in our VitalPBX, we must assign our “Trunk Group” to our DIDs. So, for this, you must navigate to “Inbound / DIDs Manage” and click on the “View” link of any of your DIDs to open the edition modal. Once the modal gets opened, you must select the desired trunk group in the field “Trunk Group.”
Setting up VitalPBX
Now that the BulkVS portal configurations are all set, we will proceed with the Trunk creation on VitalPBX.
To start with our trunk setup, we will define the fields below in the top section.
- Description: It can be any alphanumeric string for identifying the trunk.
- Profile: It can be any PJSIP Profile (usually the Default PJSIP Profile).
- Codecs: according to BulkVS documentation, we must select “ulaw, and g729.”
- Trunk CID: for the name, you can use any alphanumeric string, but for the number, you must provide the DID purchased in the initial steps using the 11-digit format (e.g., 13055551111).
- Overwrite CID: we will select the value “If not provided” to use the value of the field “Trunk CID” as the fallback value in case of the extensions don’t have an External CID defined.
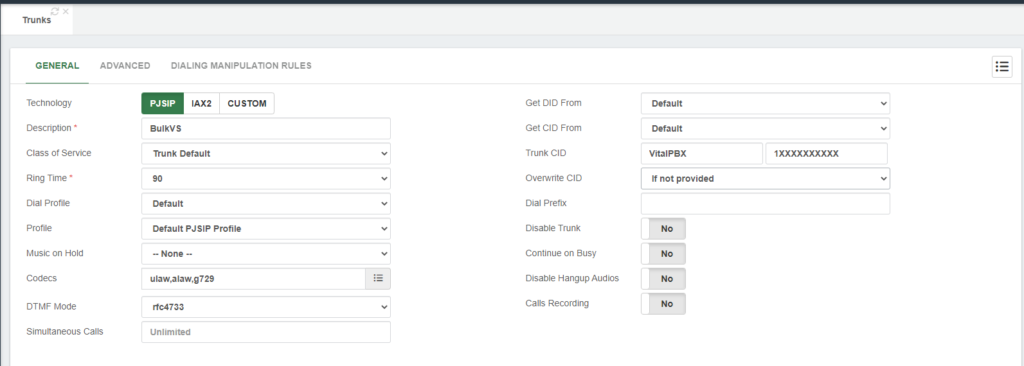
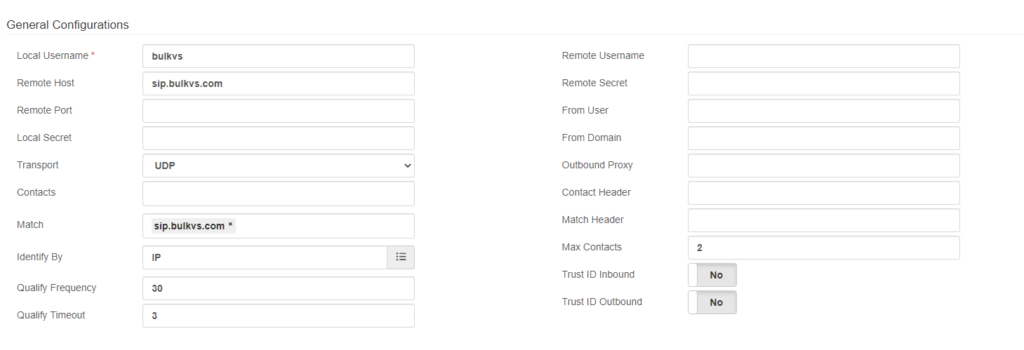
Next, in the section “General Configurations,” we must define the fields below.
- Local Username: it can be any alphanumeric string without spaces.
- Remote Host: must be set up with the value “sip.bulkvs.com”
- Match: must be filled in with the value “sip.bulkvs.com”
- Identify By: we must select the IP value because we’re implementing IP authentication for the trunk.
After saving the trunk and applying changes, you can monitor the trunk status by navigating to “Reports / PBX Reports / PJSIP Endpoints.” Once there, you must select the “Trunks” tab.

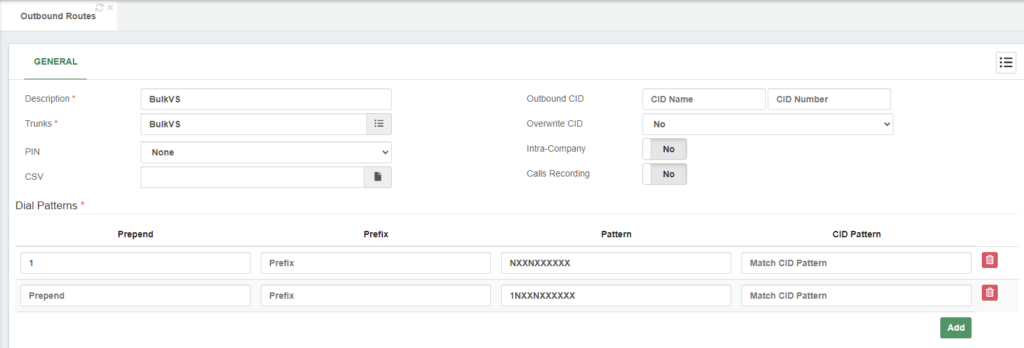
Now that we are assured that our trunk is up and running, we will create the outbound route to place calls using the BulkVS trunking.
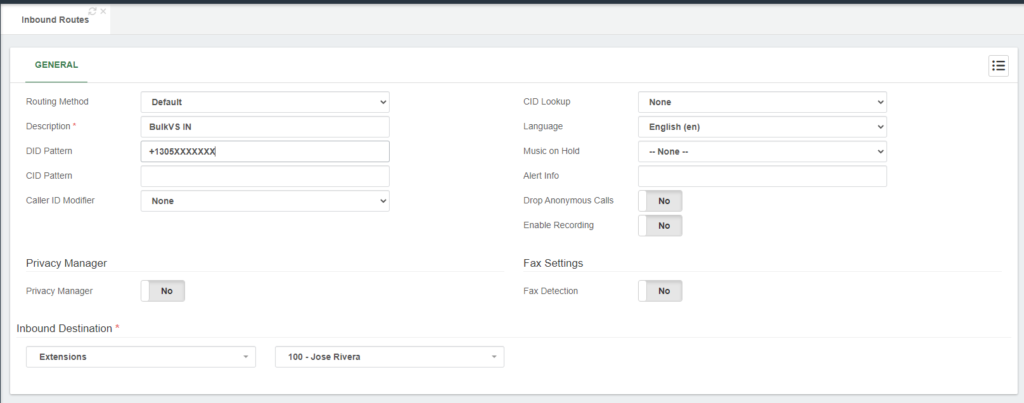
Finally, to receive calls in our VitalPBX server, we must create our inbound routes with our BulkVS DIDs using the +E.164 format.
Testing the configurations
Now that the settings are complete, we can place test calls to confirm that our trunk is working.
For testing outbound calls, you can place a test call to a phone number outside of your network; it can be your mobile number, for instance.
For inbound call testing, you can call from your mobile to any of your Vonage DIDs.
Thus, if both tests went well, congrats! You have successfully set up a BulkVS trunk in VitalPBX.
Conclusions
That’s it! You have successfully interconnected your BulkVS SIP trunk with VitalPBX using PJSIP. You can now make and receive calls using your VitalPBX and BulkVS together.


