DIDWW is a leading provider of global communications solutions, offering high-quality SIP trunking services to businesses of all sizes. With local and toll-free phone numbers from over 100 countries, DIDWW is a trusted provider for companies looking to expand their global reach.
Integrating DIDWW’s SIP trunking services with VitalPBX is a straightforward process that can be accomplished in just a few easy steps. In this blog article, we will take you through the steps to configure a DIDWW Trunk and connect it to VitalPBX using PJSIP.
Setting up DIDWW
Before diving into the DIDWW portal configurations, we must sign up for a DIDWW account. Once you have completed the sign-up process, we recommend adding credit to your account before making any configurations.
Now that our account is all set, we will purchase our DIDs by navigating to the DID Numbers and pressing “Add New DIDs.” Once there, we can select all the desired services for our DIDs and the country.
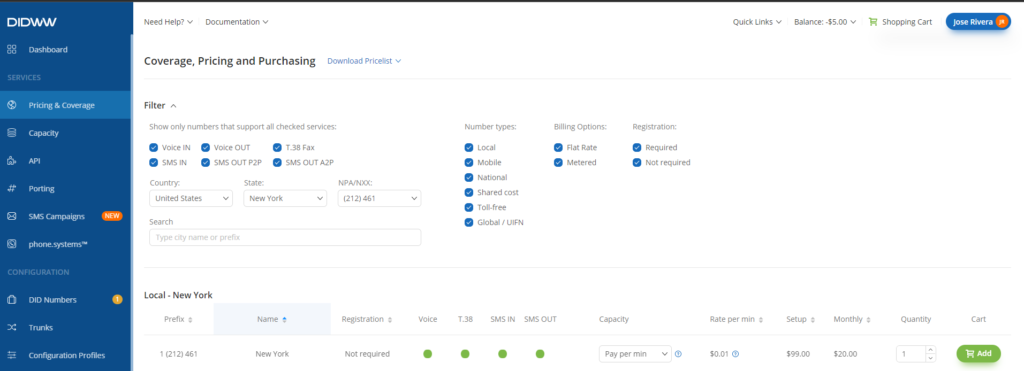
Something to highlight is that DIDWW provides DIDs for different countries. However, not all the services/features are available for all countries.
Now that we got our DIDs, we will create the required trunk configurations to place and receive calls from DIDWW.
First, we must create a “SIP Voice IN” trunk in the trunks section using the parameters below.
- Friendly Name: it can be any alphanumeric string.
- Username: we will use the variable “{DID}” to receive our DIDs in the E.164 format without the plus (e.g., 16175551212).
- Preferred Server: we will select “US, MIA.” However, you can choose the closest to you.
- Host: we will fill this field with the public PBX IP or domain.
Consider that depending on the chosen “Preferred Server,” you must use one of the PoP(Point of Presence) addresses from this link for the field “Match” on your VitalPBX trunk. Nonetheless, if you select “Auto” for the “Preferred Server” field, we recommend adding all the PoP addresses.

Next, continuing in the trunks section, we will create a “Voice OUT” trunk with the information below.
- Friendly Name: it can be any alphanumeric string.
- Allowed SIP IP Addresses: it must be the public IP address of your PBX.

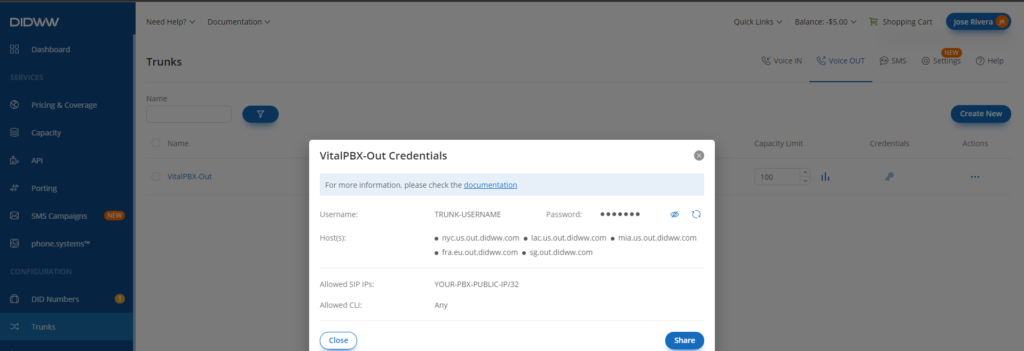
After creating the “Voice Out” trunk, you can obtain the auth credentials by clicking the “key” icon under the credentials’ column (we will need these credentials during the trunk setup on VitalPBX).
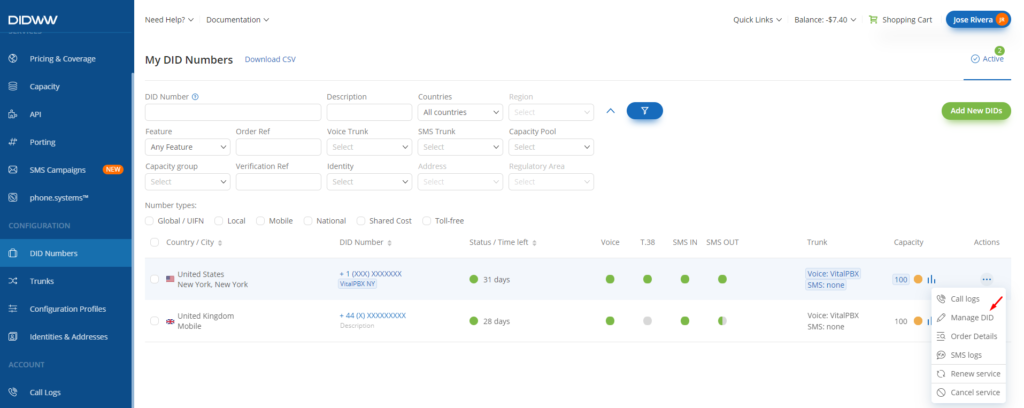
Finally, to receive calls in our VitalPBX, we must attach our “Voice IN” trunk to our DID numbers. To edit them, navigate to the “DID Numbers” section, click the three dots under the actions’ column, and finally click the “Manage DID” option.
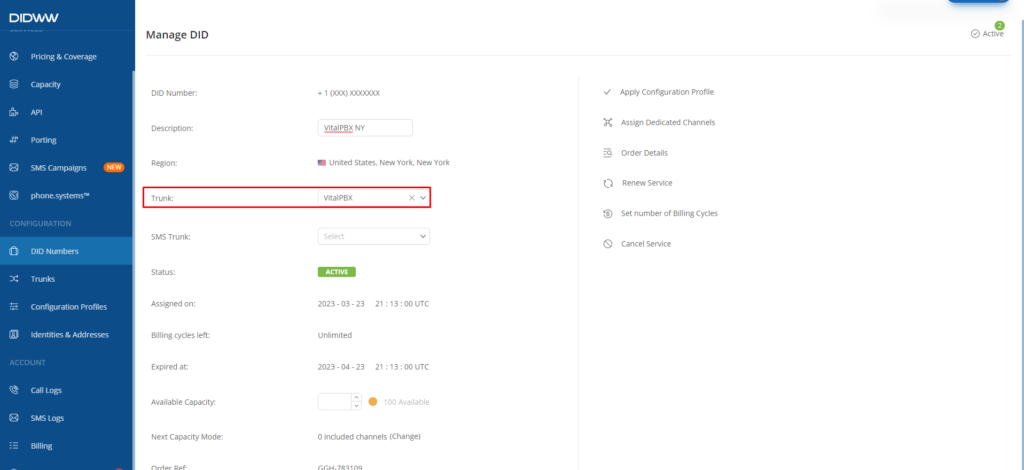
Once the edition form is open, select your “Voice IN” trunk in the trunk field of your DID.
Setting up VitalPBX
Now that the DIDWW portal configurations are all set, we will proceed with the Trunk creation on VitalPBX.
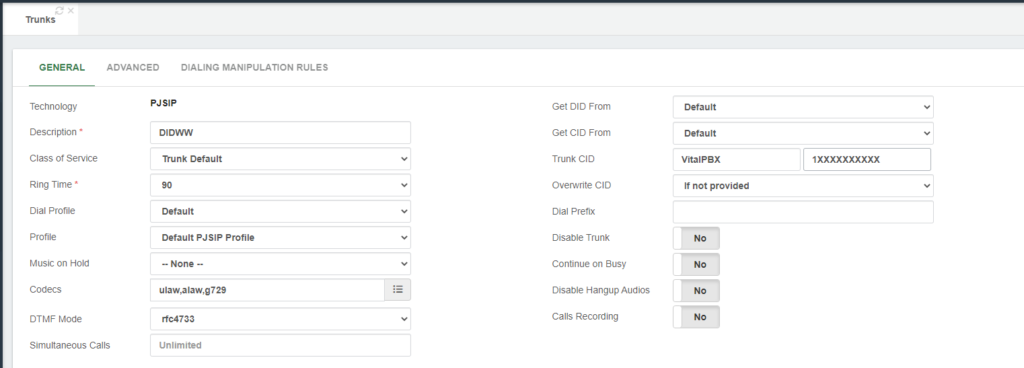
To start with our trunk setup, we will define the fields below in the top section.
- Description: It can be any alphanumeric string for identifying the trunk.
- Profile: It can be any PJSIP Profile (usually the Default PJSIP Profile).
- Codecs: according to DIDWW documentation, we could select “ulaw, alaw, and g729.”
- Trunk CID: for the name field, you can use any alphanumeric string, but for the number, you must provide the DID purchased in the initial steps using the 11-digit format (e.g., 13055551111).
- Overwrite CID: we will select the value “If not provided” to use the value of the field “Trunk CID” as the fallback value in case of the extensions don’t have an External CID defined.
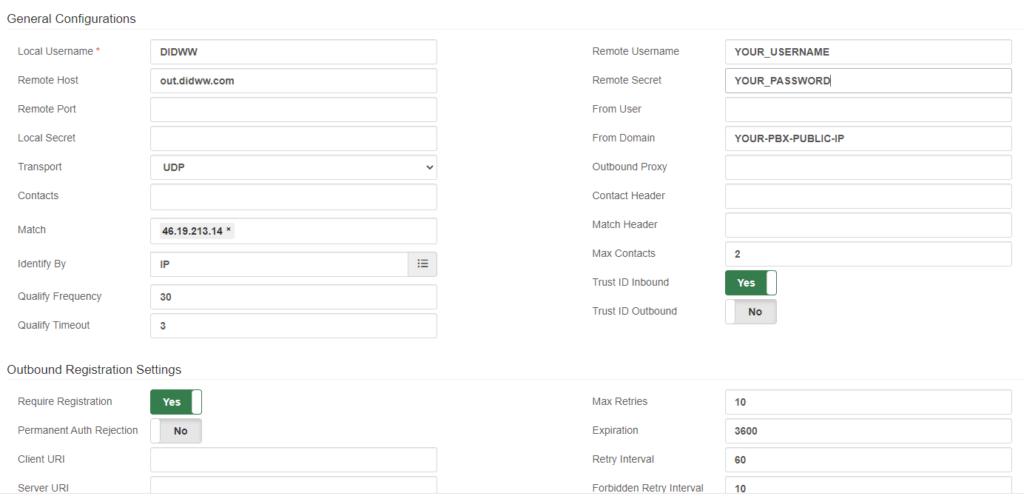
Next, in the section “General Configurations,” we must define the fields below.
- Local Username: it can be any alphanumeric string without spaces.
- Remote Host: we can set the value “out.didww.com.” However, we can select a specific location from this link.
- Match: we must fill the value with the IP “46.19.213.14” because we have chosen the “US, MIA” as the “Preferred Server” for incoming calls. Nonetheless, if you selected a different one, you can get the correct PoP IP from this link or use the subnet “46.19.208.0/21” to cover all the DIDWW POPs.
- Identify By: we must select the IP value because we will use IP authentication for incoming calls.
- Remote Username: get this value from the credentials of your “Voice OUT” trunk.
- Remote Secret: get this value from the credentials of your “Voice OUT” trunk.
- From Domain: fill this with the server’s public IP.
- Require Registration: we must set the value of this field to “Yes.”
After saving the trunk and applying changes, you can monitor the trunk status by navigating to “Reports / PBX Reports / PJSIP Endpoints.” Once there, you must select the “Trunks” tab.

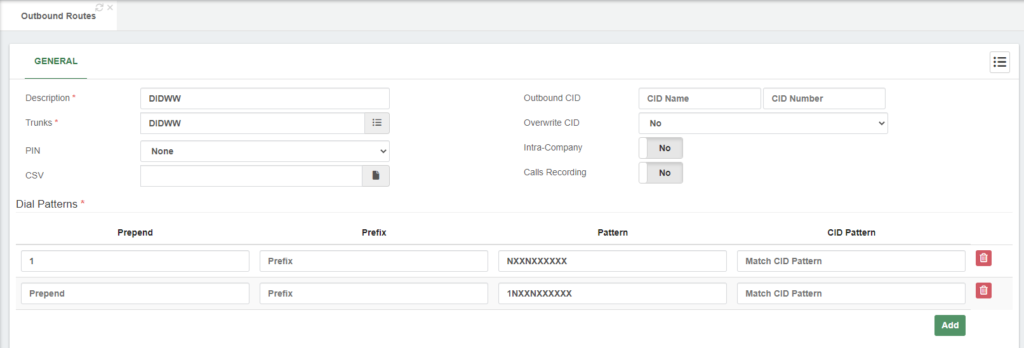
Now that we verified that our trunk is up and running, we will create the outbound route to place calls using our DIDWW trunk.
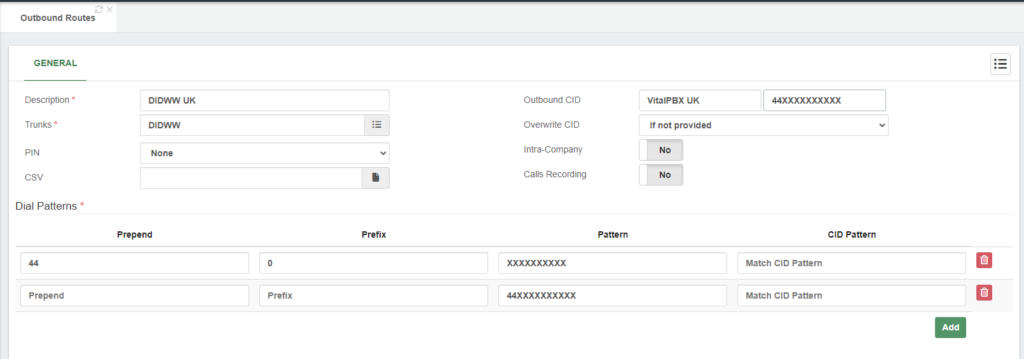
Additionally, because we have a DID from the UK, we will create an additional outbound route for local calls to the UK.
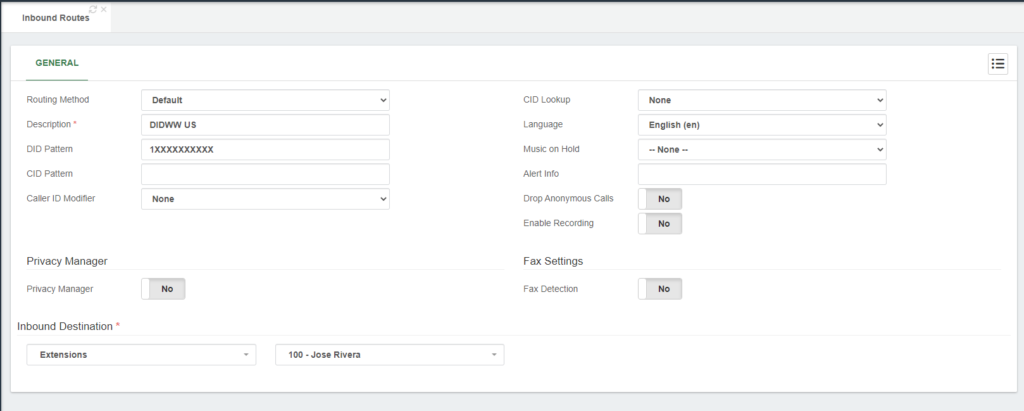
Finally, to receive calls in our VitalPBX, we must create our inbound routes with our DIDWW DIDs using the E.164 format but without plus (e.g., 13055551111).
Testing the configurations
Now that the settings are complete, we can place test calls to confirm that our trunk is working.
For testing outbound calls, you can place a test call to a phone number outside of your network; it can be your mobile number, for instance.
For inbound call testing, you can call from your mobile to any of your DIDWW’s DIDs.
Thus, if both tests went well, congrats! You have successfully set up a DIDWW trunk in VitalPBX.
Conclusions
In conclusion, the interconnection of DIDWW trunk with VitalPBX can significantly enhance the functionality and efficiency of your business’s communication system. By utilizing DIDWW’s affordable and reliable VoIP services in conjunction with VitalPBX’s robust feature set, you may streamline your company’s communication processes and raise client satisfaction.


