Short Message Service (SMS) is an important feature that many businesses use to communicate with their customers. It provides a quick and easy way to send and receive text messages from mobile devices. Integrating SMS functionality into your business phone system can help you streamline communication and improve customer satisfaction. Below, we will show you how to set up the DIDWW SMS feature on VitalPBX.
Configuring DIDWW SMS
Assuming that you already have an account on DIDWW, our first step would be purchasing some DIDs with SMS support. If you don’t have an account, you can get one by accessing this link.
While purchasing the numbers, make sure the options “SMS IN” and “SMS OUT P2P” are checked. Only numbers with those two options enabled can send and receive SMS.
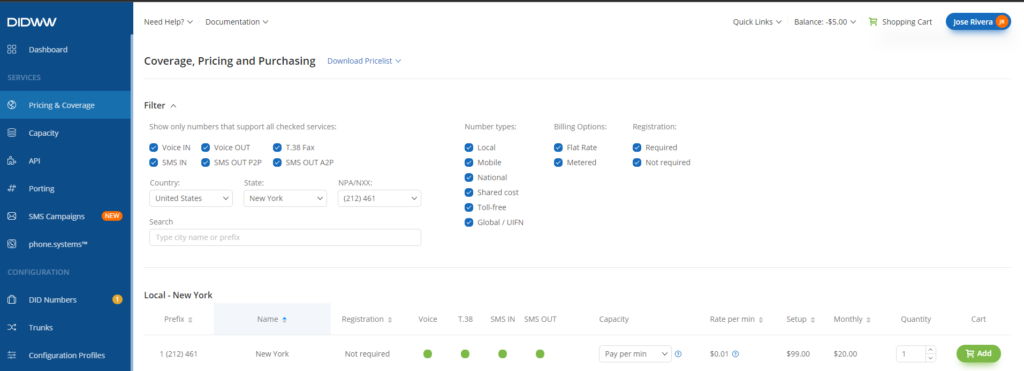
Buy DID
If you already have some DID numbers, you must verify the circles under the “SMS IN” and “SMS OUT” columns are green; otherwise, the numbers won’t be able to send or receive SMS.
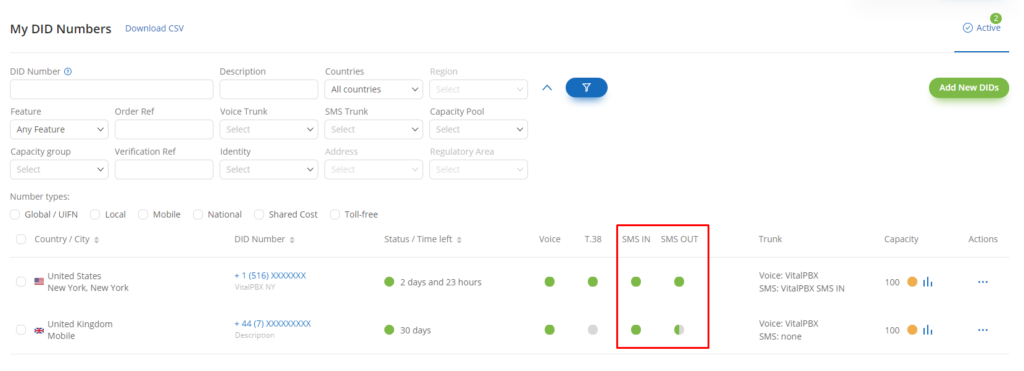
DIDs
If the circle under the “SMS OUT” column is partially gray, you can put the mouse over it to see what type of outbound SMS the DID supports. If the tooltip says “Only SMS OUT P2P Supported,” then the DID can be used for sending SMS messages from VitalPBX.
Now that our DIDs are ready to use, the next step is to create an SMS outbound trunk. To get there, we must navigate to “Configuration / Trunks.” Once there, we must access the SMS Tab, click the “Create New” button, and select “HTTP Out.”

Create HTTP OUT Trunk
When the form appears, we must fill out the “Friendly Name” with a descriptive name and leave the rest of the fields with the default values.

Configure HTTP OUT Trunk
Nonetheless, if you would like to add extra security, you can add the public IP of your PBX in the field “Allowed IP Addresses.” In this way, the SMS sending will be only allowed for the IPs listed on that field.
After creating our HTTP OUT SMS Trunk, we can get the required credentials for the SMS module on VitalPBX by clicking the “Key” icon under the “Credentials” column.
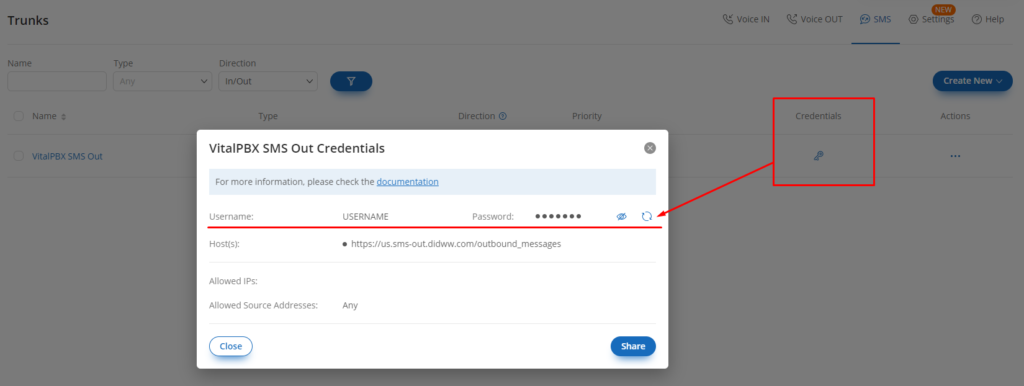
SMS HTTP OUT Trunk Credentials
Configuring the SMS Module on VitalPBX
Now that we have the SMS OUT Trunk credentials from DIDWW, we will create a new Messaging Provider in our VitalPBX. So, fill out the form with the following information.
- Provider: DIDWW
- Description: it can be any alphanumeric string.
- Auth Username: the username from the SMS HTTP OUT trunk on DIDWW.
- Auth Password: the password from the SMS HTTP OUT trunk on DIDWW.

Messaging Provider Setup
After saving, you will see the field “Webhook URL.” We will use this URL to finish the SMS Trunks configurations on DIDWW.
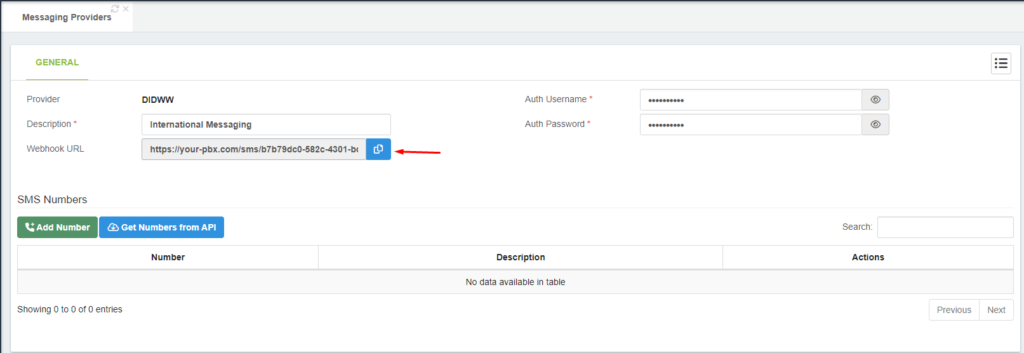
Webhook URL
After copying the URL, we must return to DIDWW and edit our SMS HTTP OUT trunk by clicking the three points icon under the “Actions” column and then the “Edit” option.

Edit SMS HTTP OUT Trunk
Once in the edition form, we will paste our Webhook URL in the “Callback URL” field and then submit/save.
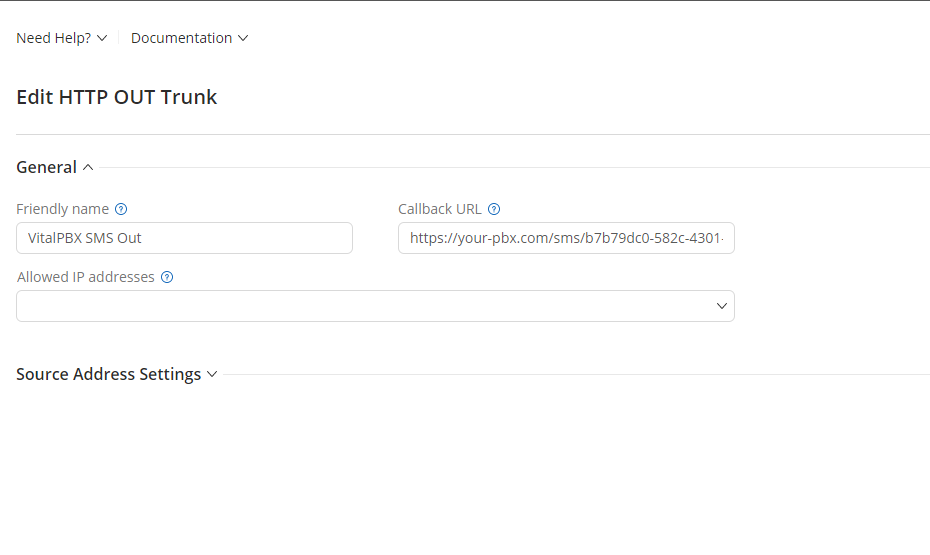
Configure Webhook URL
Now, for receiving SMS messages, we must create an HTTP IN SMS trunk.

Create SMS HTTP IN Trunk
We will fill out the field of this trunk with the values below.
- Friendly name: it can be any alphanumeric string.
- HTTP Method: POST
- Request URL: the webhook URL from the VitalPBX “Messaging Providers” module.
- Body Type: JSON
- Request Body:
{"SMS_TIME":"{SMS_TIME}","SMS_SRC_ADDR":"{SMS_SRC_ADDR} ","SMS_DST_ADDR":"{SMS_DST_ADDR}","SMS_TEXT":"{SMS_TEXT}","SMS_TEXT_BASE64_ENCODED":"{SMS_TEXT_BASE64_ENCODED}"}
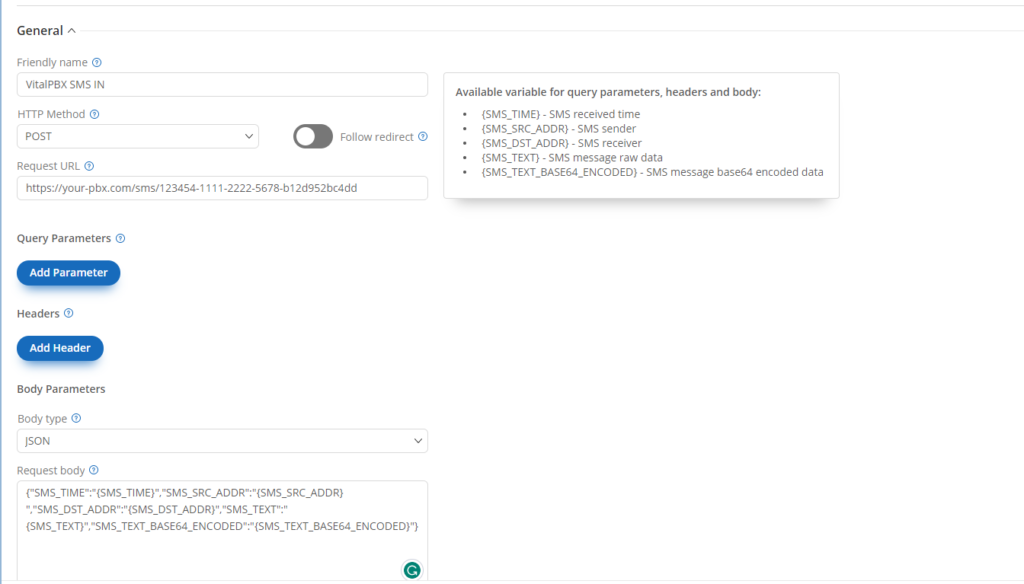
SMS HTTP IN Trunk
Finally, we must edit our DID numbers to assign them the SMS HTTP IN trunk.
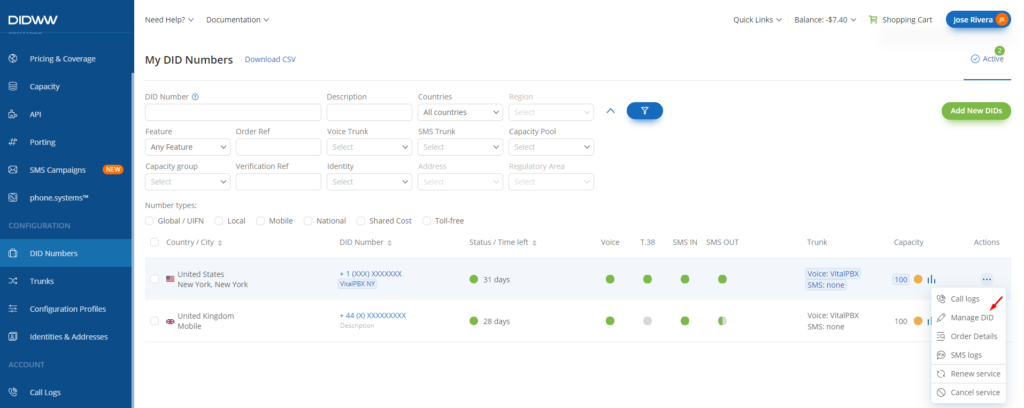
Manage DID
Once the edition form of the DID is open, we must select our SMS HTTP IN trunk in the “SMS Trunk” field of our DID.
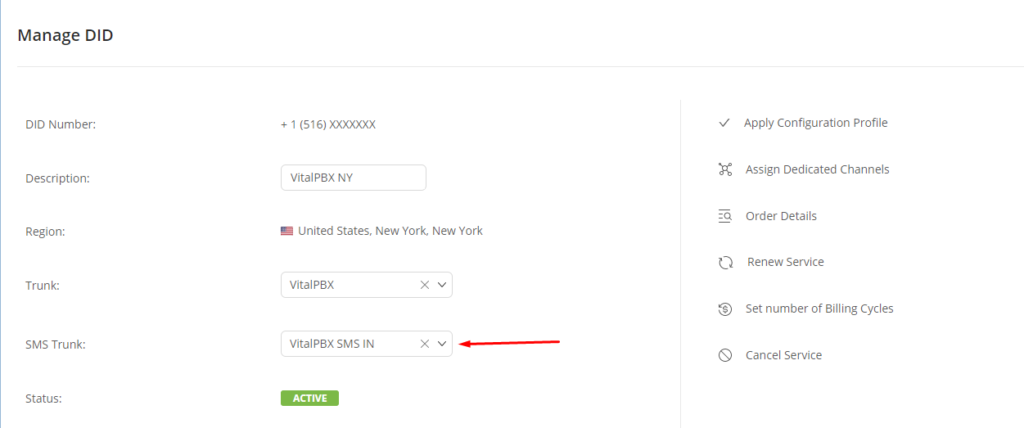
Attach SMS IN Trunk
After doing the above, we can manually add our DIDs to the SMS module on VitalPBX to start testing our configurations.
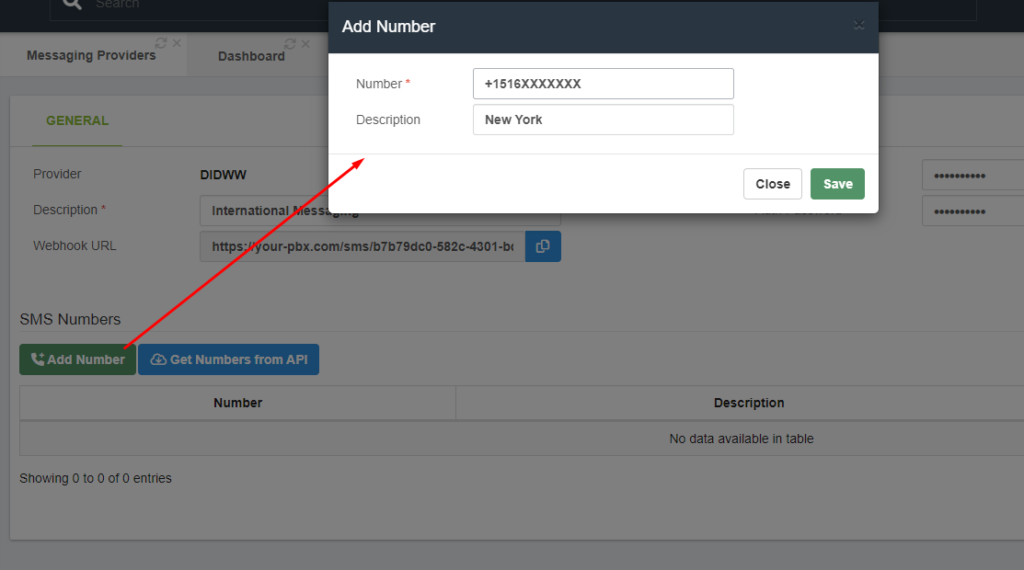
Add SMS Number
After adding your DIDs, you can send an SMS to one of your numbers or use the yellow action button to send an SMS from your PBX to any number.
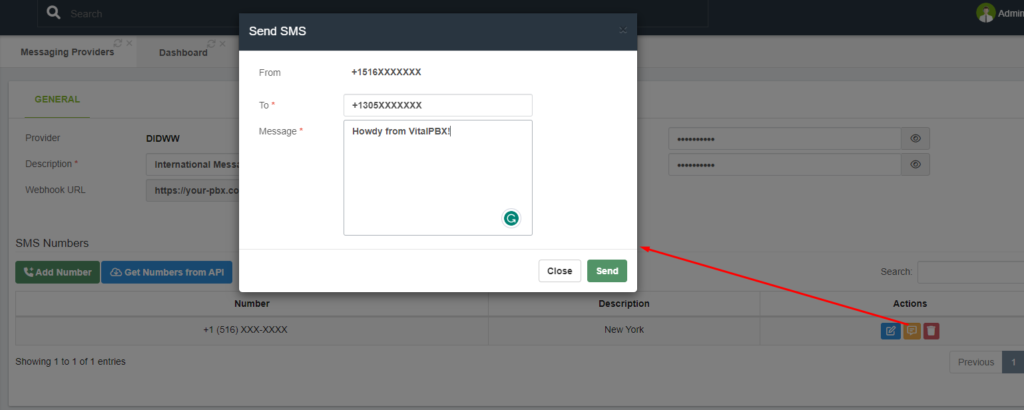
Send SMS Test
Finally, to verify the status of your messages, you can use the Messaging Logs module; there, you would see if the message got delivered or didn’t get sent.

Messaging Logs
Conclusion
Integrating SMS functionality into your VitalPBX system is a great way to enhance your communication capabilities and improve your customer service. With the DIDWW SMS feature, you can easily send and receive text messages directly from your VitalPBX interface. This integration is quick and easy to set up, and it can be a valuable addition to any business that relies on efficient communication. We hope that this guide has been helpful in showing you how to integrate the DIDWW SMS feature on VitalPBX.


