Introduction
ZeroTier is an innovative solution that allows you to quickly and easily set up virtual private networks (VPN), enabling the interconnection of VitalPBX servers located in local networks without exposing them directly to the internet.
In VoIP environments, ensuring secure and reliable connectivity between different servers is essential.
In this blog, I will show you how to integrate ZeroTier with VitalPBX 4.5 on Debian 12, highlighting its practical applications and the benefits it offers.
What is ZeroTier?
ZeroTier is a software-defined networking (SDN) platform that combines the advantages of traditional VPNs with the simplicity and flexibility of peer-to-peer networks. It allows servers in different locations to be connected as if they were on the same local network, without the need for complex tunnels or public IP addresses.
Benefits of Using ZeroTier with VitalPBX
✅ 1. Secure connectivity between multiple VitalPBX servers
With ZeroTier, you can securely connect multiple VitalPBX instances located in different local networks, without exposing the servers directly to the internet or needing public IP addresses.
✅ 2. Cost and complexity reduction
It eliminates the need to purchase additional services such as static public IP addresses or advanced VPN configurations.
✅ 3. Increased security in interconnection
By using ZeroTier, VitalPBX servers are interconnected privately through internal IP addresses assigned by ZeroTier, reducing security risks associated with direct internet exposure.
Prerequisites
- A server running Debian 12.
- VitalPBX 4.5 installed and configured.
- Access to my.zerotier.com to manage ZeroTier networks.
Step 1: Install ZeroTier on Debian 12
🔧 Installation Commands:
Open a terminal and run the following commands:
					curl -s https://install.zerotier.com | bash
systemctl enable zerotier-one
systemctl start zerotier-one
Verify that the service is running:


3. On the Debian 12 server, run:
zerotier-cli join <NETWORK_ID>
					root@vpbx45:/var/lib/zerotier-one/peers.d# zerotier-cli join 9e1948db639af477
200 join OK
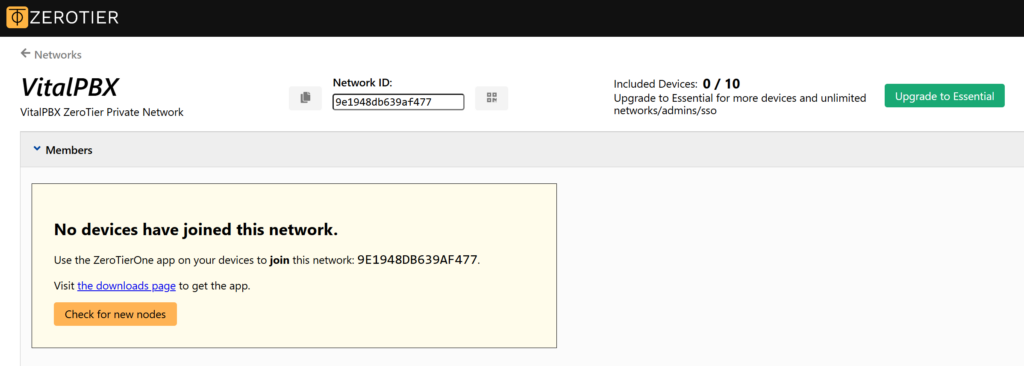
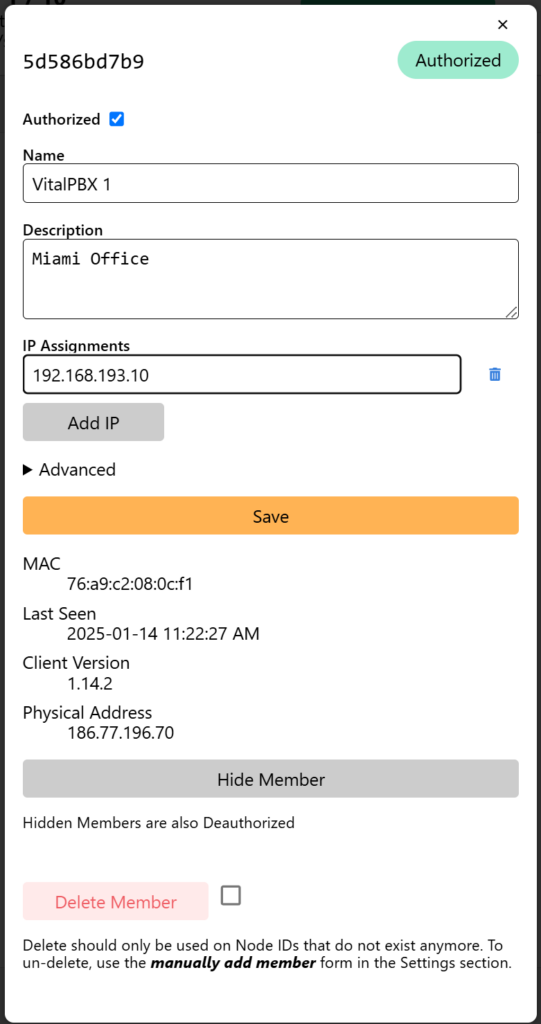
4. Go to your ZeroTier dashboard and authorize the device that appears as pending.

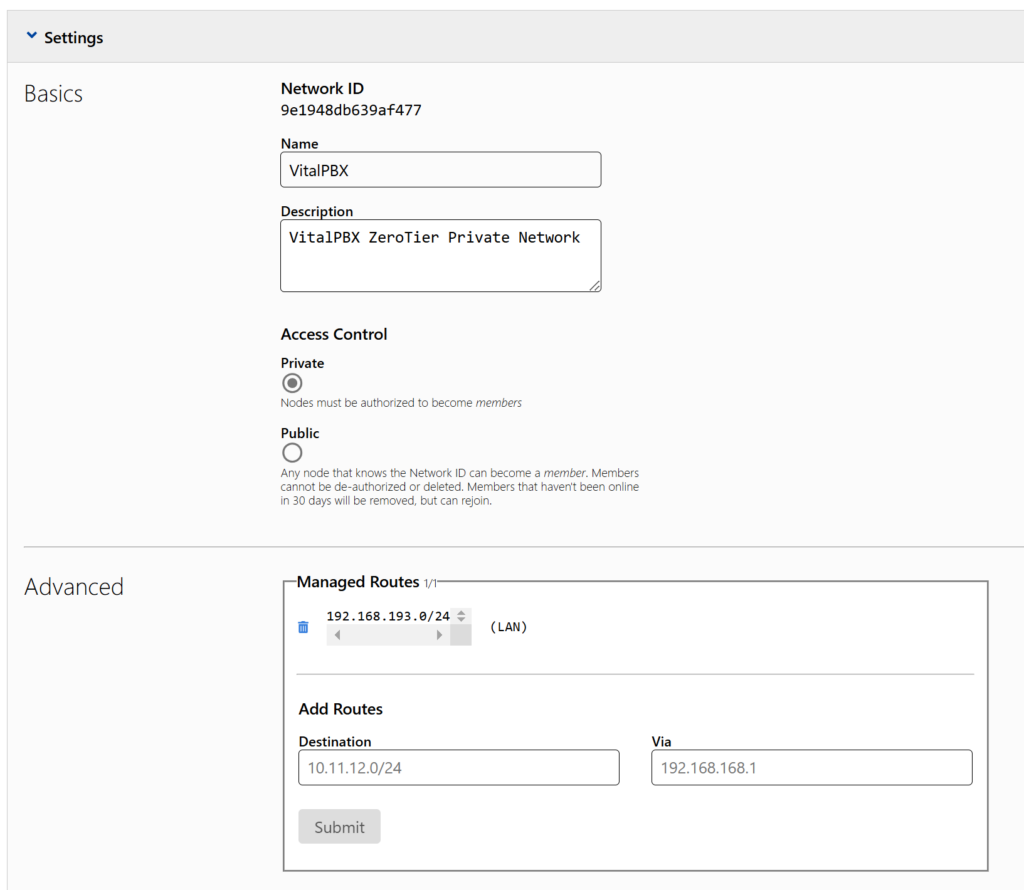
5. Fix the IP Address.

6. Verify the connection:
zerotier-cli listnetworks
200 listnetworks 9e1948db639af477 VitalPBX 76:a9:c2:08:0c:f1 OK PRIVATE ztiv5nelyu 192.168.193.10/24
7. Leave a specific network:
Once you have identified the Network ID of the network you want to leave, run the following command:
zerotier-cli leave <NETWORK_ID>
Step 3: Connect Multiple VitalPBX Servers Using ZeroTier
Once both VitalPBX servers are connected to the same ZeroTier network, you can configure a PJSIP trunk to allow communication between them using the private IP addresses assigned by ZeroTier.
📌 IP Addresses Assigned by ZeroTier:
- VitalPBX 1: 192.168.193.10
- VitalPBX 2: 192.168.193.11
🔧 PJSIP Trunk Configuration on VitalPBX 1:
- Access the VitalPBX 1 web interface.
- Go to PBX > Trunks > PJSIP Trunks and create a new trunk.
- Configure the following parameters:
- Description: ZeroTier_VPBX2
- Local Username: ZeroTier_VPBX2
- Class of Service: All Permission (To ensure that calls can be made between PBXs without creating inbound routes)
- Remote Host: 192.168.193.11
- Match: 192.168.193.11
4. Save the changes and apply the configuration.
🔧 PJSIP Trunk Configuration on VitalPBX 2:
Access the VitalPBX 2 web interface.
- Access the VitalPBX 1 web interface.
- Go to PBX > Trunks > PJSIP Trunks and create a new trunk.
- Configure the following parameters:
- Description: ZeroTier_VPBX1
- Local Username: ZeroTier_VPBX1
- Class of Service: All Permission (To ensure that calls can be made between PBXs without creating inbound routes)
- Remote Host: 192.168.193.10
- Match: 192.168.193.10
4. Save the changes and apply the configuration.
Step 4: Configure Inbound and Outbound Routes
📌 Routes on VitalPBX 1:
- Go to PBX > External > Outbound Routes.
- Create a route for calls directed to VitalPBX 2.
- Select the ZeroTier_VPBX2 trunk.
📌 Routes on VitalPBX 2:
- Go to PBX > External > Outbound Routes.
- Create a route for calls directed to VitalPBX 1.
- Select the ZeroTier_VPBX1 trunk.
Step 5: Common Troubleshooting
- Firewall: Make sure that UDP port 9993 is open.
- Permissions: If you encounter permission errors, use sudo before the commands.
- Service Restart: If changes are not reflected, restart network and VitalPBX services.
Practical Applications of ZeroTier in VitalPBX
- Secure office interconnection: Connect multiple offices using VitalPBX in a private network without the need for public IP addresses.
- Server interconnection: Facilitate communication between VitalPBX servers located in different local networks.
- Infrastructure expansion: Easily add new VitalPBX servers while maintaining network security.
Conclusion
Integrating ZeroTier with VitalPBX 4.5 on Debian 12 is an excellent way to improve the security and flexibility of your VoIP infrastructure.
By connecting multiple VitalPBX servers in local networks through a private and secure network, you can ensure efficient and reliable communication without relying on public IP addresses.
This solution reduces security risks and simplifies the interconnection of different locations.


