Commio is a prominent cloud communication provider that offers affordable, reliable, and user-friendly voice/trunking services for businesses of all sizes.
If you’re already using VitalPBX, you can easily integrate Commio’s voice/trunking services with your PBX system to take advantage of advanced communication features like time conditions, IVRs, and call recording. This blog post will guide you through the steps for integrating Commio’s voice/trunking services with VitalPBX to streamline your business communication and stay connected with your team members and customers, no matter where they are.
Below, we will show you how to integrate Commio’s voice/trunking services with VitalPBX and enhance your business communication capabilities.
Setting up Commio
Before venturing into the Commio portal configurations, you can learn more by visiting this link to explore and learn about their services and features. Nonetheless, if you prefer direct contact from Commio, you can reach Dan Lemke by email or call him at 1 (984) 401-3011 or 1 (724) 396-8426.
After getting your account credentials and logging in, we will purchase our DIDs by navigating to “Products / Inbound / Get Numbers.” Once there, we can search our DIDs by NPA or Rate Center.
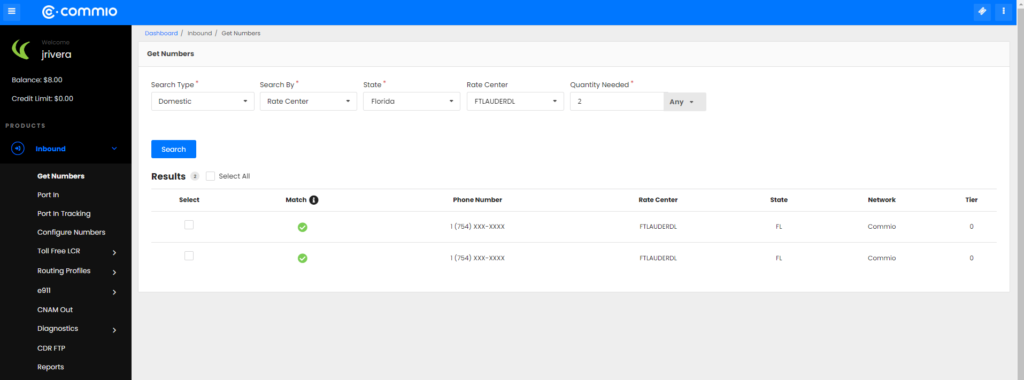
Buy DID Number
Now that we got our DIDs, we will create the required trunk configurations to place and receive calls from Commio.
First, we must create an “Outbound Routing Profile” by navigating to “Products / Outbound / Routing Profiles.” Follow the wizard form and leave almost all the settings by default during the profile creation.

Routing Profile
Continuing with the “Outbound Routing Profile” creation, in the “Settings” section/step, Commio recommends setting a lower value for the “Max Rate” parameter (e.g., 0.10). This parameter represents how much you want to pay per minute per call. Keep in mind that if no carriers are found below this rate, the calls will fail with a 503.

Routing Profile – Settings
In the last step, you can select the “Long Distance Carriers” option for regular conversation traffic. However, for call centers or heavy voice traffic, Commio recommends enabling the option “High Volume Carriers” as well.
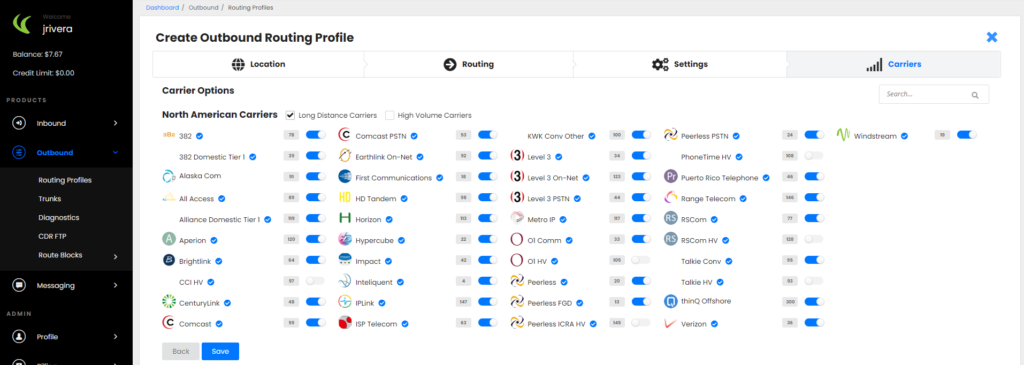
Routing Profile – Carriers
After saving the routing profile, we will navigate to the “Trunks” menu and create our trunk. We will be presented with a wizard form when creating the trunk, and for the first step, we must select “Commio” as our carrier.
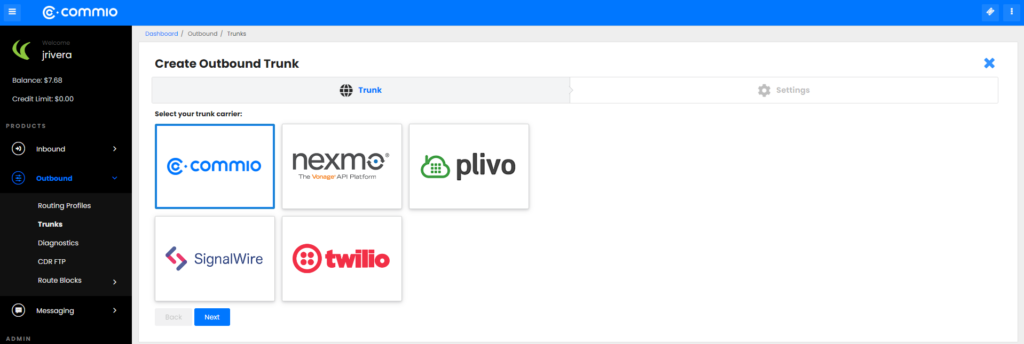
Creating Trunk – Selecting Carrier
Now, in the “Settings” section, we must configure the parameters below.
• Trunk Name: it can be any alphanumeric string.
• Routing Profile: select the “Outbound Routing Profile” created previously. • Channel Limit: leave the value by default or contact Commio for the best value for this parameter.
• IP Address: the PBX IP from where the calls will come from.

Creating Trunk – Settings
After finishing the outbound configurations, we will create our “Inbound Routing Profile” by navigating to “Products / Inbound / Routing Profiles / Inbound Profiles.”
After clicking the “Add Profile” button, we will see a modal in which we will set up the parameters below.
• Name: it can be any alphanumeric string.
• Type: if your PBX has a domain name assigned, select “DNS A.” Otherwise,
select “IP” if your PBX has a public IP without a domain.
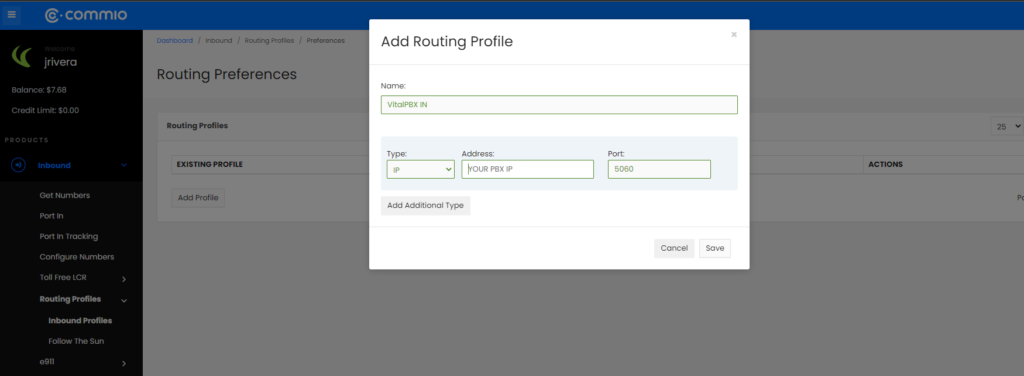
Inbound Profile
Finally, to receive calls in our VitalPBX, we must attach our “Inbound Profile” to our DID numbers. To edit them, navigate to the “Configure Numbers” menu, click the pencil icon under the “actions” column, and select the inbound profile previously created in the “Routing Pref” field.
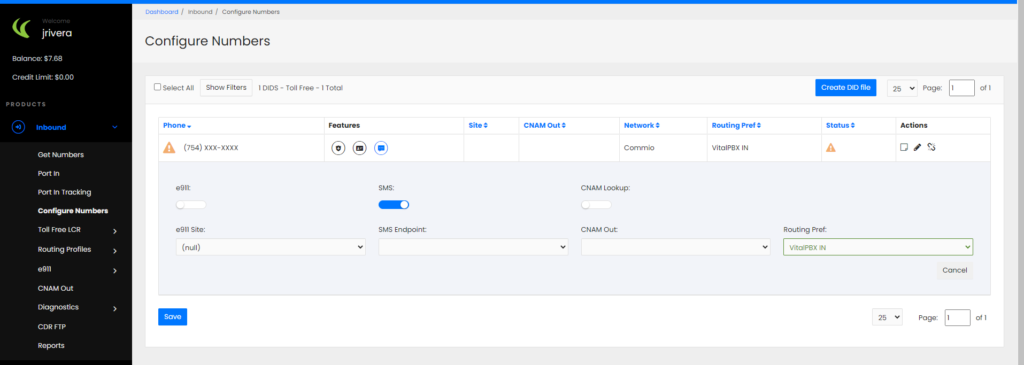
DID – Set Inbound Profile
Setting up VitalPBX
After concluding the Commio portal configurations, we will proceed with the Trunk creation on VitalPBX.
To start with our trunk setup, we will define the fields below in the top section.
• Description: It can be any alphanumeric string for identifying the trunk.
• Profile: It can be any UDP PJSIP Profile (usually the “Default PJSIP Profile”). • Codecs: select “ulaw, alaw, and g729.”
• Trunk CID: for the name field, you can use any alphanumeric string, but for the number, you must provide the DID purchased in the initial steps using the +E.164 format (e.g., +17545551111).
• Overwrite CID: we will select the value “If not provided” to use the value of the field “Trunk CID” as the fallback value in case the extensions don’t have an External CID defined.
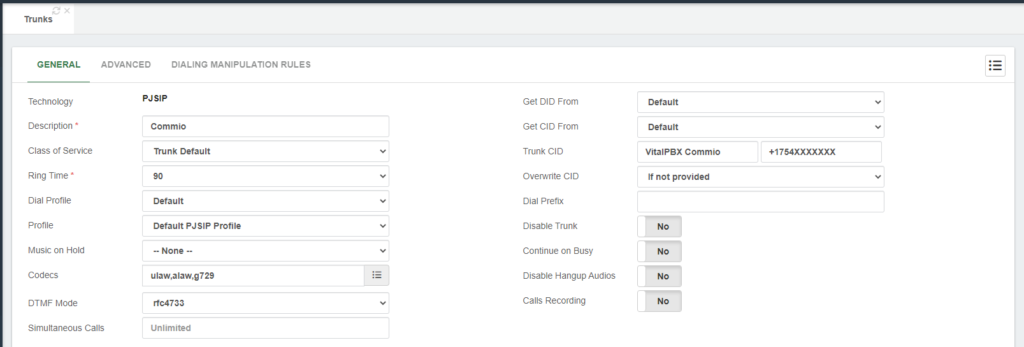
Commio Trunk – Top Settings
Next, in the section “General Configurations,” we must define the fields below.
• Local Username: it can be any alphanumeric string without spaces.
• Remote Host: we must set the value “a.icr.commio.com.”
• Match: we must fill the field with the IP addresses “192.81.237.20” and “192.81.236.20.”
• Identify By: we must select the “IP” value because we will use IP authentication for incoming calls.
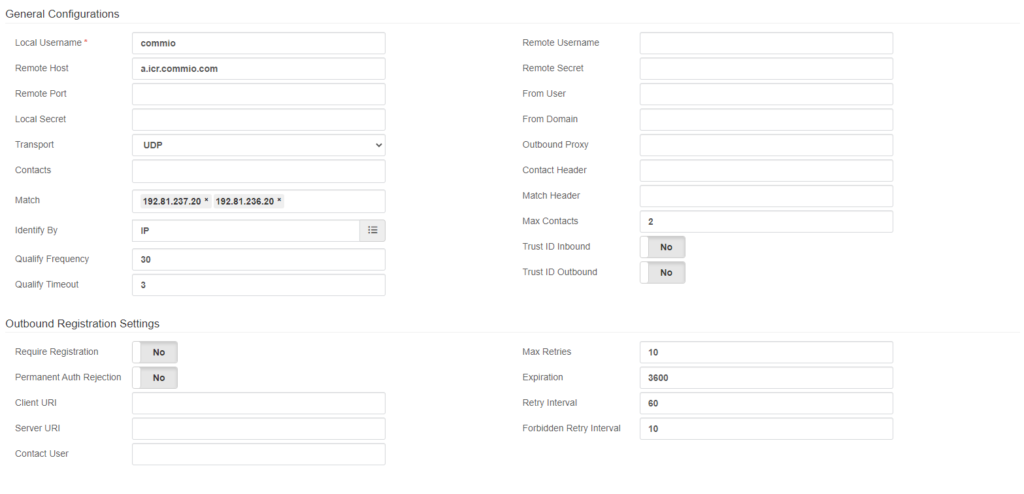
Commio Trunk – General Configurations
After saving the trunk and applying changes, you can monitor the trunk status by navigating to “Reports / PBX Reports / PJSIP Endpoints.” Once there, you must select the “Trunks” tab.

Commio Trunk – Monitor
Now that we verified that our trunk is up and running, we will create the outbound route to place calls using our Commio PJSIP trunk.
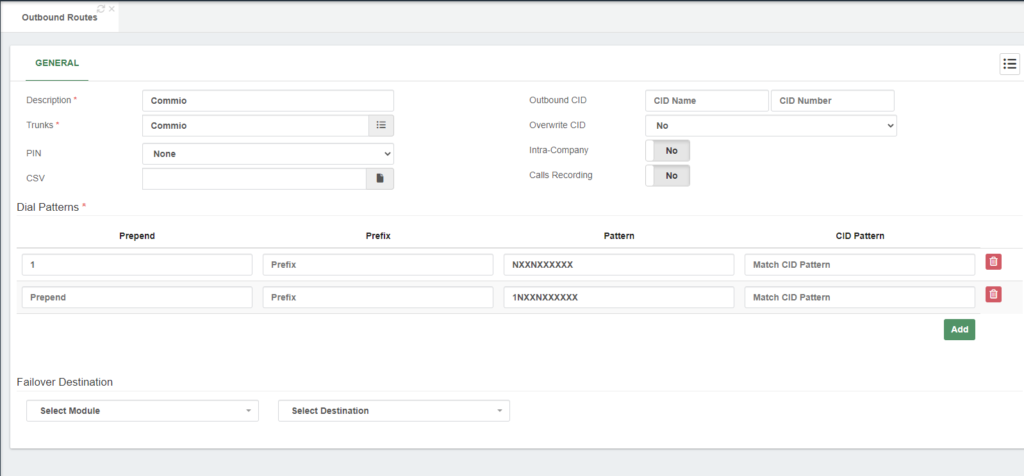
Commio Trunk – Outbound Route
• Finally, to receive calls in our VitalPBX, we must create our inbound routes with our Commio DIDs using the +E.164 format (e.g., +17545551111).
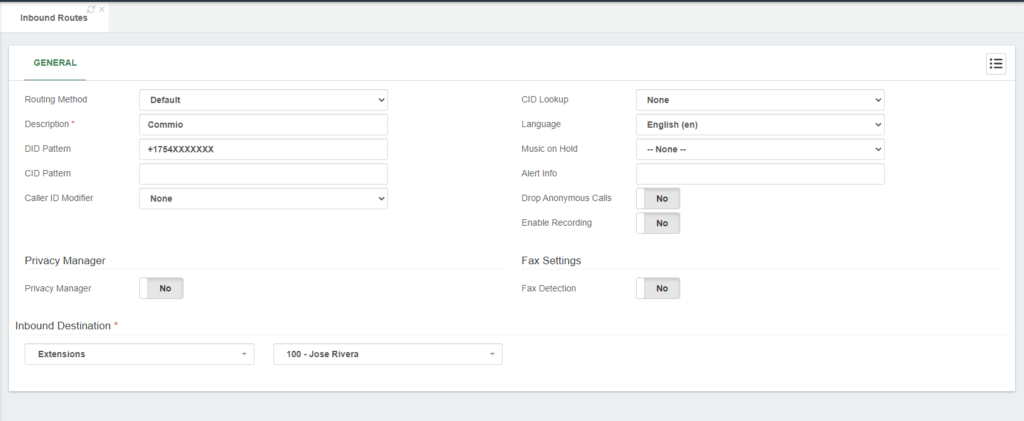
Commio Trunk – Inbound Route
Testing the configurations
Now that the settings are complete, we can place test calls to confirm that our trunk is working.
For testing outbound calls, you can place a test call to a phone number outside of your network; it can be your mobile number, for instance.
For inbound call testing, you can call from your mobile to any of your Commio’s DIDs.
Thus, if both tests went well, congrats! You have successfully set up a Commio trunk in VitalPBX.
Conclusions
In conclusion, With the easy-to-follow steps outlined in this blog post, you can quickly and easily set up and configure Commio’s Trunk services on VitalPBX, enabling you to take advantage of the high-quality voice communication and reliable connectivity that Commio offers.


