Configuring a Twilio trunk with VitalPBX can be a straightforward process. Below, we’ll cover the step-by-step guide to configuring a Twilio Elastic SIP Trunking on VitalPBX.
Setting Up Twilio
The first step is to create an account on Twilio. You can sign up for a free Twilio account, which provides a balance to test their services.
Once you have a Twilio account, you must buy a phone number. To do so, navigate to the “Phone Numbers” section and click “Buy a Number.” Select a number and click on “Buy” to complete the purchase.
Now that you have a Twilio account and phone number, it’s time to configure our Elastic SIP Trunking. Our first step would be creating an ACL with the public IP of our VitalPBX server.
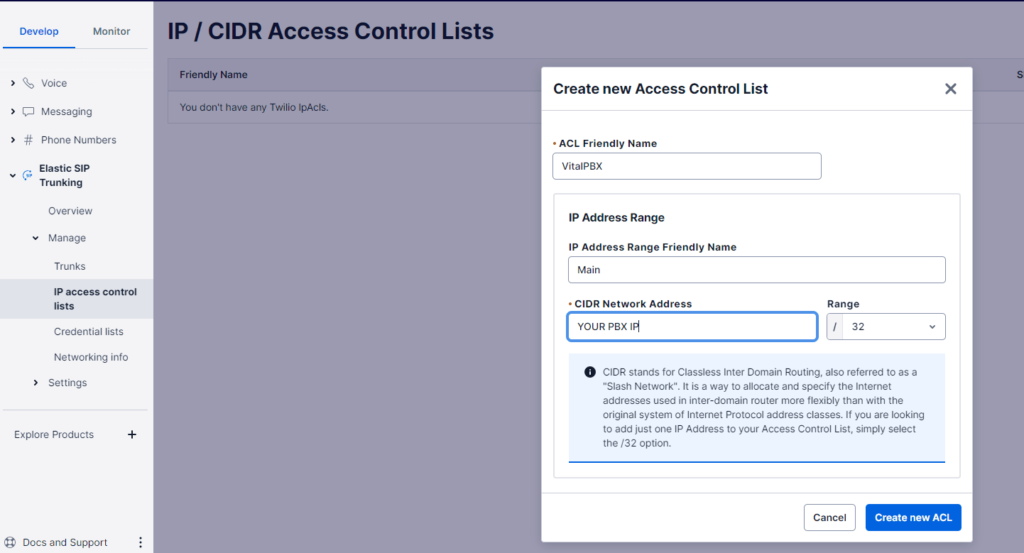
After creating the ACL, we must navigate to the “Trunks” menu and click “Create a new SIP Trunk.” After clicking that button, you will see a window with four sections: General, Termination, Origination, and Numbers.
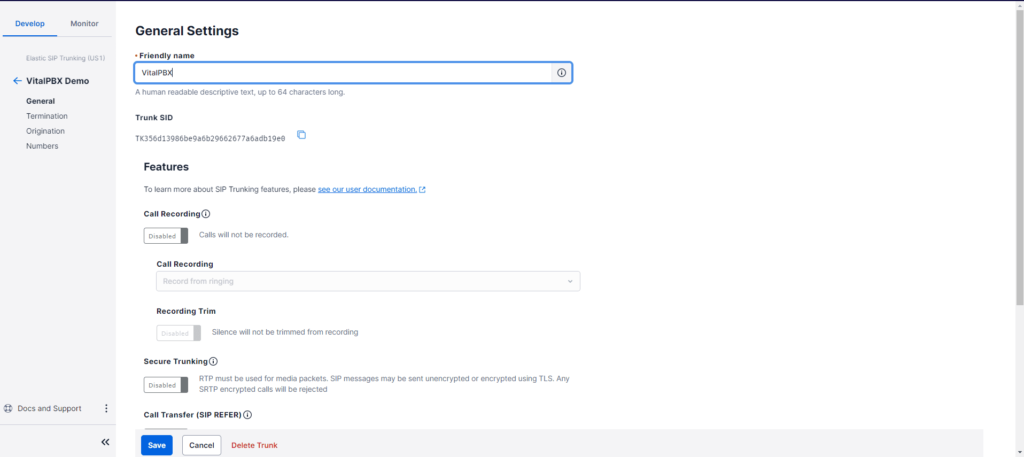
In the “General” section, we only have to provide a Friendly Name for our trunk. No further configurations need to be made. Nonetheless, remember to hit the “Save” button before continuing.
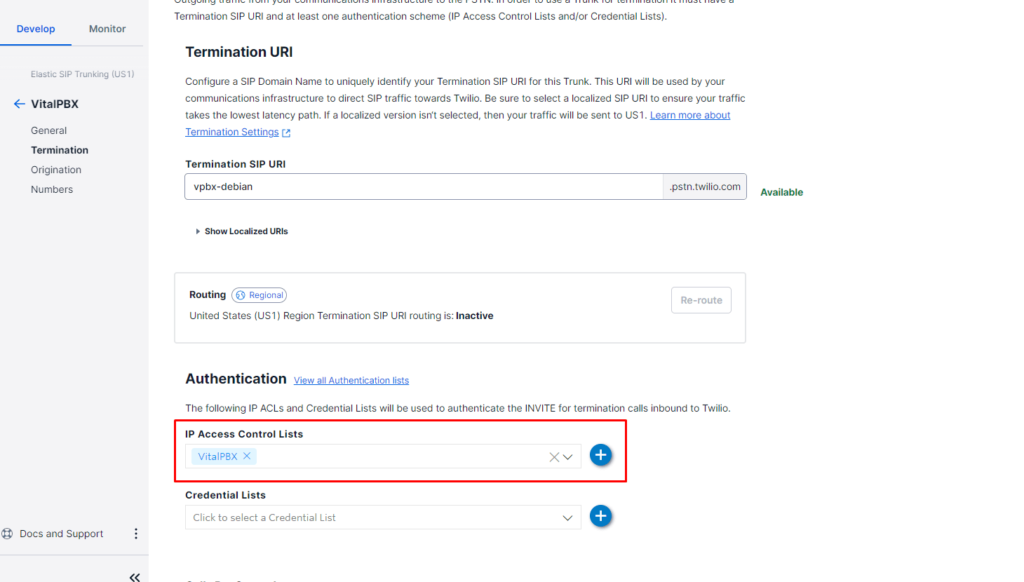
Next, in the “Termination” section, we’ve to provide the “Termination SIP URI” and select the “IP ACL” created previously.
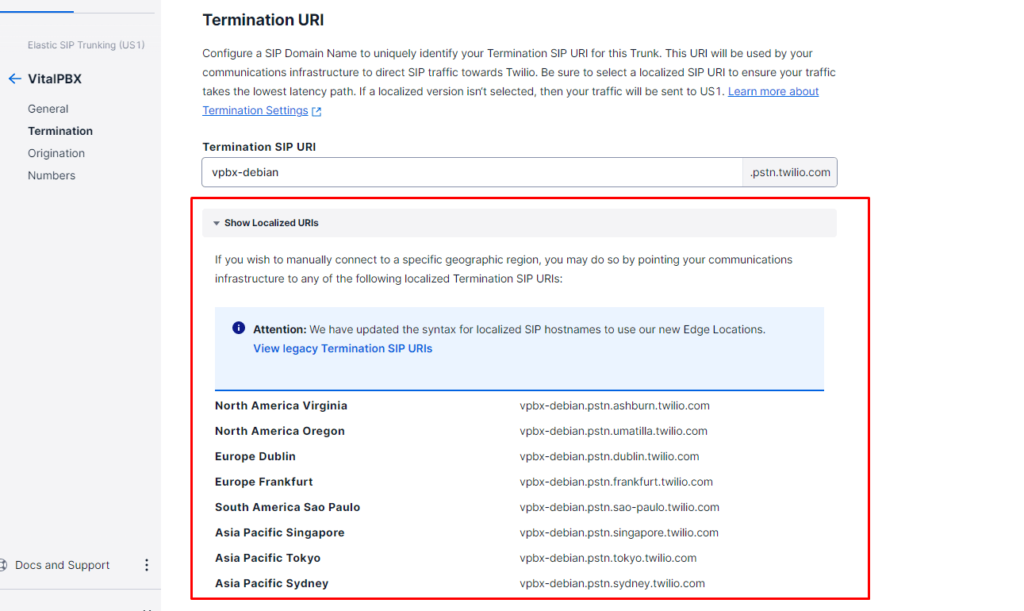
Additionally, always in the “Termination” section, if you click the button “Show Localized URIs,” you will see the different URIs you can use to set up your trunk. In our particular case, we will use “North America Virginia” and “North America Oregon.”
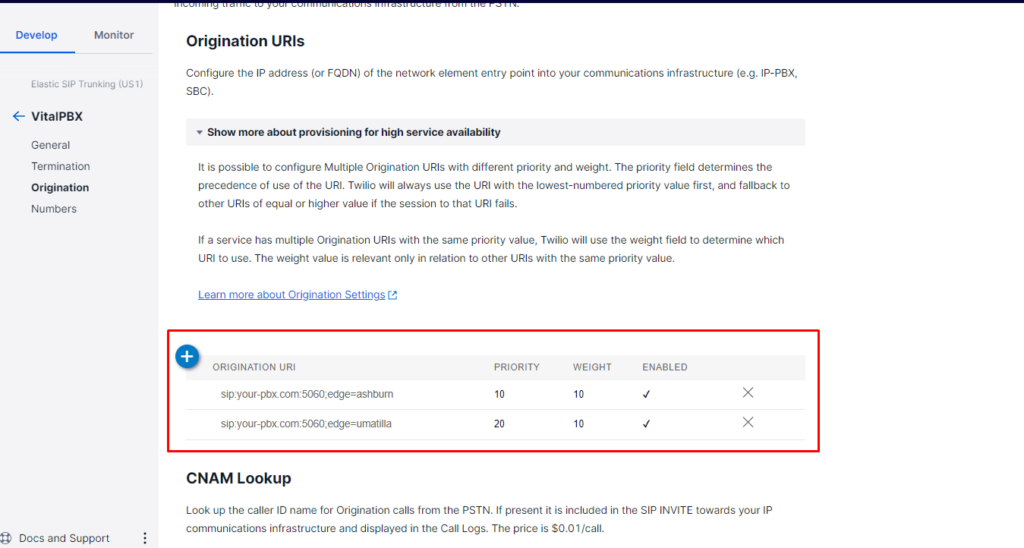
Now, in the “Origination” section, we will configure the Origination URIs using the IP or Domain of our VitalPBX server. The format of the URI must be “sip:IP-OR-DOMAIN:PORT.” In our case, we will also provide the edge parameter to have redundancy data centers for incoming calls.
Finally, in the “Numbers” section, we will assign to our elastic trunk the number purchased previously.

Setting up VitalPBX
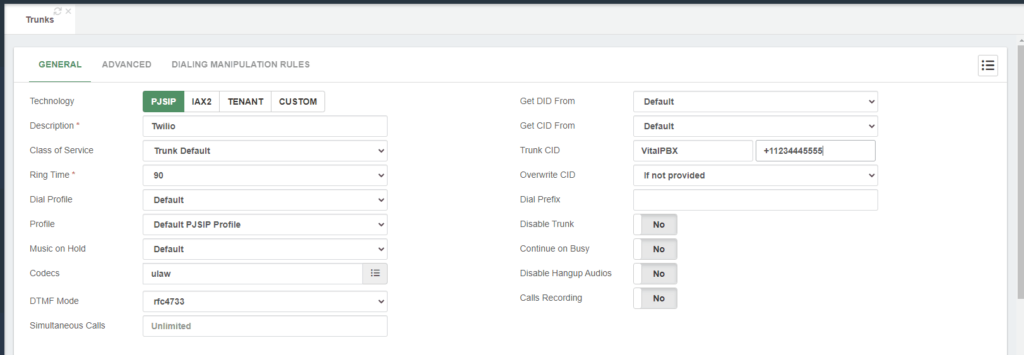
Now that we have set up our Twilio Elastic SIP Trunking, the next step would be creating a PJSIP trunk on VitalPBX. In the top section of the Trunk definition, we will provide a description, select the profile(usually the Default PJSIP Profile), and the Trunk CID. Keep in mind that the CID Number must be in format +E.164.
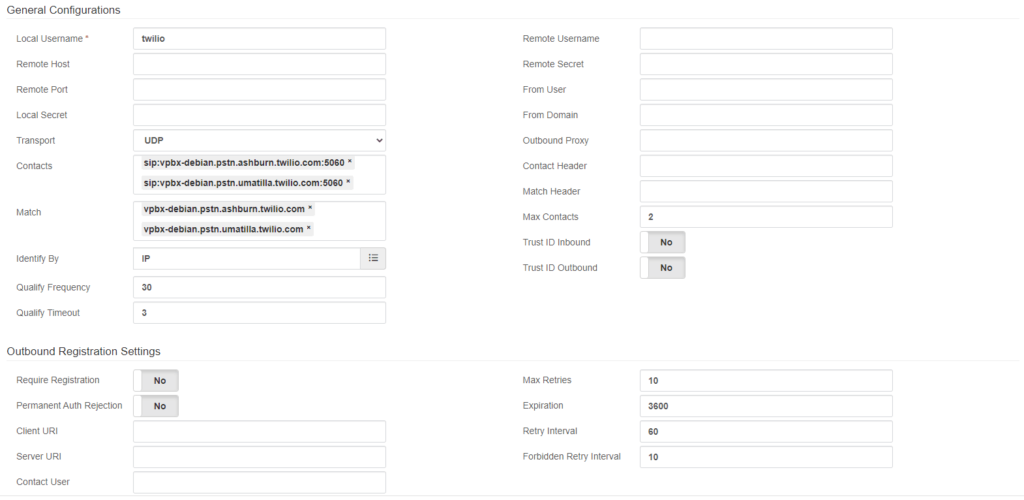
Next, in the general configurations of our trunk, we will fill the “Local Username, Contacts, Match, and Identify By” fields. In the contacts and match fields, the “vpbx-debian” must get replaced with your “Termination SIP URI.”
On the other hand, for the field “Identify By,” you must select the IP method because we’re using the IP Auth method for this trunk.
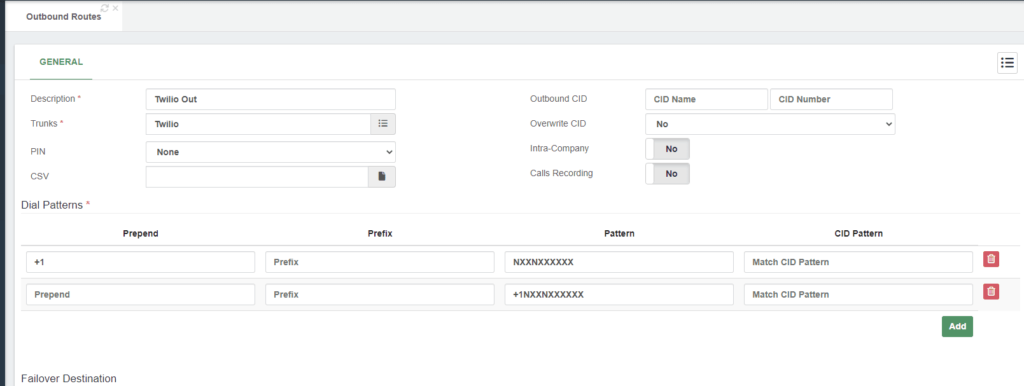
Now that we’ve our trunk up and running, we will create the respective outbound route to place calls using our Twilio trunk.
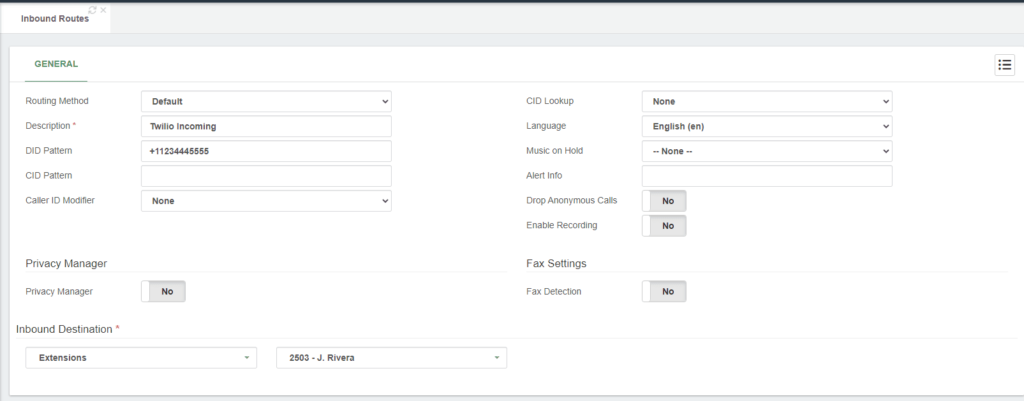
Finally, in order to receive calls, we must create an inbound route with the DID we purchased in the Twilio portal.
Testing the configurations
Once you have completed the above steps, you can call any local number, and if everything is well configured, the call should go through the Twilio trunk and connect successfully.
Moreover, you can call your DID number from your mobile to test the incoming call configurations.
Conclusion
In summary, configuring a Twilio trunk with VitalPBX is a straightforward process that can be completed in a few simple steps. With this setup, you can enjoy the benefits of a cloud-based telephony solution. These include low-cost international calls and improved call quality.
Twilio is a trademark of their respective owners and are not affiliated, endorsed, connected or sponsored in any way to VitalPBX or any of our sites.


