One of the most frequent questions asked by our community is how to customize or expand the VitalPBX’s Dial Plan. This is an important topic because sometimes we need to connect our PBX with a third-party applications to get or set information during a call, so, this why we have decided to create this blog article, explaining with a simple example how to expand VitalPBX’s functionalities with your own Dial Plan.
Read our tutorials and guides on how to implement new tools and technologies for your business with VitalPBX here.
Scenario
We need to create a dialing code (7747) to get the public IP address of the server and say it to the caller.
To retrieve the public IP address we will use the asterisk CURL application and the ipinfo.io service.
Prerequisites
To create our custom context we need to create a file with the following name structure “extensions__{ANYNUMBER}-{DESCRIPTION}.conf” where {ANYNUMBER} is a consecutive number that represents the order that the asterisk will read the files, and the {DESCRIPTION} is any string that describes what the file contains. This file must be created under “/etc/asterisk/vitalpbx” path.
For our example, the file will be named “extensions__90-custom.conf“
Solutions
1. Extend from extensions context (Class of Service)
This solution is quite simple, we just need to know the name of the class of service that we will extend. For example, if our class of service name is “internal“, we will extend from the context “cos-internal-custom“. For this example, we will extend from the default class of service “all” as shown below.
[cos-all-custom](+)
exten => 7747,1,NoOp()
 same => n,Goto(say-public-ip,s,1)
 same => n,Hangup()

[say-public-ip]
exten => s,1,NoOp(Say Public IP Address)
 same => n,Answer()
 same => n,Set(PUBLIC_IP=${CURL(http://ipinfo.io/ip)})
 same => n,Playback(your-public-ip-is)
 same => n,SayDigits(${CUT(PUBLIC_IP,.,1)})
 same => n,Playback(letters/dot)
 same => n,SayDigits(${CUT(PUBLIC_IP,.,2)})
 same => n,Playback(letters/dot)
 same => n,SayDigits(${CUT(PUBLIC_IP,.,3)})
 same => n,Playback(letters/dot)
 same => n,SayDigits(${CUT(PUBLIC_IP,.,4)})
 same => n,PlayBack(silence/1&vm-goodbye)
 same => n,Hangup()
Disadvantage
- Numbering Collision: Due that you are creating the dial plan by hand there’s no way for VitalPBX to know what numbers you have defined in your custom contexts, so, this opens the possibility than a PBX user can define the same number that you are using in your custom dial plan in the PBX’s GUI.
- Cannot be used in the GUI: With this method, there’s no way to redirect Incoming Calls, IVR Options, etc. to your custom contexts.
2. Custom Contexts add-on
The custom context add-on is a commercial module that allows you to use your custom contexts as destinations across the GUI.
For example, to call the custom context that we have created for this blog, we need to create a custom context item as shown below.

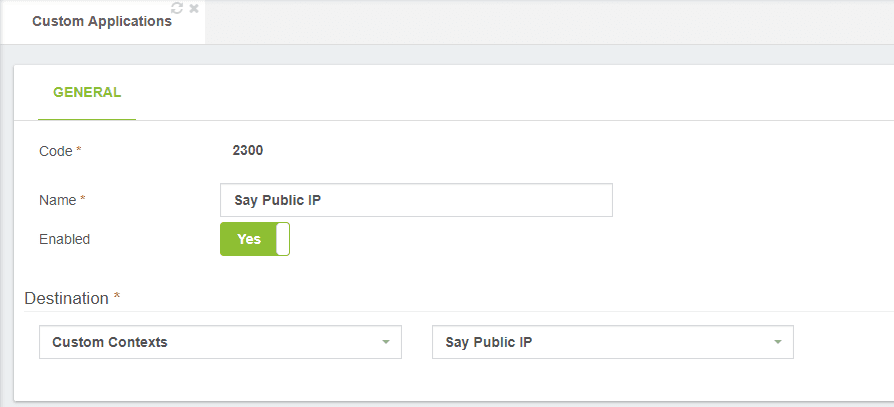
Once we have created the custom context item we can use it from any module that uses destinations, for example, from the custom applications module.

With this method, we avoid all the disadvantage presented in the previous method, and we get a better integration level.
Also, you may have noticed that the custom contexts add-on have a destination, well, this destination is sent as parameters to your custom context, in case that you want to redirect the call after executing your custom dial plan.
Notes
We have hosted this example on Github, so if you want to install it on your PBX, follow the steps on this link: https://github.com/VitalPBX/custom-contexts
Conclusion
As you can see, customizing the VitalPBX dial plan is quite easy. We strongly recommend the custom context add-on because, as we mentioned, this add-on gives you a better integration level and avoid numbering collisions on your PBX.
Get to know about VitalPBX, our services and how we can help you achieve your goals in our official website.


