Not long ago we talked about how to convert text to speech using Google Cloud capabilities. Today we will use the “Google Cloud Voice Transcript” API to convert voice to text and implement an ASR.
For this, we have created a script (hosted on GitHub) to install the pre-requisites and a custom dial plan for testing the ASR.
Read our tutorials and guides on how to implement new tools and technologies for your business with VitalPBX here.
How it works
Google Cloud Voice Transcript is an easy-to-use API that allows developers to easily convert audio into text thanks to the use of powerful neural network models. This API recognizes 120 languages and variants to help you manage your international user base and, among other things, allows you to enable control by voice commands or transcribe conversations from call centers, between many other possibilities. In addition, it uses Google’s machine learning technology to process pre-recorded or real-time audios.
Getting the API Key
- In order to use the Speech Recognition service, it is necessary to obtain an API Key, so, you must go to google developer site (It is necessary to have an account with google. When you register, google gives you a trial of 1 year with US$ 300.00 in credit)
- Click on Project List (My First Project)
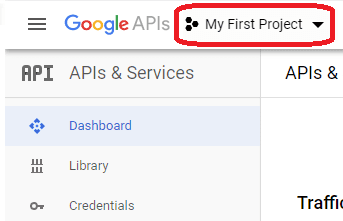
- Click on NEW PROJECT

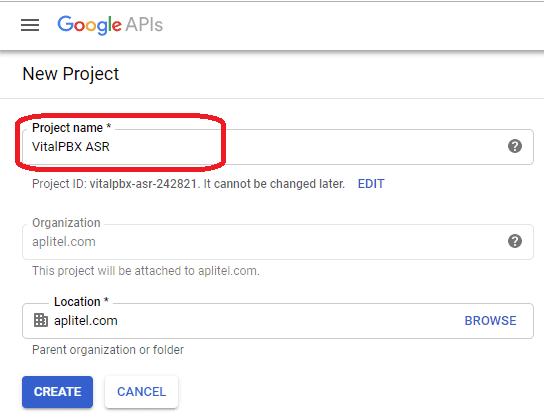
- Write the name of your project and click the CREATE button.
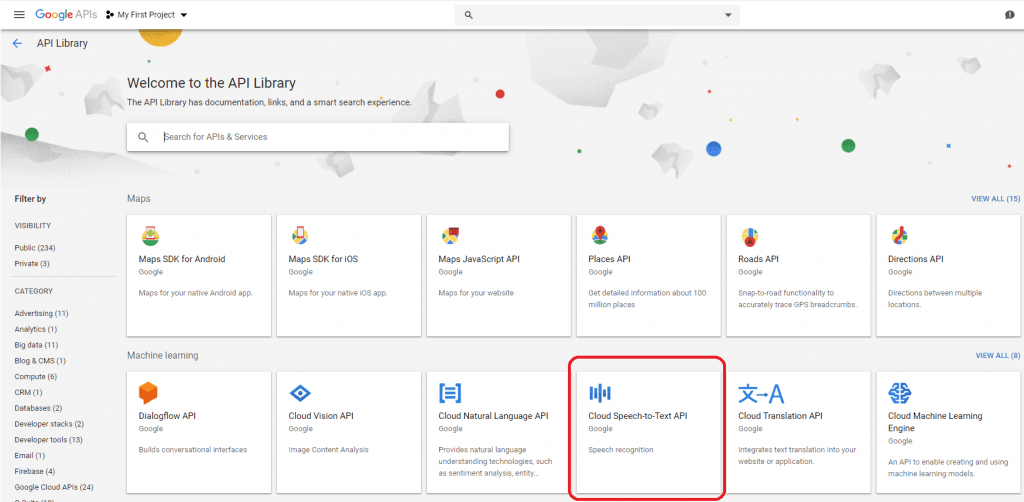
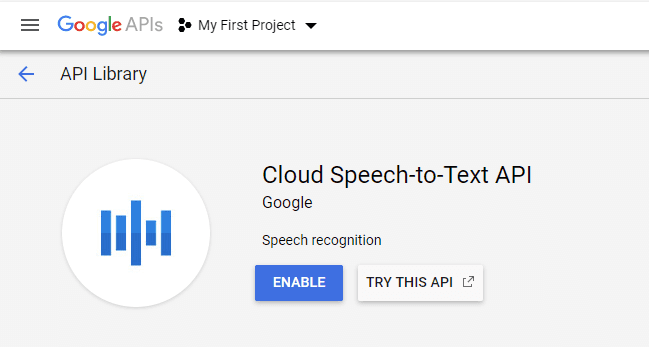
- Select the Project, and go to the Library to enable the Speech API
- Then go to Credentials and Create Credentials > API key
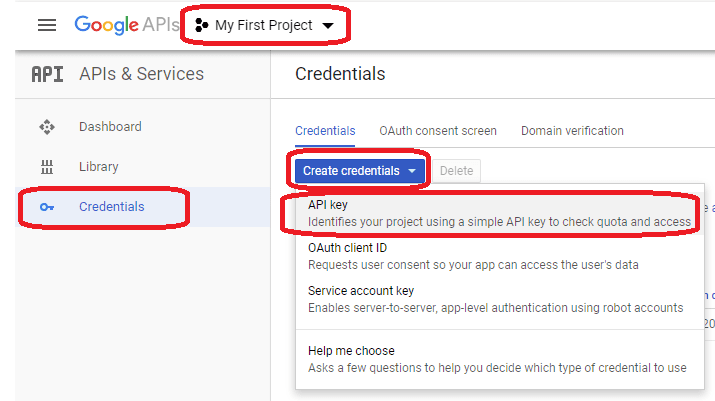
- Finally, copy the API Key
Installing the Prerequisites on VitalPBX
To work properly we recommend installing the Google TTS application firsthttps://vitalpbx.com/en/google-text-to-speech-tts-in-vitalpbx/
- Connect via an SSH client to the VitalPBX console.
- Download the file that contains the installation scripts, give it execution permissions, and run the script:
[root@vitalpbx /]# cd /tmp
[root@vitalpbx tmp]# wget https://raw.githubusercontent.com/VitalPBX/Google_ASR_VitalPBX/master/install.sh
[root@vitalpbx tmp]# chmod +x install.sh
[root@vitalpbx tmp]# ./install.sh
- Edit “googleasr.agi” file and add the API key obtained in Google. Which should be located on Line 66.
[root@vitalpbx /]# cd /var/lib/asterisk/agi-bin/
[root@vitalpbx agi-bin]# vi googleasr.agi
my $key = ""
- Insert the key between the double quotes.
- Now you can dial *277 to do the Speech-To-text test in different languages.
Final Notes
If you want to modify the file that contains the dial plan, you must go to “/etc/asterisk/ombutel/extensions__60-google_asr.conf“, and after modifying it, you have to reload the dial plan with the following command:
[root@vitalpbx /]# asterisk -rx"dialplan reload"
This is a very easy way using Google’s Speech-to-Text services on VitalPBX, opening new possibilities with your VitalPBX installation.
Demo Video
Learn more about VitalPBX, our services and how we can help you achieve your goals in our official website.

