Introduction
As a continuation of the previous Blog, we will assume that we already have two instances of Proxmox VE installed, just as we have an NFS Server on our network.
The project consists of the installation and configuration of a Virtualization Cluster in High Availability through Proxmox using NFS shared storage, whose purpose is to have a virtualization environment with two nodes for which we will always have our resources available, so we can migrate virtual machines both hot and cold, in addition to always having our machines available if one of the two nodes goes down or goes out.
Prerequisites
To mount a structure with High Availability with Proxmox, the following is necessary:
a.- 3 Servers with similar characteristics.
- 16 GB of RAM is recommended.
- 256GB SSD recommended.
- 8th generation Intel 4 Core I7 CPU, recommended.
b.- A NAS Server with enough capacity to store all the virtual machines we will create.
Our structure will have three machines and a shared NFS storage server
Node 1: Machine name: vpbx01.vitalpbx.local
IP: 190.168.10.20
Node 2: Machine name: vpbx02.vitalpbx.local
IP: 192.168.10.21
Node 3: Machine name: vpbx03.vitalpbx.local
IP: 192.168.10.22
NFS Server
IP: 192.168.10.9

Configurations
NFS Storage Configuration
In this example, we will use a 4TB “WD My Cloud” NAS for NFS storage. Therefore, we first create an account for our Proxmox to access it remotely.
If you have another network storage system, you must create an account for Proxmox to have access.
The first thing we will do is create a folder to which Proxmox will have access, for which we enter Shares and add them.
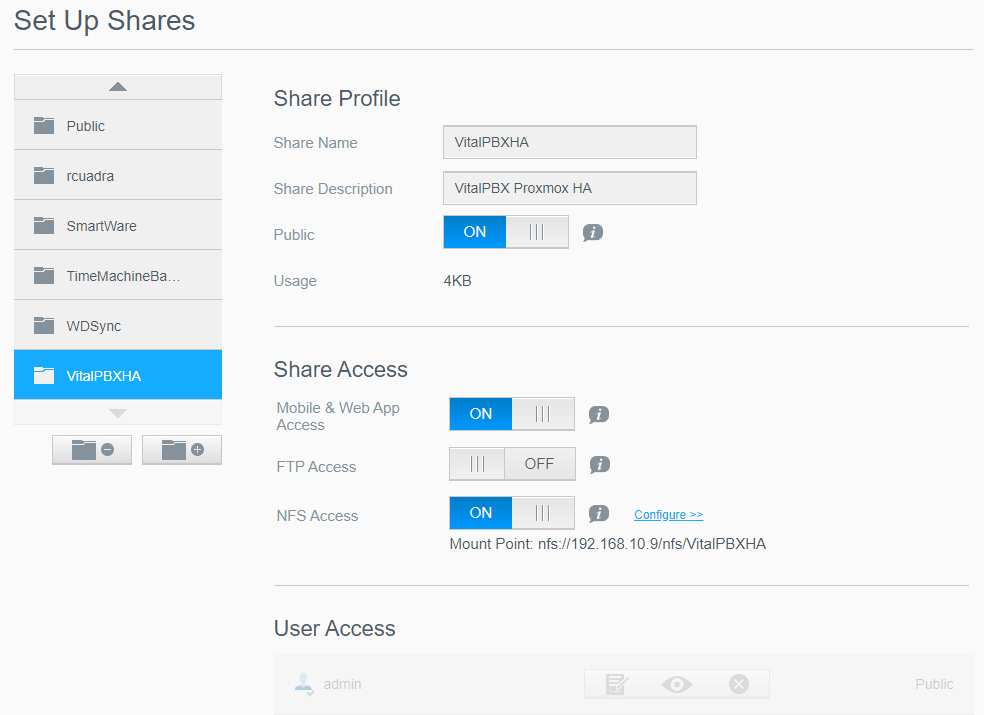
We give NFS Access permissions, and in Host, we configure * so that the three Proxmox have access. And we also give Write permission.

Now in our nodes, we are going to indicate that they use this shared storage, so we go to Datacenter / Storage, click on Add and NFS and configure the options:
Node 1:
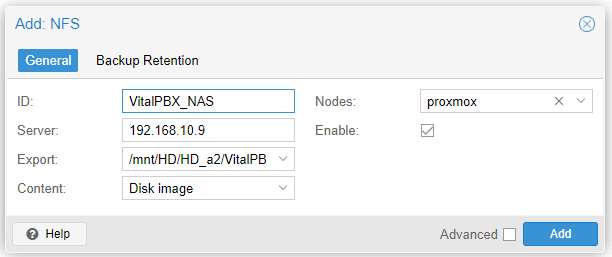
It is essential to select in Content everything that we want to be stored on our NAS.
Cluster Configuration
We already have our three nodes installed and configured with shared storage so let’s configure the cluster.
Cluster Creation
On Node 1, we go to Datacenter/Cluster and create the cluster by pressing Create Cluster
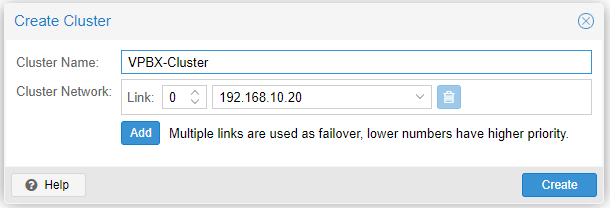
Cluster Name, a short name to identify our cluster.
Assigning nodes to the cluster.
Now in Datacenter/Cluster, we press “Join Information” and copy the data that we are going to use to add the other nodes.

Now we go to Node 2 with the information copied in the previous step, and in Datacenter/Cluster, we press Join Cluster.
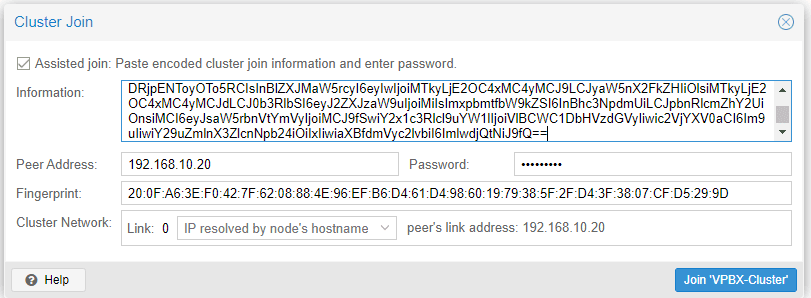
We write the root Password of Node 1 and press Join ‘VPBX-Cluster’. We wait a couple of minutes, and our node will be assigned to the cluster.
We do the same with node 3, and we now have a cluster of 3 nodes, which is the minimum recommended for high availability.

VitalPBX Instance Creation
Now we are going to create an instance of VitalPBX in vpbx01, to test our HA. For them, we follow the following steps.
Create a Container (CT) in which we will install VitalPBX 4.
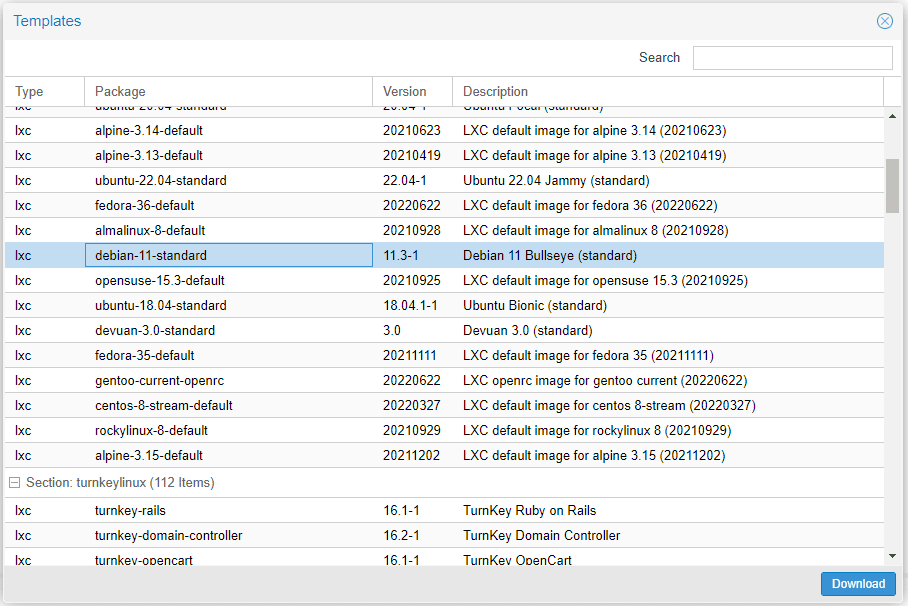
First, we will load the Debian 11 Template on our NAS, for which we go to VitalPBX_NAS/CT Templates/Templates and search for Debian-11-standard, and press Download.
Now we will create the Container (CT), by pressing the Create CT button. We create it in node 1.
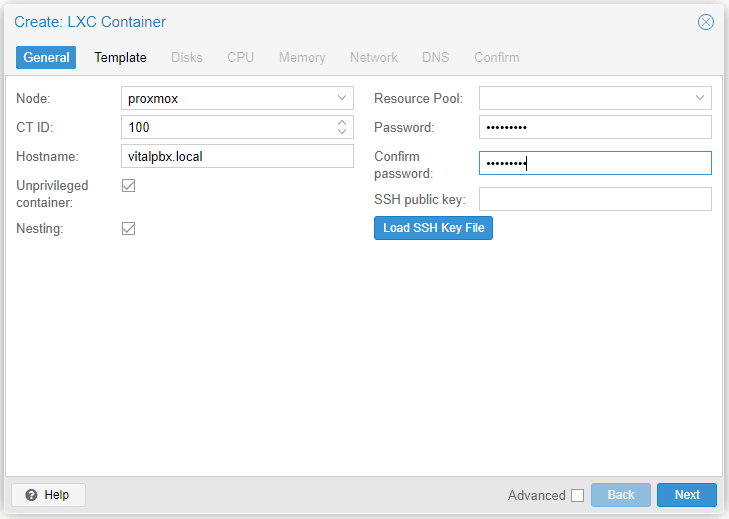
In General, we configure the following:
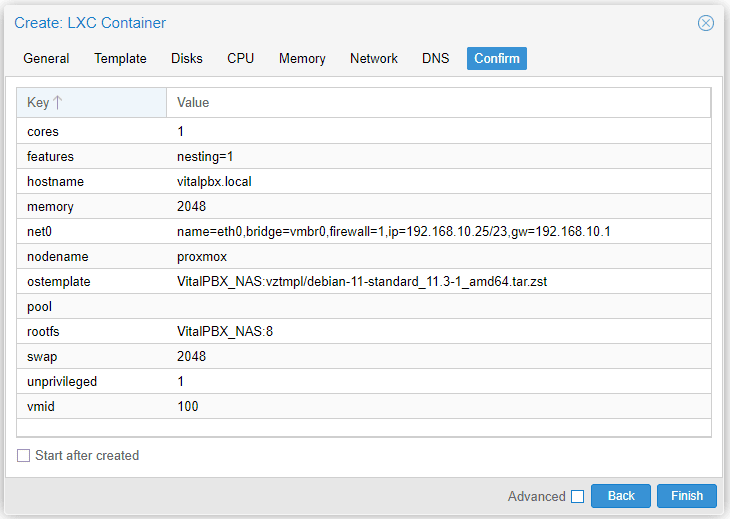
- Hostname, a hostname to identify our instance.
- Password, password of the root user to enter our instance by console.
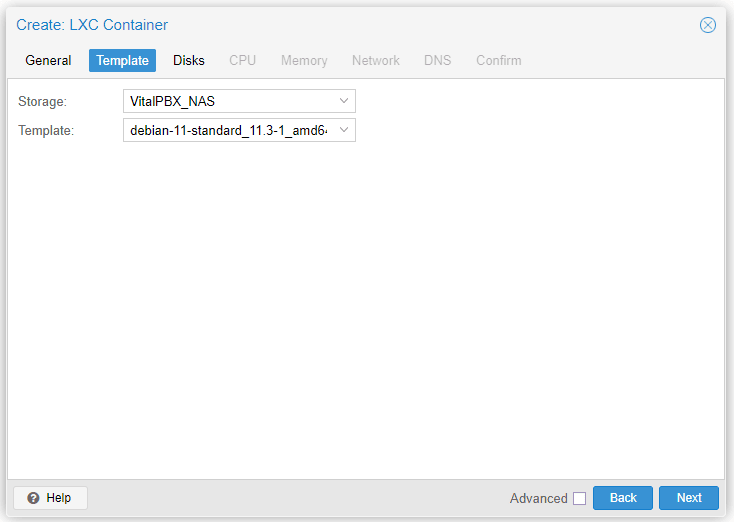
Now in Templates, we select our NAS and the Debian 11 Template we previously downloaded.
In Disk we select our NAS and the GB to assign to this instance.
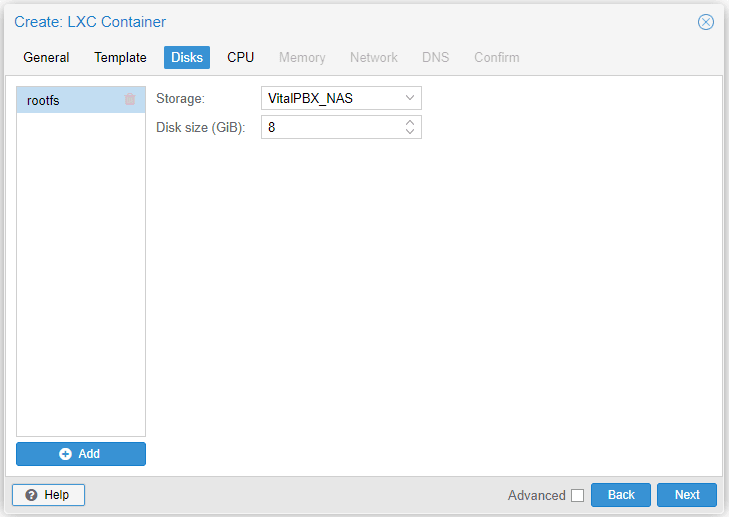
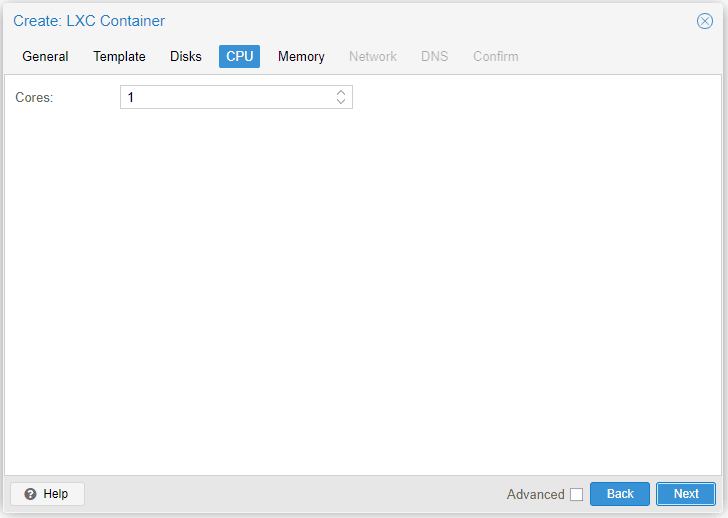
In CPU, we assign the number of Cores that we will assign to our instance.
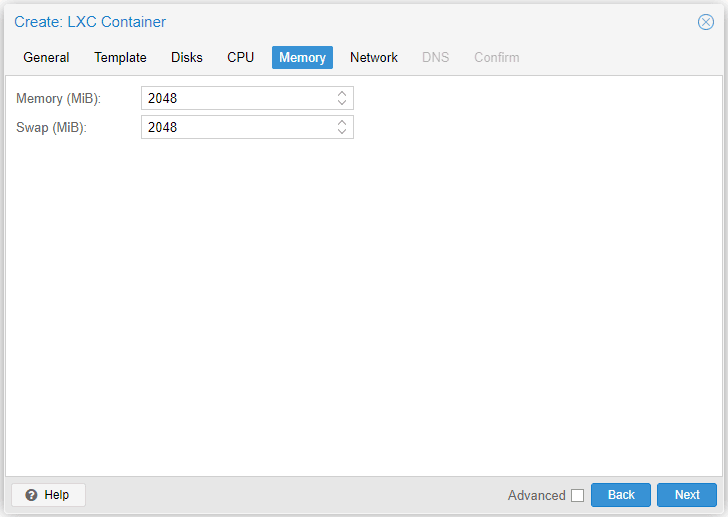
In Memory, we will allocate the amount of memory to our instance. Also, the disk swap memory to allocate.
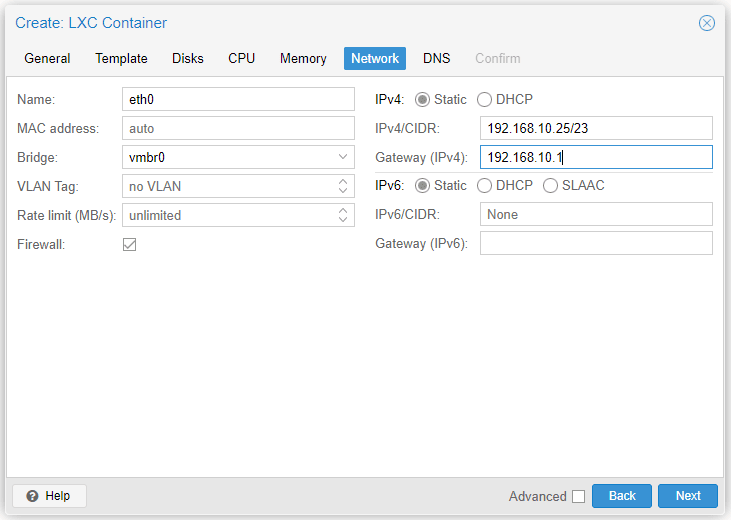
In Network, we select the interface to use, and if we want a static IP or by DHCP, in our case, we are going to use a fixed IP which is 192.168.10.25/23.
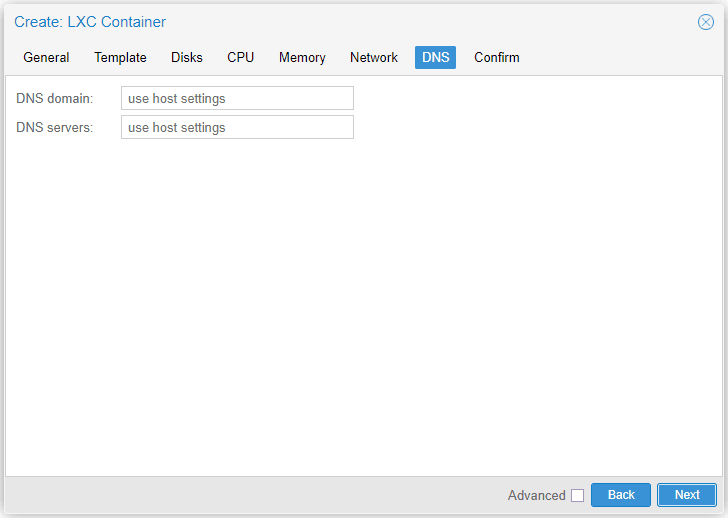
Finally, it will ask us for the DNS, we can configure those of Google or leave it blank so that it uses the same ones as our Proxmox.
Now we verify everything and give it Finish.
We wait a couple of minutes, and our Instance will be created.
Once our Instance has been created, we will see it listed in our left panel, we press it with the right mouse button, and we start it (Start).
When starting correctly, a green symbol will appear. We press the right mouse button again, enter the console with the credentials, and install VitalPBX 4 from the script.
It is very important to first update through the update and then upgrade our Instance.
| root@vitalpbx:~# apt update root@vitalpbx:~# apt -y upgrade root@vitalpbx:~# wget http://repo.vitalpbx.org/vitalpbx/apt/debian_vpbx_installer.sh root@vitalpbx:~# chmod +x debian_vpbx_installer.sh root@vitalpbx:~# ./debian_vpbx_installer.sh |
Now we wait about 10 minutes for the Script to finish executing and we will have our VitalPBX 4 installed.
Hot and Cold Migration
By having a cluster of two nodes configured, we may at some point need to migrate resources from one node to another, we can do this both Cold (the machine is off) and Hot (the machine is on).
First, we will perform a Cold migration.
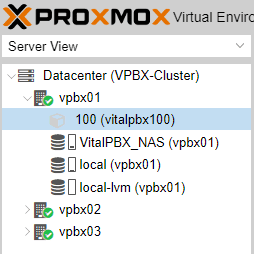
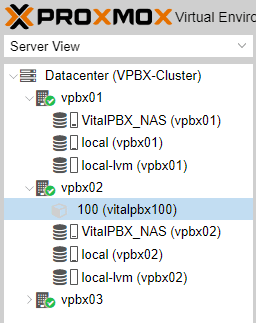
As we can see, we have the machine with the ID 100 turned off in the vpbx01 node, and we want to migrate it to the vpbx02 node that does not have any virtual machine. For this, we right-click on the machine, select migration, and press Migrate.

Once the migration is complete, the following message will appear.
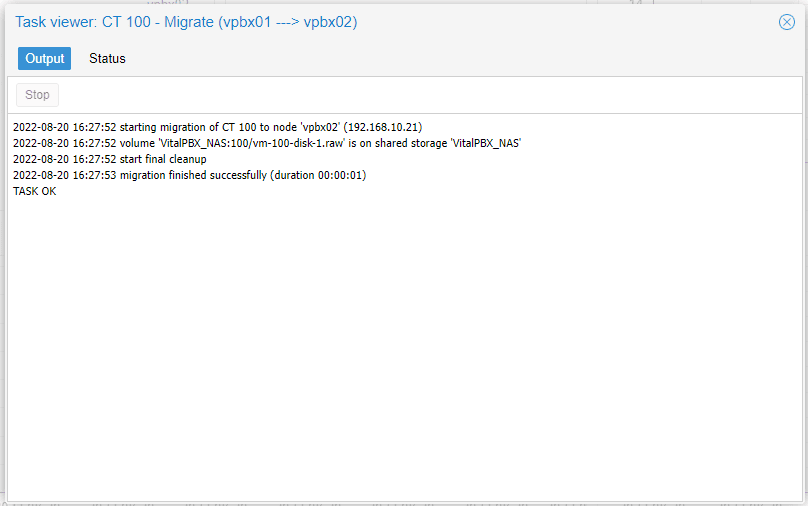
And we can see that our instance was migrated to Node 2.
Now we will hot migrate machine 100, which is started in node vpbx01. We want to have it available in our other node without turning it off, so we right-click on the machine and select Migration.
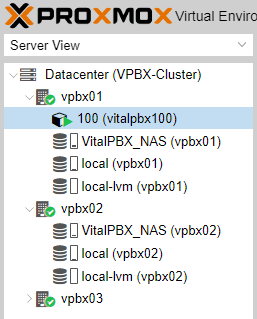
However, when migrating it, our Instance must be restarted.

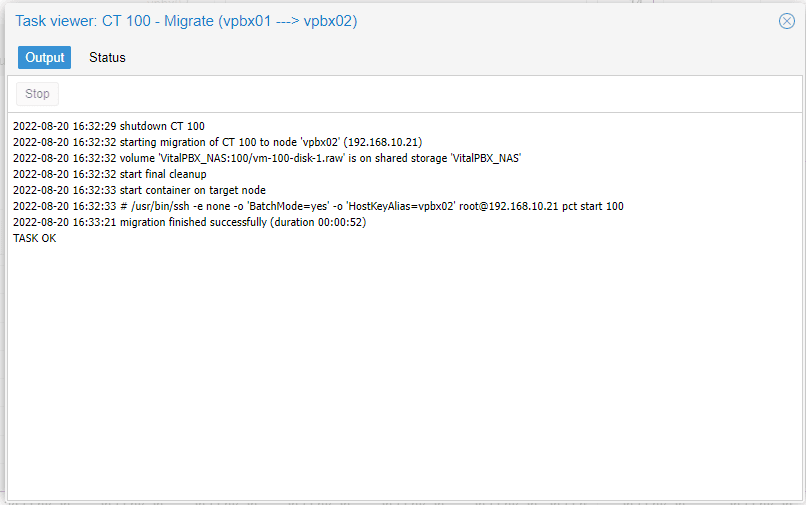
Once the process is finished, it will show us the following result.

High Availability Configuration
Now we will take care of configuring our cluster to work in high availability, with the intention that the resources we choose are always available.
We go to Datacenter/HA/, and in Resources, we press Add.
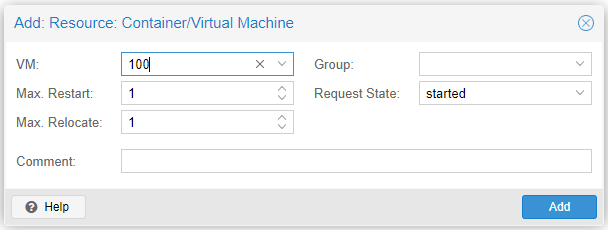
We select the instance to add in High Availability and press Add.
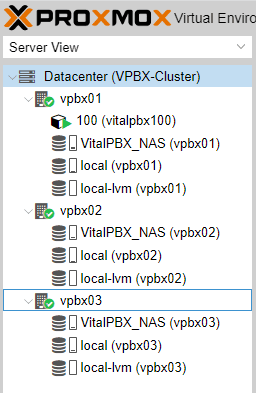
To test our high availability, we turn off node 1 (vpbx01), and we will see how the instance stops at the next available node.
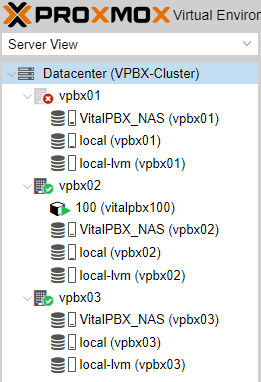
After 1 or 2 minutes, we will see how in node 2 (vpbx02), our instance will appear as already started.
Note:
When shutting down Node 1 (vpbx01), remember that it will not have access through the interface, so we will have to access our Proxmox cluster through node 2 or 3.
Conclusions
As we have seen, we can have the following options with Proxmox VE 7:
- Multi-Instance allows multiple Container or Virtual Machine with VitalPBX.
- Cluster allows you to manage several servers from a single interface and balance their load by allowing you to migrate Instance from one server to another.
- High Availability allows that if a server loses connection or any of the others is damaged, it assumes the load of all the affected instances.
In the case of VitalPBX 4, only one license is required to have High Availability with this type of configuration.


