Introduction
People have been wondering why you need to use two different logins to access VitXi and VitalPBX, and why they must be entered separately. Here is the answer.
VitalPBX was designed from the start to be a Modular App, with the ability to install certain modules on separate servers to reduce the workload on the main server and enhance security.
Certain clients use VitXi a lot and having many users accessing the main server where calls are processed is not a good practice. That is why we recommend that if you are going to have over 300 concurrent VitXi users to use a separate server.
The purpose of this Blog is not to cover the installation of VitalPBX or VitXi. If you want to know how to Install / Configure VitalPBX-VitXi, please go to the following links:
https://vitalpbx.com/blog/install-vitalpbx-4-in-debian/
https://wiki.vitalpbx.com/documentation/vitxi/vitalpbx-preparations/
https://wiki.vitalpbx.com/documentation/vitxi/installation/
Initial Settings
The first thing we will do is install VitalPBX on both Servers. This will make configuration much easier. We will call these servers as follows:
- Server 1 (VitalPBX Server)
- Server 2 (App Server)
To see the steps how to install VitalPBX 4 we recommend the following Blog:
https://vitalpbx.com/blog/install-vitalpbx-4-in-debian/
On both Servers, install VitXi App that we want to have remotely.
Server 1 Configurations
Go to /etc/mysql/mariadb.conf.d and edit the 50-server.cnf file to allow external connections to the database.
| cd /etc/mysql/mariadb.conf.d/ nano 50-server.cnf |
Change
| bind-address = 127.0.0.1 |
by
| bind-address = 0.0.0.0 |
Or if you want more security add only the IP of the Server 2
| bind-address = 127.0.0.1,IP_SERVER2 |
and restart MariaDB
| systemctl restart mariadb |
Now we have to enable access to port 3306 for which we must go to the VitalPBX GUI and in ADMIN/Firewall/Services create the MariaDB Service with TCP port 3306.

Then go to Rules and create the Rule with the previously created Service and if we want to be more strict, only allow connections from the IP of Server 2 only.

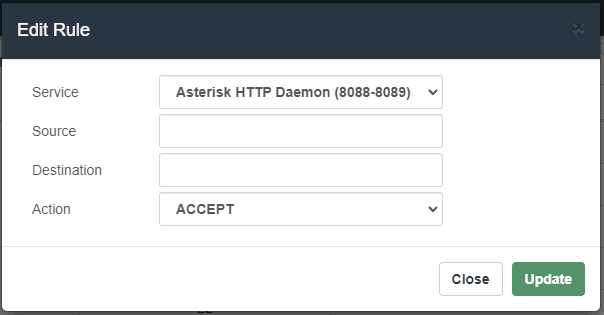
To make calls with the VitXi, an extension needs to be connected to it, and for the extension to work with Server 1, access to port 8089 must be enabled. To do this, we will use the following rule.

We also recommend at the Firewall level to whitelist the IP of Server 2, for which we go to ADMIN/Firewall/Access Control and press +Whitelist an IP.

Finally, we must go to ADMIN/Admin/Application Keys and create a key that includes all the Tenants (–Any Tenant–) and copy it, we will use it later in the configuration of Server 2.

Install VitXi
Consider the following to install and configure VitXi.
- You must have a valid domain with SSL certificate.
- The Community version of VitalPBX brings 2 VitXi users, the Enterprise Plan 50 and the Call Center and Carrier Plus Plan is not limited.
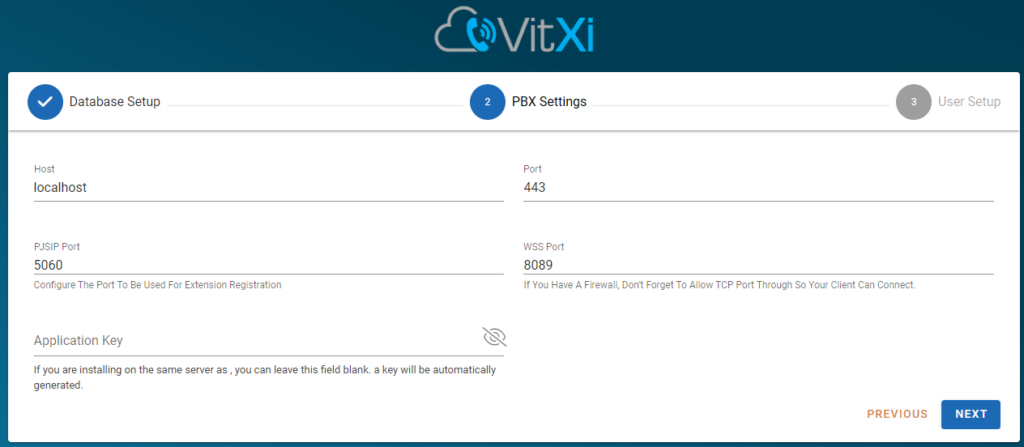
Install Vitxi from the VitalPBX interface. We must remember to install Vitxi on Server 1 locally, then choose localhost when running the configuration Wizard as shown below.

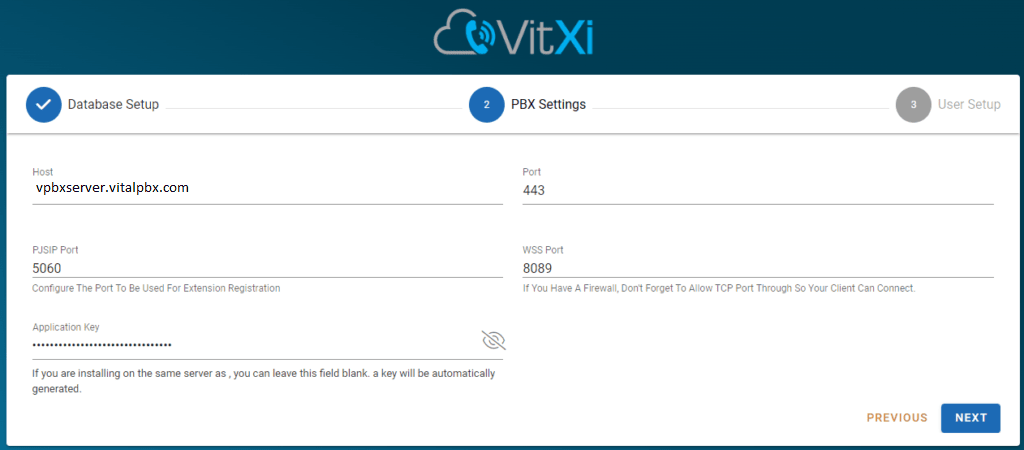
Now in the installation of VitXi on Server 2 we must enter the valid FQDN domain of Server 1 as well as the API Key that we created and copied previously.

Now we go to Server 1 and copy the MariaDB connection credentials and also give privileges with these credentials so that they can connect from Server 2.
VitXi Credentials
Go to /usr/share/vitxi/backend and edit the .env file
| cd /usr/share/vitxi/backend/ nano .env |
Copy the credentials from the VitXi database.
| DB_HOST=127.0.0.1 DB_DATABASE=vitxi DB_USERNAME=vitxi_user DB_PASSWORD=jQPimag8kdpTJaeCNZyL |
With this information, enter MariaDB and create Server 2 access to these databases.
| mysql -uroot |
| grant all privileges on vitxi.* to “vitxi_user”@”207.246.70.193” identified by “jQPimag8kdpTJaeCNZyL”; |
| FLUSH PRIVILEGES; exit |
Now we go back to Server 2 and set up the MariaDB connection credentials we got from configuring Server 1. We are also going to change the DB_HOST to the IP of Server 1.
Go to /usr/share/vitxi/backend and edit the .env file
| cd /usr/share/vitxi/backend/ nano .env |
In the VitXi database we should have something like this. Only DB_HOST and DB_PASSWORD is changed.
| DB_HOST= VitalPBX Server FQDN DB_DATABASE=vitxi DB_USERNAME=vitxi_user DB_PASSWORD=jQPimag8kdpTJaeCNZyL |
Now we reloaded VitXi and everything should work fine. We have already installed VitXi on an External Server.
Conclusions
All the information related to these configurations will be in Server 1 (VitalPBX Server), simplifying the process of backup and maintenance.
If you want to update VitXi, you must do so on both Servers.
As we could see in this Blog, it is very easy to install VitXi on a separate server.
Take into account that the licenses only need to be registered on Server 1 (Main).


