Continuing with this series of blog about how to configure VitalPBX with the different Google services (Text to Speech & Automatic Speech Recognition). Today, we will take the integration of VitalPBX and Google to next level. We will interconnect the Google Assistant API to make it possible to interact with this A.I through a Phone Call.
If you wish to read about the new features and add-ons introduced in previous updates, click here and learn about all the tools and upgrades we´ve added over time.
For this integration, a little technical knowledge and a Google Cloud account are required to access the Google Assistant API.
How it Works
The Google Assistant SDK lets you add hot-word detection, voice control, natural language understanding and Google’s smarts to your ideas. This project captures an utterance (a spoken audio request, such as “What’s on my calendar?”), sends it to the Google Assistant, and receives a spoken audio response in addition to the raw text of the utterance.
Starting the Configurations
1. Configure an Actions Console project
A Google Cloud Platform project managed by the Actions Console, gives your project access to the Google Assistant API. The project tracks quota usage and gives you valuable metrics for the requests made from your hardware.
To enable access to the Google Assistant API, do the following:
1.1 Open the Actions Console.
https://console.actions.google.com/
1.2 Click on Add/import project.
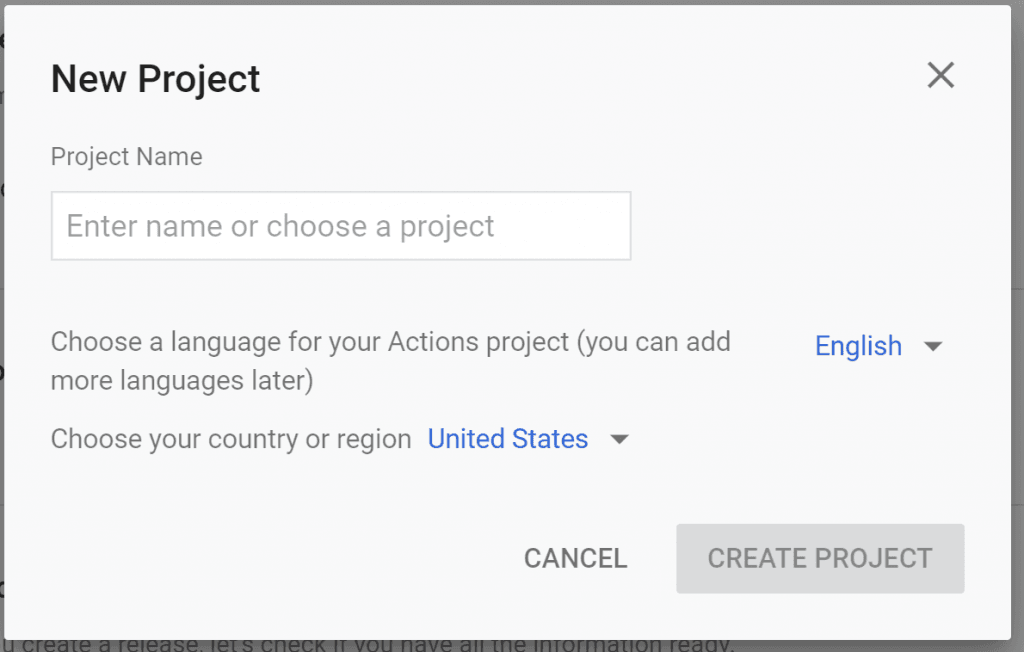
1.3 To create a new project, type a name in the Project name box and click CREATE PROJECT.
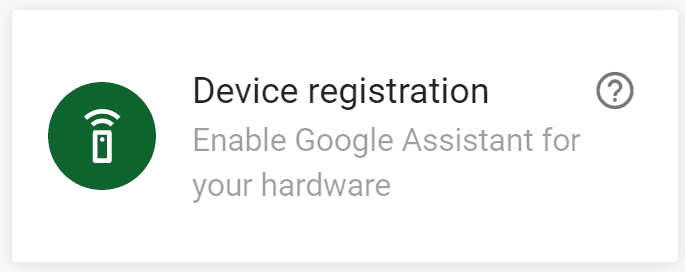
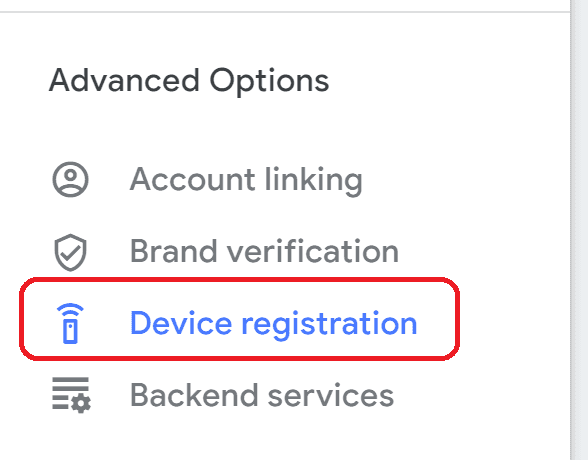
1.4 If you created a new project, click the Device registration box near the bottom of the page. If you imported a previously-created project, this box will not be displayed; select the Device registration tab (under ADVANCED OPTIONS) from the left navbar.
Note: Keep this browser tab open. You will use it to register a device model in a later step.
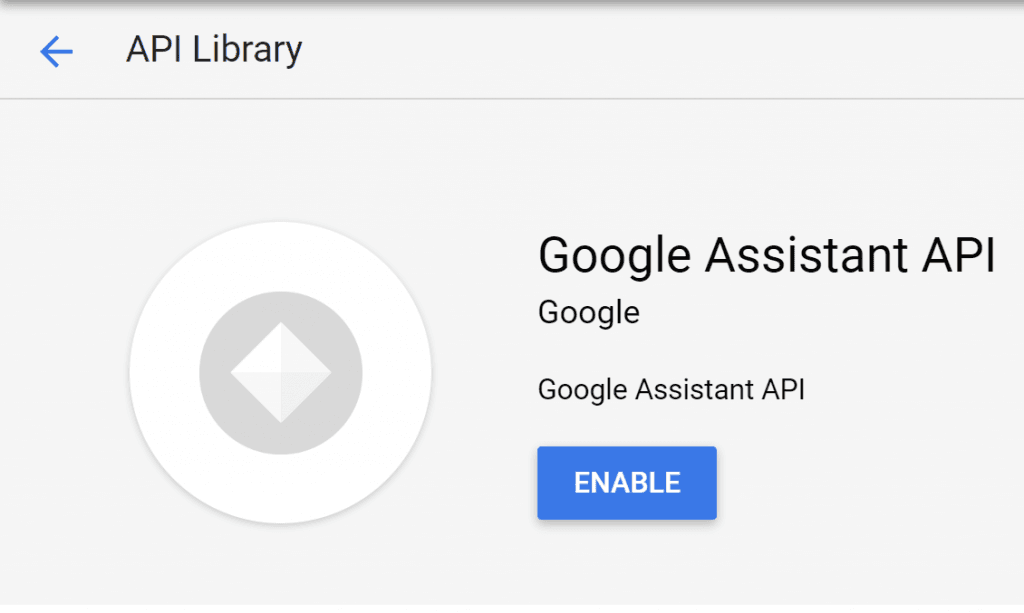
1.5 Enable the Google Assistant API on the project you selected (see the Terms of Service). You need to do this in the Cloud Platform Console.
https://console.developers.google.com/apis/api/embeddedassistant.googleapis.com/overview
1.6 You must configure the OAuth consent screen for your project in the Cloud Platform Console. Note that most fields on this page are optional.
https://console.developers.google.com/apis/credentials/consent
- Application type: Internal
- Application name: (The name of the app asking for consent, you can leave the default name)
- Application logo: (optional)
- Support email: (Select your email)
Save
Set activity controls for your account
In order to use the Google Assistant, you must share certain activity data with Google. The Google Assistant needs this data to function properly; this is not specific to the SDK.
Open the Activity Controls page for the Google account that you want to use with the Assistant. You can use any Google account, it does not need to be your developer account.
https://myaccount.google.com/activitycontrols
Ensure the following toggle switches are enabled (blue):
- Web & App Activity
- In addition, be sure to select the Include Chrome history and activity from sites, apps, and devices that use Google services
- Device Information
- Voice & Audio Activity
1.7 Register the Device Model
In order for the Google Assistant to respond to commands appropriate to your device and the given context, the Assistant needs information about your particular device. You provide this information, which includes fields like device type and manufacturer, as a device model. You can think of this model as a general class of device – like a light, speaker, or toy robot.
This information is then accessible to the Google Assistant and is associated with your Actions Console project. No other projects have access to your model and device information.
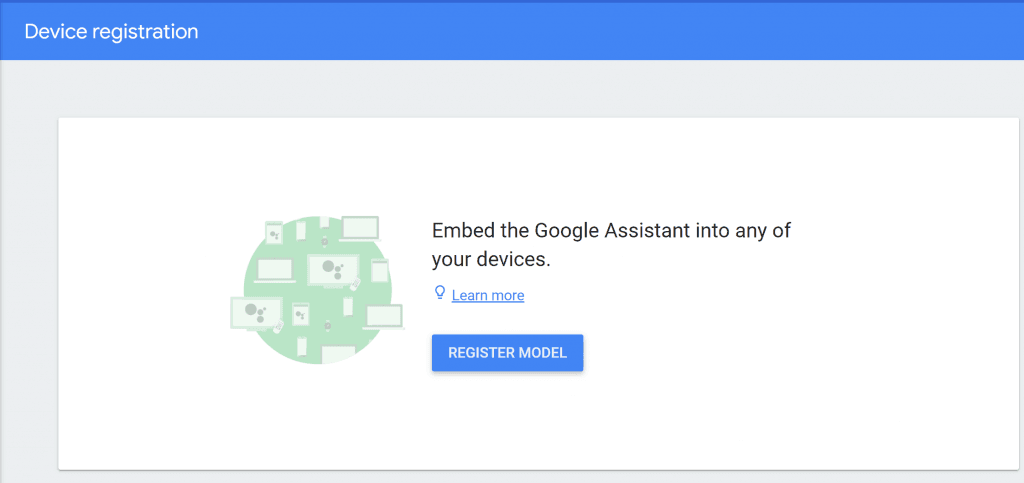
Use the registration UI (Return to the browser tab you left open in step 1.4)
Use the registration UI in the Actions Console to register a device model.
https://console.actions.google.com/
Click the REGISTER MODEL button.
Create a model
Fill out all of the fields for your device. Select any device type, such as Light.
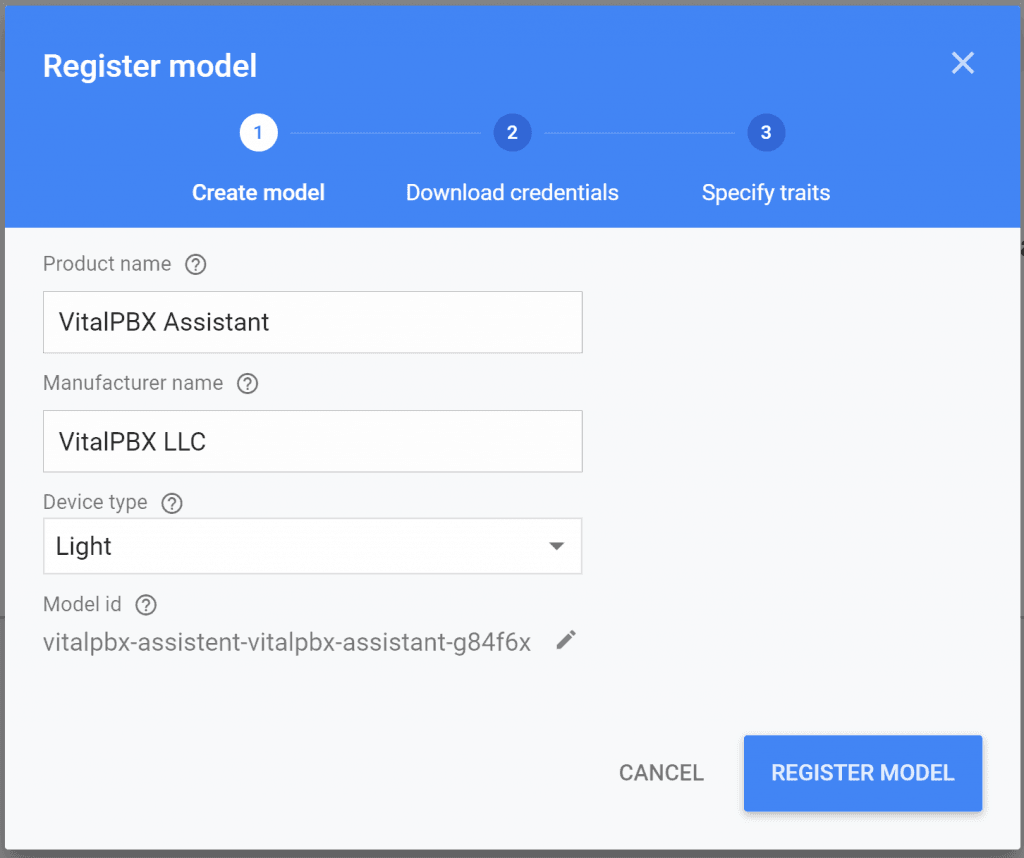
When you are done, click REGISTER MODEL.
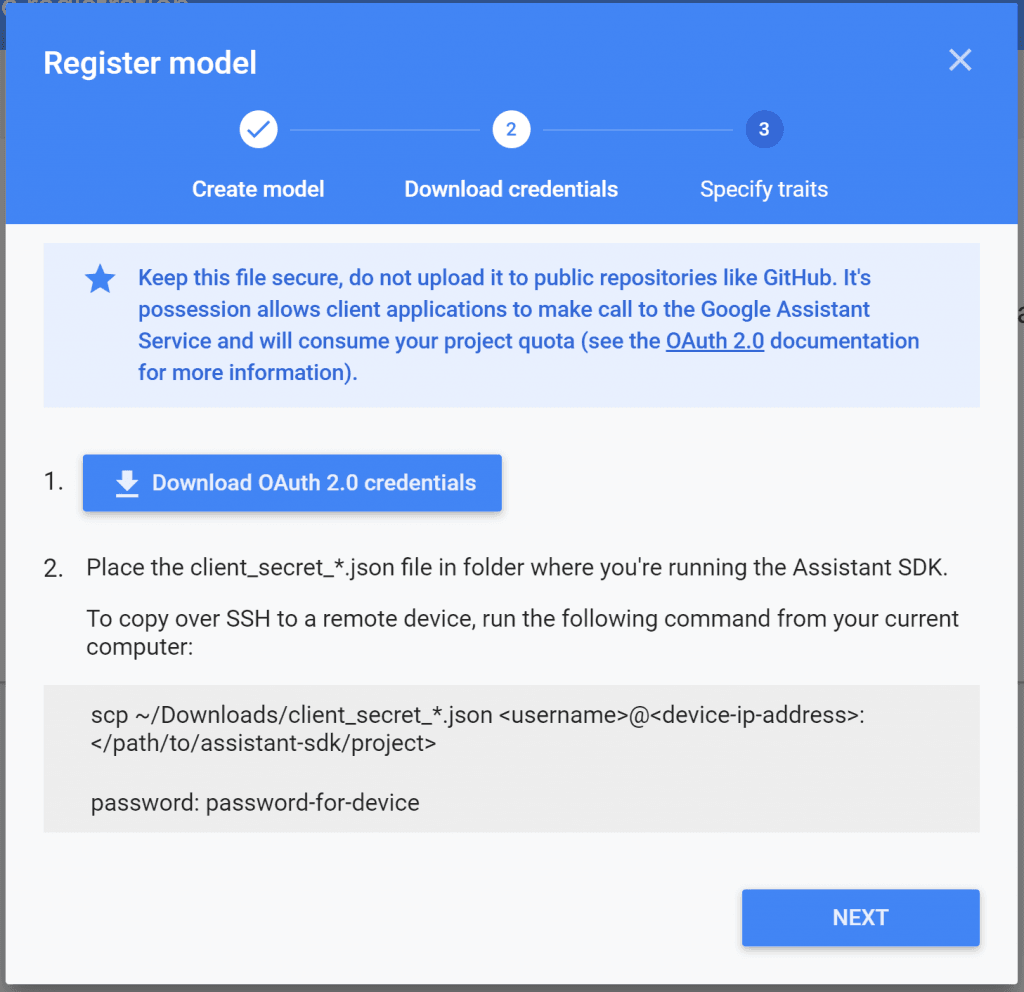
Download credentials
The client_secret_*.json file must be located on the device. This file contains a client ID and client secret, but no access token. Later, you will run an authorization tool and reference this file in order to authorize the Google Assistant SDK sample to make Google Assistant queries (see the OAuth 2.0 documentation for more information). Do not rename this file.
Download this file and transfer it to VitalPBX in /var/lib/asterisk. Click NEXT.
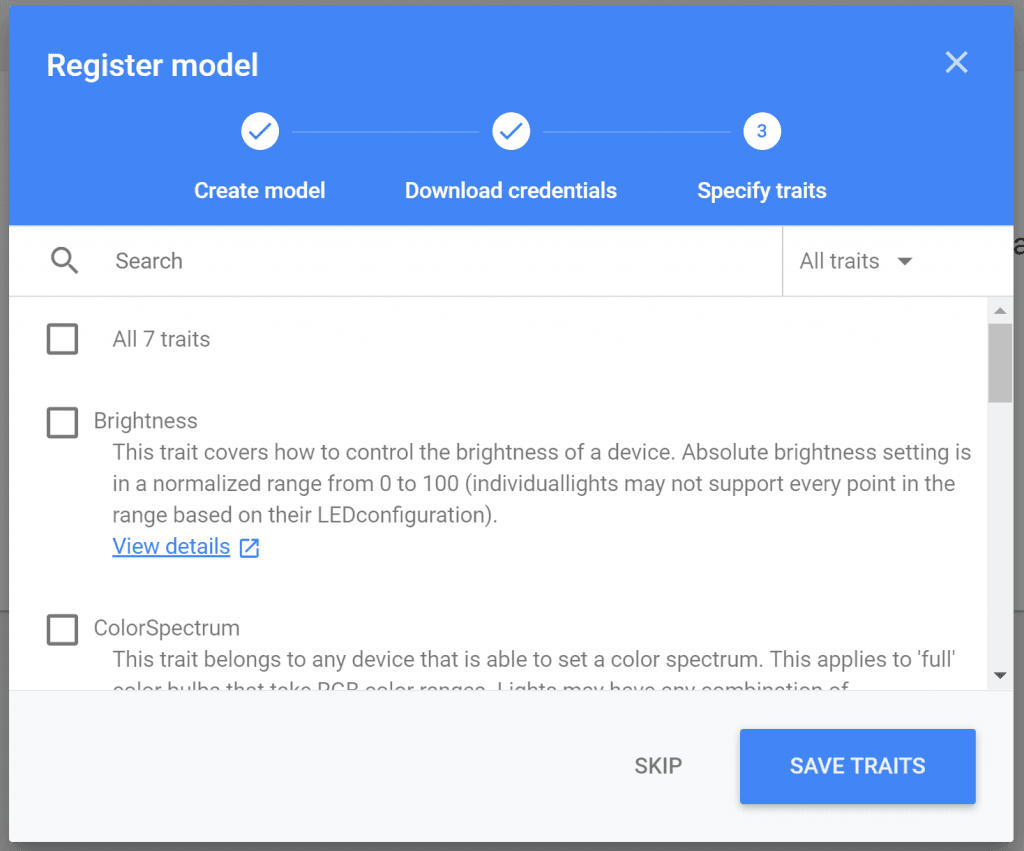
Specify traits
Later, you will specify the different abilities that your device supports on this screen. But for now, click the SKIP button.
2. Install the SDK and dependencies
Follow these instructions to install the SDK and sample code on your project. Run all of the commands on this page in a terminal on the VitalPBX server (either directly or via an SSH connection).
[root@vitalpbx /]# yum install python-devel python-pip wget
[root@vitalpbx /]# python -m pip install --upgrade pip setuptools wheel
Install the package’s system dependencies
[root@vitalpbx /]# yum install portaudio-19 libffi-devel openssl-devel libmpg123-devel
[root@vitalpbx /]# python -m pip install --upgrade google-assistant-library==1.0.1
[root@vitalpbx /]# python -m pip install --upgrade google-assistant-sdk[samples]==0.5.1
3. Generate credentials
3.1 Install or update the authorization tool
[root@vitalpbx /]# python -m pip install –upgrade google-auth-oauthlib[tool]
[root@vitalpbx /]# python -m pip install --upgrade google-auth-oauthlib[tool]
3.2 Generate credentials to be able to run the sample code and tools. Reference the JSON file you downloaded in a previous step; you may need to copy it the device. Do not rename this file.
[root@vitalpbx /]# google-oauthlib-tool --scope https://www.googleapis.com/auth/assistant-sdk-prototype --scope https://www.googleapis.com/auth/gcm --save --headless --client-secrets /var/lib/asterisk/client_secret_*.json
You should see a URL displayed in the terminal:
Please visit this URL to authorize this application: https://…
3.3 Copy the URL and paste it into a browser (this can be done on any machine). The page will ask you to sign in to your Google account. Sign into the Google account that created the developer project in a previous step.
3.4 After you approve the permission request from the API, a code will appear in your browser, such as “4/XXXX”. Copy and paste this code into the terminal
Enter the authorization code:
If the authorization was successful, you will see a response similar to the following:
credentials saved: /root/.config/google-oauthlib-tool/credentials.json
If instead, you see InvalidGrantError, then an invalid code was entered. Try again, taking care to copy and paste the entire code.
Move the credential file to /var/lib/asterisk/:
[root@vitalpbx /]# mv /root/.config/google-oauthlib-tool/credentials.json /var/lib/asterisk/
Create a working directory
[root@vitalpbx en]# mkdir /var/lib/asterisk/.config/
[root@vitalpbx en]# chown asterisk:asterisk /var/lib/asterisk/.config/4.- Get the Sample Code
4. Get the Sample Code
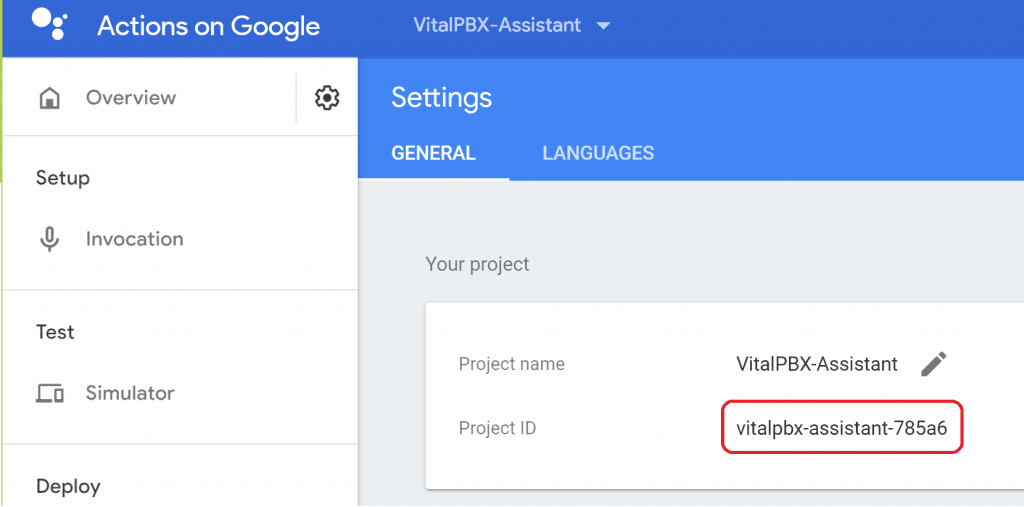
4.1 Get Project ID and Device Model ID
Goto: https://console.actions.google.com/
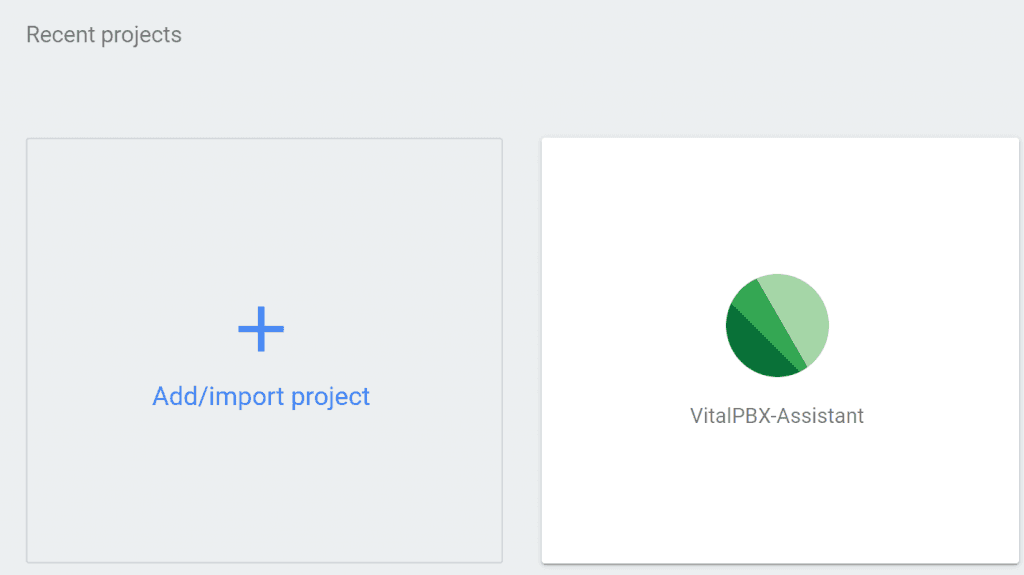
Select the project
In the upper left next to Overview press the Settings button

Select Project Settings
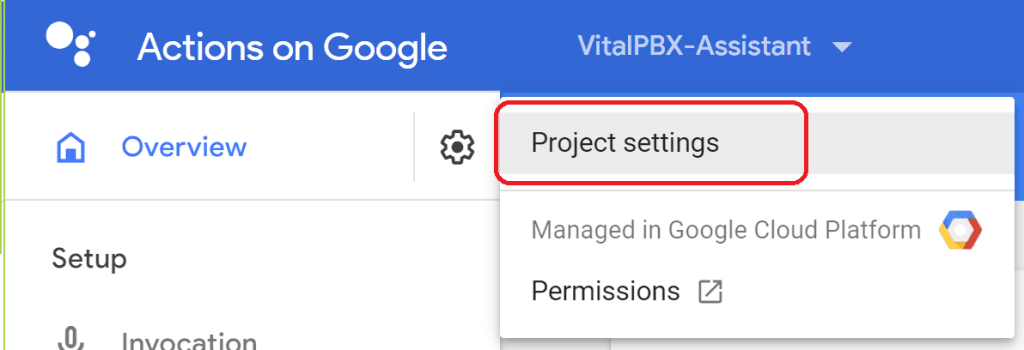
Copy the Project ID
Now in the left Menu, Advanced Options, select Device Registration
Double click in product and copy the Model ID

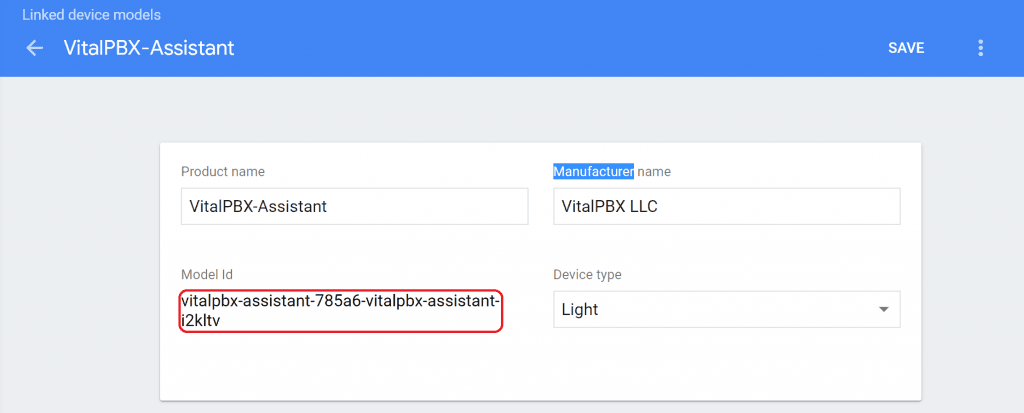
4.2 Copy google.agi file and add owner and permissions.
[root@vitalpbx /]# cd /var/lib/asterisk/agi-bin
[root@vitalpbx /]# wget https://raw.githubusercontent.com/VitalPBX/VitalPBX_Google_Assistant/master/google.agi
[root@vitalpbx /]# chown asterisk:asterisk google.agi
[root@vitalpbx /]# chmod +x google.agi
4.3 Edit google.agi file an replace “my-project-id” and “my-device-model” variables
[root@vitalpbx agi-bin]# vi google.agi
# Google Project ID             #
my $projectid = "my-project-id";
# Google Device Model ID        #
my $devicemodelid = "my-device-model";
4.4 Get Dialplan Example and reload asterisk dial plan
[root@vitalpbx ombutel]#  cd /etc/asterisk/ombutel
[root@vitalpbx ombutel]#  wget https://raw.githubusercontent.com/VitalPBX/VitalPBX_Google_Assistant/master/extensions__60-google_assistant.conf
[root@vitalpbx ombutel]# asterisk -rx"dialplan reload"
4.5 Get prompts
[root@vitalpbx ]#  cd /var/lib/asterisk/sounds/en
[root@vitalpbx ]#  wget https://raw.githubusercontent.com/VitalPBX/VitalPBX_Google_Assistant/master/google_another.sln
[root@vitalpbx ]#  wget https://raw.githubusercontent.com/VitalPBX/VitalPBX_Google_Assistant/master/google_example.sln
[root@vitalpbx ]#  wget https://raw.githubusercontent.com/VitalPBX/VitalPBX_Google_Assistant/master/google_goodbye.sln
[root@vitalpbx ]#  wget https://raw.githubusercontent.com/VitalPBX/VitalPBX_Google_Assistant/master/google_wait.sln
[root@vitalpbx ]#  wget https://raw.githubusercontent.com/VitalPBX/VitalPBX_Google_Assistant/master/google_welcome.sln
4.6 Test your installation
From any phone in your PBX dial: *789
5. Installation with the install.sh script
5.1 Copy the file client_secret_XXXX.json in /var/lib/asterisk obtained in the step Download Credential.
5.2 Get Project ID and Device Model ID
- Goto: https://console.actions.google.com/
- Select the project
In the upper left next to Overview press the Settings button
Select Project Settings
Copy the Project ID
- Now in the left Menu, Advanced Options, select Device Registration
Double click in product and copy the Model ID
5.3 Download and execute the installation script
[root@vitalpbx ]# wget https://raw.githubusercontent.com/VitalPBX/VitalPBX_Google_Assistant/master/install.sh
[root@vitalpbx ]# chmod +x install.sh
[root@vitalpbx ]# ./install.sh
************************************************************
*           Welcome to the VitalPBX Assistant              *
*                   Powered by Google                      *
************************************************************

Client Secret JSon File Name... > client_secret_client_ClientID.json
Project ID..................... > Project ID
Device Model ID................ > Device Model Id
5.4 When the installation script asks, copy a paste the name of the client secret file obtained in the step Download Credential. Also, Project ID and Device Model Id obtained in step 5.2
5.5 Wait for the verification device URL a paste this in the web browser.
5.6 From any phone in your PBX dial: *789
6. Credits
6.1 Sources of Information used
- https://github.com/rgrokett/RaspiAsteriskGoogle
- https://developers.google.com/assistant/sdk/guides/service/python/
Get to know about VitalPBX, our services and how we can help you achieve your goals in our official website.

