The OpenVPN protocol is not one that is built into the Apple iOS operating system for iPhones, iPads, and iPods. Therefore a client program is required that can handle capturing the traffic you wish to send through the OpenVPN tunnel, and encrypting it and passing it to the OpenVPN server. And of course, the reverse, to decrypt the return traffic. There is currently only one client available that works on standard Apple iOS devices.
Read our tutorials and guides on how to implement new tools and technologies for your business with VitalPBX here.
Official OpenVPN Connect app
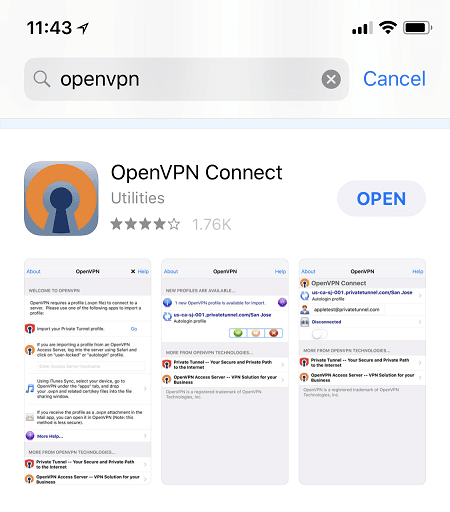
On the official Apple App Store, the client you can download and install for free is called OpenVPN Connect. This application supports only one active VPN tunnel at a time. Trying to connect to two different servers at the same time is a function that is not built into the official application OpenVPN Connect app, and it is also not possible because the underlying operating system does not allow this. The OpenVPN Connect app is able to remember multiple different servers, but only one can be active at a time.
To obtain the OpenVPN Connect app, go to the Apple App Store on your Apple iOS device. Search for “OpenVPN Connect” and the application will show up in the search results. You can install it from there. Once installed an icon will be placed on your home screen where you can find the app.
Next, we will show you how to configure an iPhone OpenVPN client.
1.- First make sure that the Server Configuration is complete.
Server
In this tab, you will find the information about OpenVPN Server.
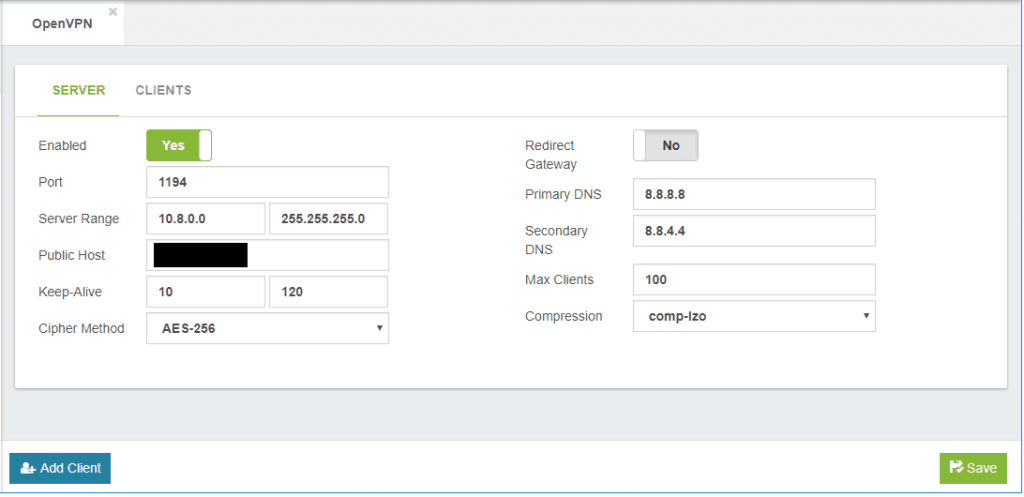
2.- Add OpenVPN client by pressing the button on the bottom left

Add Client

3.- We create a client and download the configuration.

4.- In the compressed file that we download there are 5 files:
1.- ca.crt
2.- clientX.crt
3.- clientX.key
4.- clientX.ovpn
5.- clientX_full.ovpn
We are going to use only the fifth file named clientX_full.ovpn.
5.- Now we send an email to our account with the attachment to be read on our iPhone. When receiving the mail we press on the attachment and in this way our OpenVPN will be configured. Please follow the next steps:
a.- Open the email
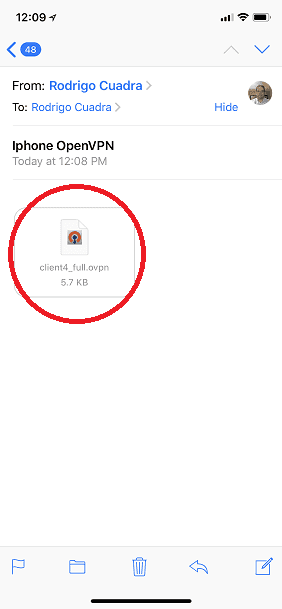
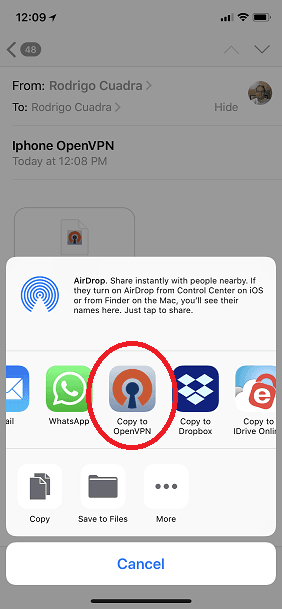
b.- Tap the attached file and select Copy to OpenVPN App.
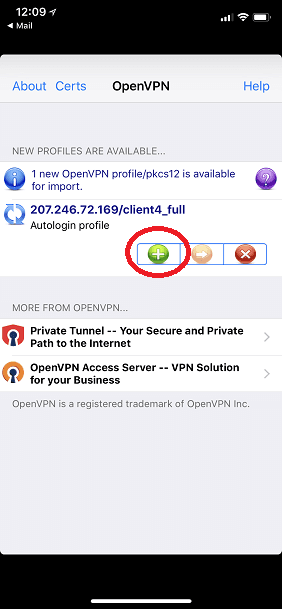
c.- Now add the profile.
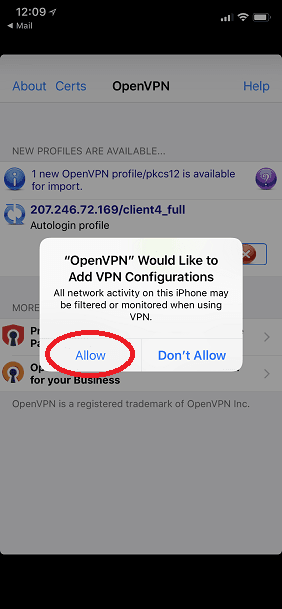
d.- Then Allow the profile.
e.- Now that everything is configured just press the connect button
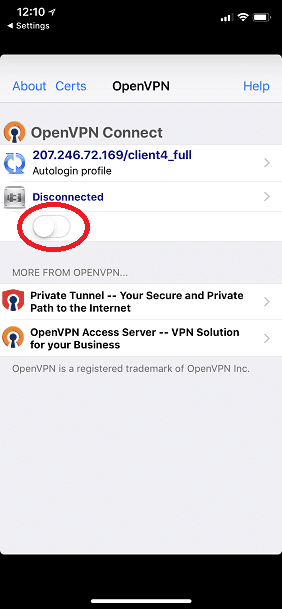
f.- If everything is OK, the connect button will turn green and you will see activity in the sending/receiving of packages.
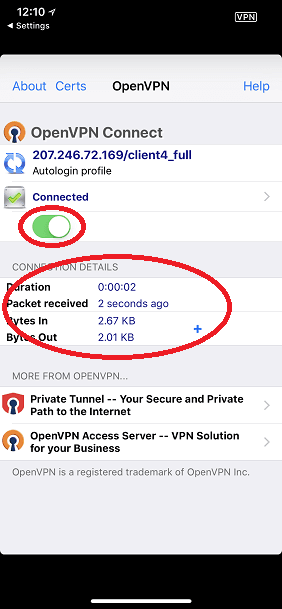
- After establishing the tunnel, it is necessary to configure the SIP account of the SIP/IAX Mobile App. Remember that the IP Address to reach VitalPBX is the first in that range, that is, if we have the range 10.8.0.0, the IP Address of the PBX is 10.8.0.1.
- When you create the SIP extension to connect, remember that to have audio it is necessary for the configuration of NAT must be Force, Comedia.
- In future articles we will explain how to connect as Client phones of the brand Yealink, Htek, Grandstream as well as Android phones.
Learn more about VitalPBX, our services and how we can help you achieve your goals in our official website

