Vonage (formerly known as Nexmo) is a cloud communications platform that provides SIP Trunking Services to connect businesses to the world via the internet. SIP (Session Initiation Protocol) Trunking enables organizations to make and receive phone calls over the internet, providing a cost-effective and scalable solution to traditional phone systems.
A few steps are required to integrate Vonage SIP Trunking with VitalPBX. In this blog article, we will take you through the steps to configure a Vonage SIP Trunk and connect it to VitalPBX.
Setting up Vonage
Before diving into the configurations, we must create an account on the Vonage Website to get our free trial.
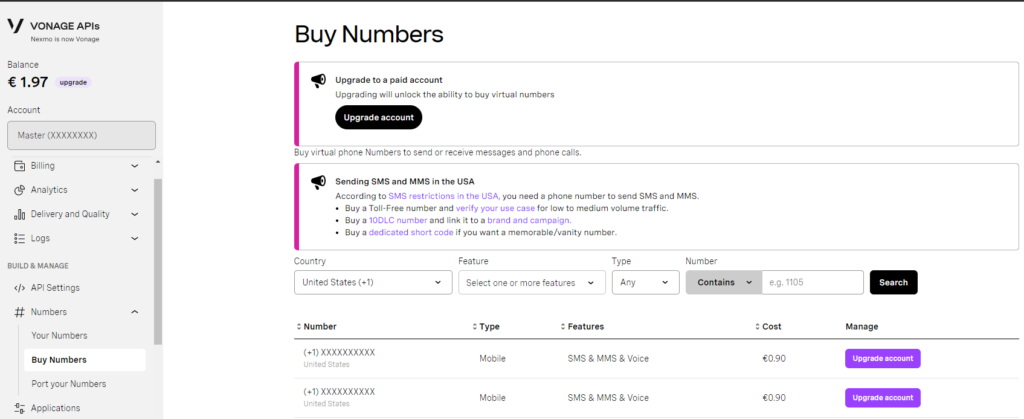
After completing the registration steps and logging in, we will navigate to “Build & Manage / Numbers / Buy Numbers” to buy our first DID. In our case, we are going to buy a USA Number. However, you can buy numbers from different countries (The United Kingdom, Italy, France, Australia, etc.).
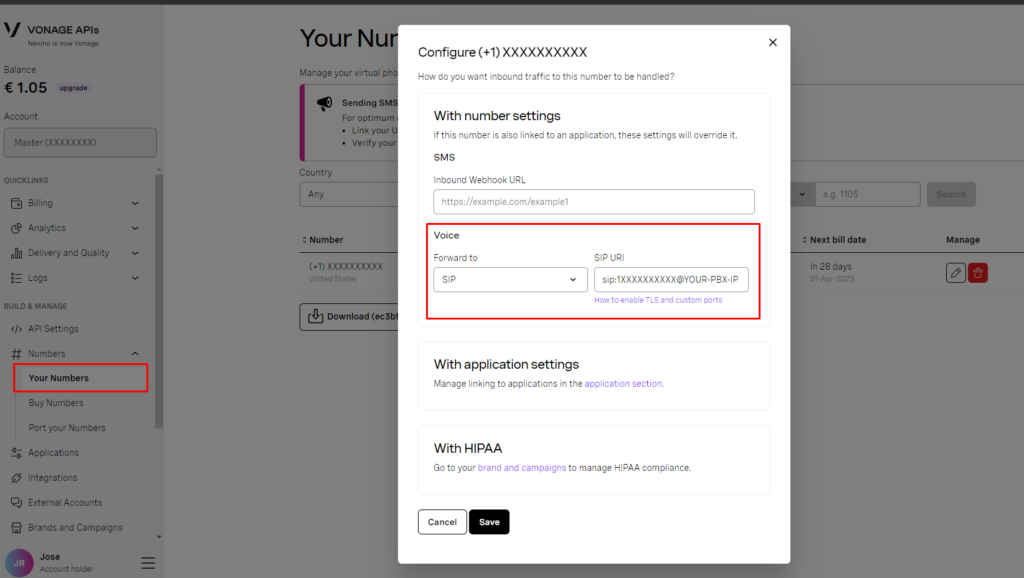
Now that we have our first DID, we must edit it to receive calls in our VitalPBX. So for this, we have to navigate to “Build & Manage / Numbers / Your Numbers” and click the edit button of our DID. Once the edition modal gets opened, we must configure the voice section with the values below.
- Forward To: SIP
- SIP URI: sip:1XXXXXXXXXX@YOUR-VITALPBX-IP-OR-DOMAIN
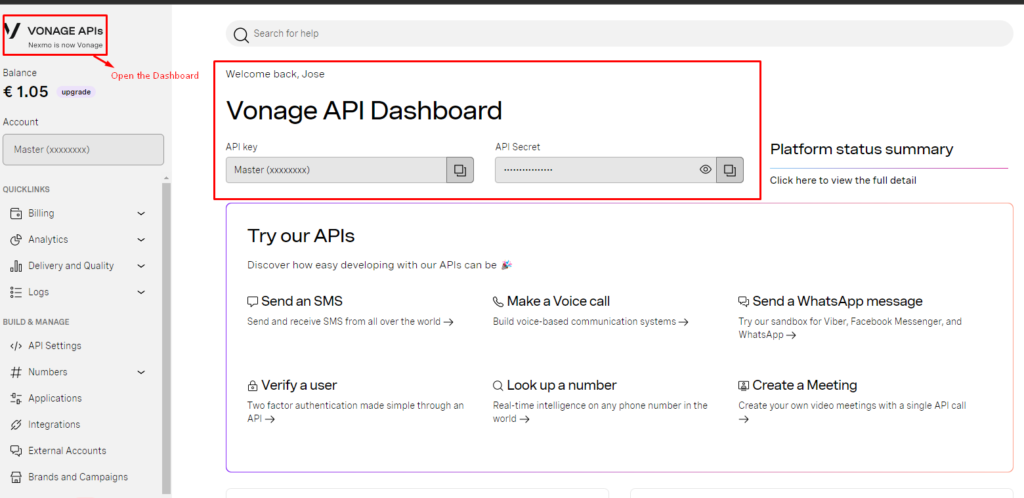
Our next step would be creating a trunk to connect and authenticate our PJSIP trunk on VitalPBX. However, with Vonage, we only require the API Key and Secret located at the Vonage dashboard (To open the dashboard, you need to click on the logo in the top left corner).
Setting up VitalPBX
Now that we have configured the Vonage portal, our next step would be to configure our VitalPBX. So, we will start defining the PJSIP trunk in our VitalPBX.
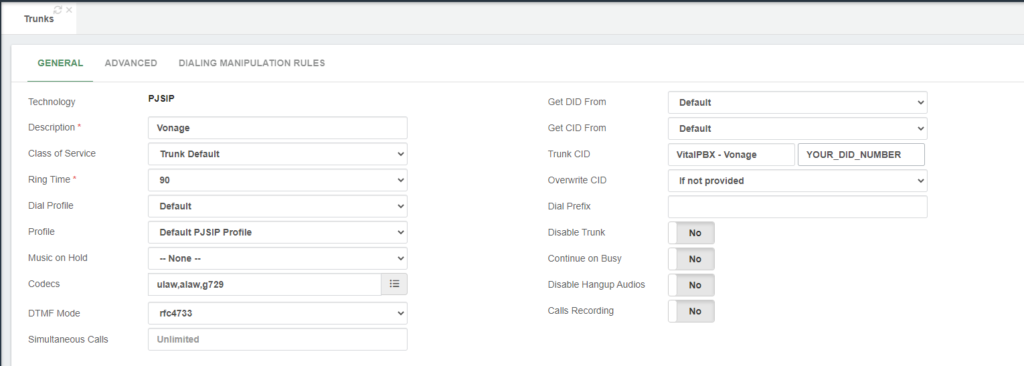
To start with our trunk setup, we will define the fields below in the top section.
- Description: It can be any alphanumeric string for identifying the trunk.
- Profile: It can be any PJSIP Profile (usually the Default PJSIP Profile).
- Codecs: according to Vonage documentation, we must select “ulaw, alaw, and g729.”
- Trunk CID: for the name, you can use any alphanumeric string, but for the number, you must provide the DID purchased in the initial steps using the 11-digit format (e.g., 13175551111).
- Overwrite CID: we will select the value “If not provided” to use the value of the field “Trunk CID” as the fallback value in case of the extensions don’t have an External CID defined.
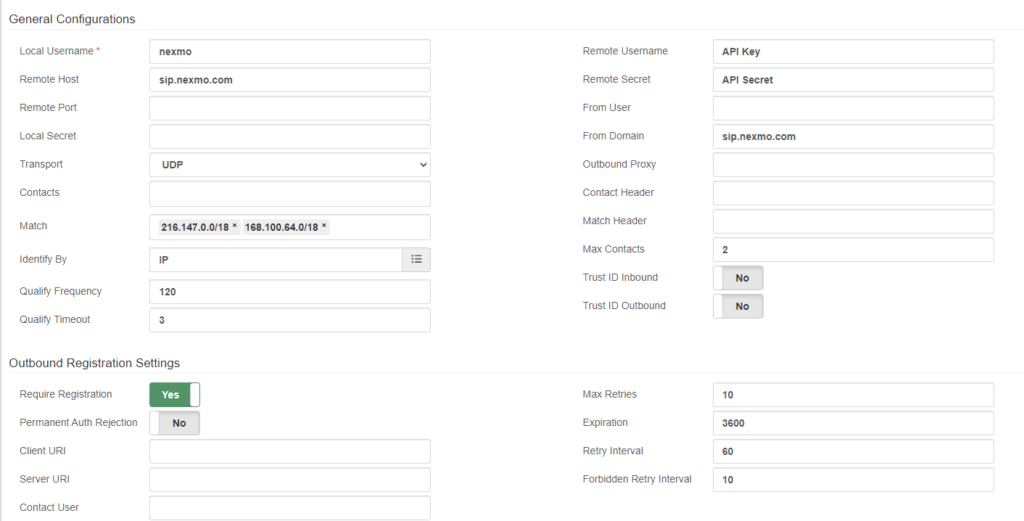
To continue with the trunk setup, in the sections “General Configurations and Outbound Registration Settings,” we will set up the fields below with their respective values.
- Local Username: it can be any alphanumeric string without spaces.
- Remote Host: must be set up with the value “sip.nexmo.com”
- Match: must have the IP addresses 216.147.0.0/18 and 168.100.64.0/18 separated by a comma.
- Identify By: we must select the IP value because we will identify the incoming calls from Vonage by IP.
- Qualify Frequency: we must set it up with 120 seconds.
- Remote Username: we will use the API Key value from the Vonage dashboard.
- Remote Secret: we will use the API Secret value from the Vonage dashboard.
- From Domain: it must have the value “sip.nexmo.com”
- Require Registration: we must set the value of this field to “Yes.”
After saving the trunk and applying changes, you can monitor the trunk status by navigating to “Reports / PBX Reports / PJSIP Endpoints.” Once there, you must select the “Trunks” tab.

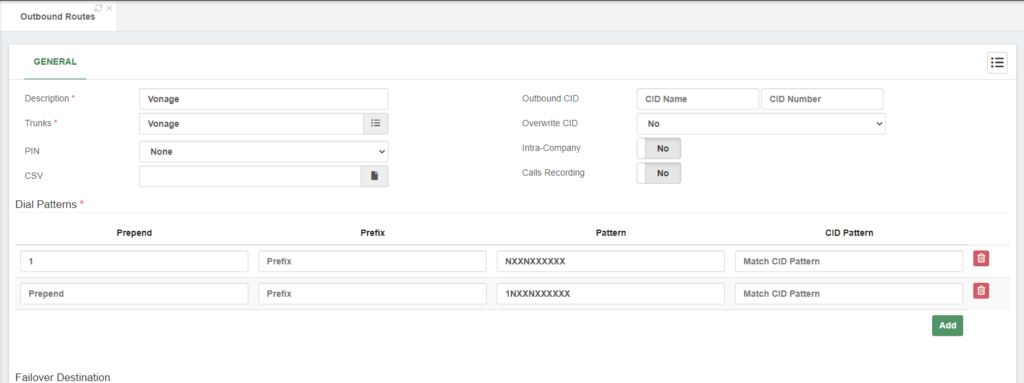
Now that we verified that our trunk is up and running, we will create the outbound route to place calls using our Vonage trunk.
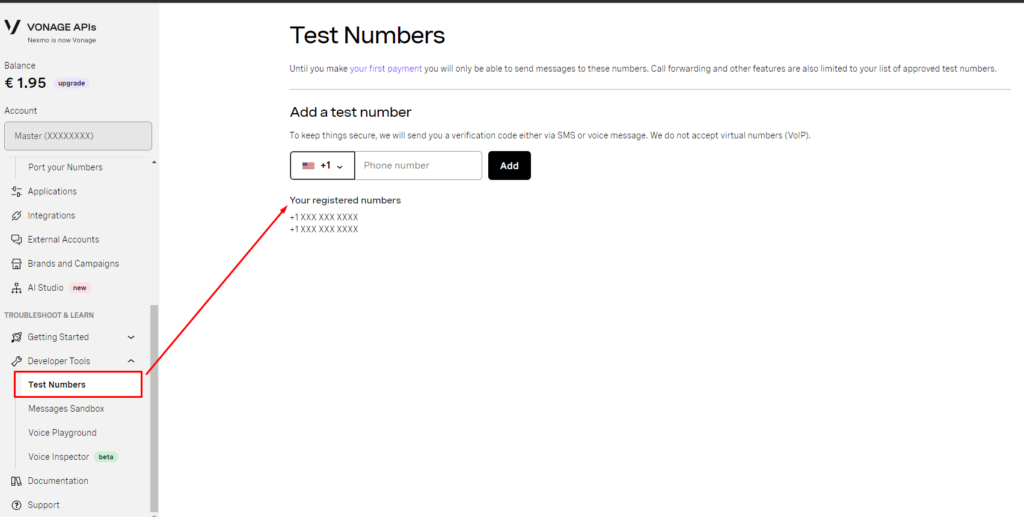
Remember that this is a trial account. Thus, we can only place calls to the number provided during the registration process or the numbers in the Vonage Portal under the “Test Numbers” section.
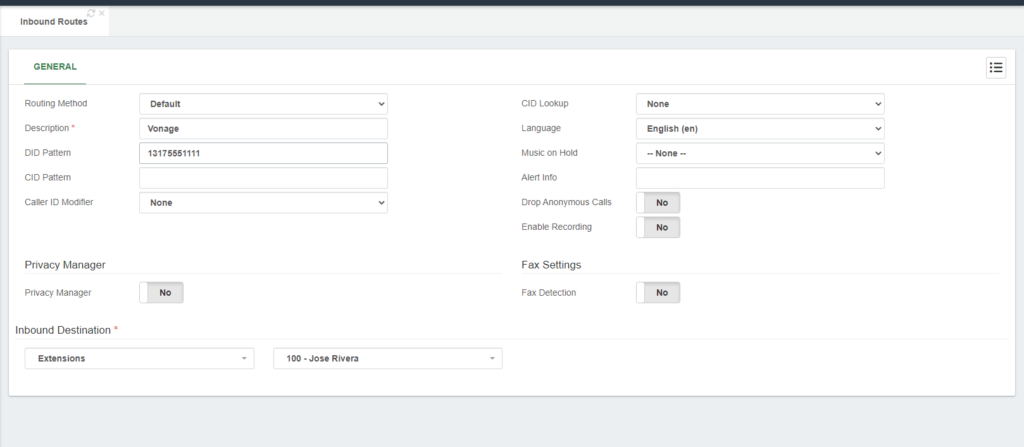
Finally, we will create our inbound route for receiving calls. The DID must have the same format that we used in the Vonage portal when configuring the “Voice” section of our DID.
Testing the configurations
Now that the settings are complete, we can place test calls to confirm that our trunk is working.
For testing outbound calls, you can place a test call to a phone number outside of your network; it can be your mobile number, for instance.
For inbound call testing, you can call from your mobile to any of your Vonage DIDs.
Thus, if both tests pass with flying colors, congrats! You have successfully set up a Vonage (Nexmo) trunk in VitalPBX.
Conclusions
In conclusion, setting up a Vonage Trunk on VitalPBX is a simple procedure that requires a few easy steps. By completing the instructions outlined above, you will interconnect VitalPBX with Vonage in a few minutes to start making and receiving calls using Vonage as your VoIP provider.


