While investigating about how to make certain implementations using WebRTC, we found this article “How to: WebRTC Audio & Video calls on Asterisk” on the Community site from Asterisk. This was very intriguing for us, so we proceeded to install it in a transparent way with VitalPBX.
On the article, it is shown how to install Asterisk and configure it for the WebRTC application to work on a Raspberry Pi. However, on this post we are going to focus on configuring VitalPBX and installing the WebRTC application on the same server.
The Browser-Phone WebRTC Project is hosted on the following address: https://github.com/InnovateAsterisk/Browser-Phone
Even though they say that the application is designed for Asterisk 13 & 16, we are going to be using the latest version of VitalPBX with Asterisk 18.01 which is the current version at the moment of writing this post.
We are also going to be doing the integration with PJSIP instead of SIP, which is how the original articled showed the application.
Coming up are the steps to follow.
1.- Install VitalPBX 3
2.- We configure our VitalPBX installation to integrate with the WebRTC Application
2.1.- VitalPBX Server Preparations
For WebRTC to work perfectly, it is necessary that to have a valid FQDN to assign it security certificates. Next, we will show you the steps to follow once we have VitalPBX installed on our server with a valid domain.
2.2.- Create a certificate and enable HTTPS
Remember that it is necessary to have a valid FQDN and that our VitalPBX server has a valid certificate.
It is also very important that the host name of the server matches the FQDN that we are using to generate the Let’s Encrypt certificate. So, first you have to go to Admin > Network > Network Settings, and configure the Hostname as shown below.

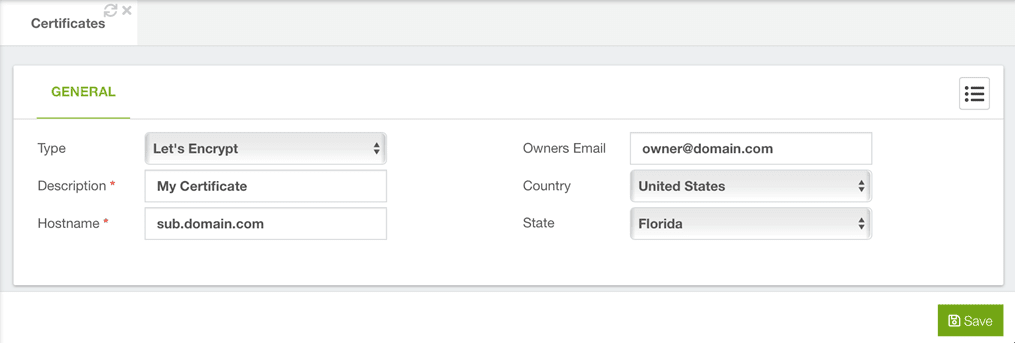
Now, we are going to configure the certificate. For this, we need to go to Admin > System Settings > Certificates.
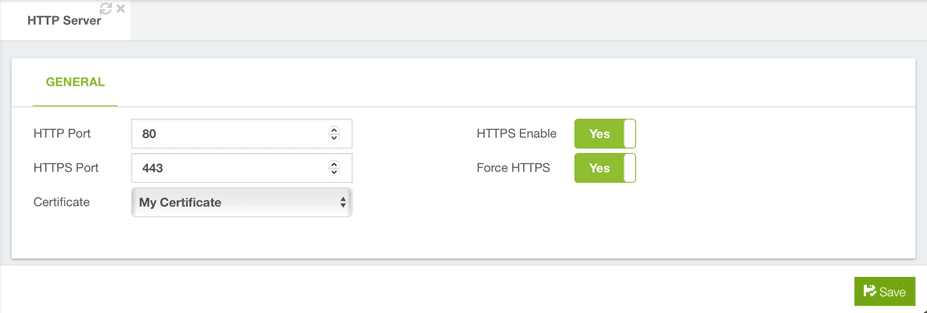
Afterwards, go to Admin > System Settings > HTTPS Server, and force HTTPS Connections and select the certificate we created previously.
2.3.- Prepare VitalPBX for WebRTC applications
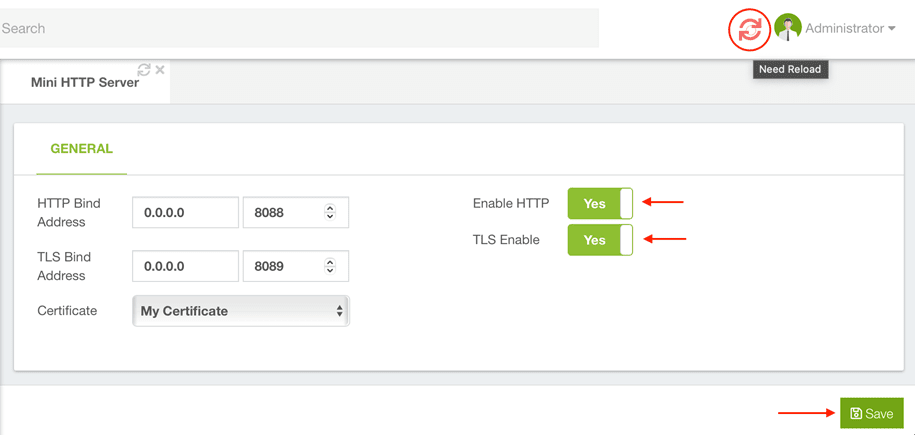
Now, we must go to Settings > PBX Settings > Mini HTTP Server and configure it as shown below. You must select the certificate we have created previously. Remember to Save and Apply Changes. We perform this step so that the WebRTC PJSIP WebSocket can communicate with VitalPBX.
Next, we go to Settings > PBX Settings > RTP Settings and configure it as shown below. Remember to Save and Apply Changes.
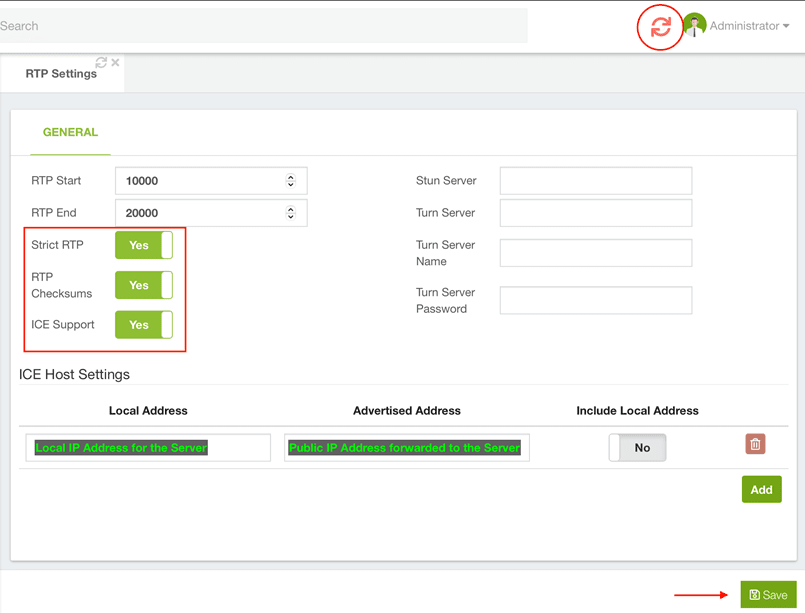
The ICE Host Settings are optional. These are needed in situations where you are getting no audio and are using port forwarding.
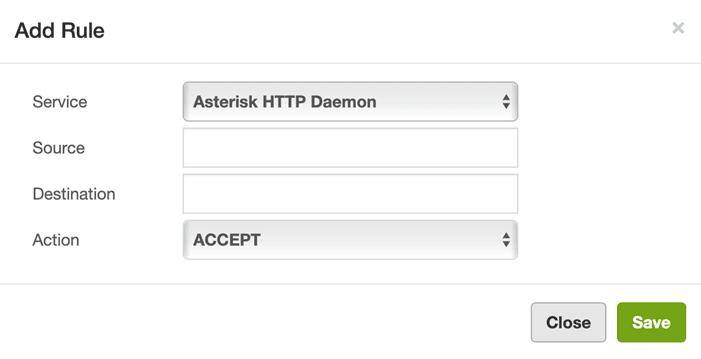
Afterwards, we are going to add the firewall rule that will allow WebRTC connections from the PJSIP socket, for which we will go to Admin > Firewall > Rules and we add the rule “Asterisk HTTP Daemon.” Then, we Save and Apply Changes.
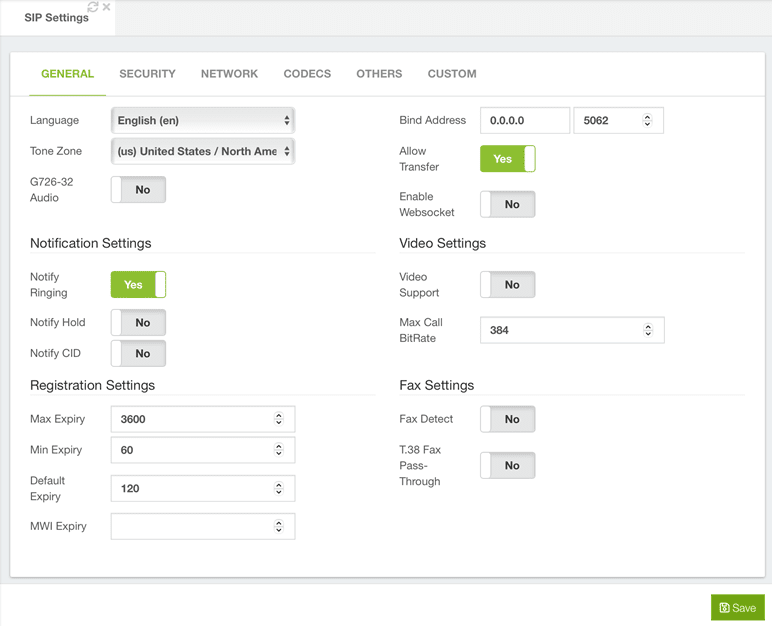
We will then proceed to disable the SIP WebSocket, since the WebSocket cannot work in SIP and PJSIP at the same time. For this, we go to Settings > Technology Settings > SIP Settings. On the General Tab, disable the option “Enable WebSocket” if this was enabled.
After that, go to the Linux Console and restart Asterisk with the following command:
[root@sub ~]# system restart asterisk3.- We install the Browser-Phone WebRTC Application
3.1.- Create the directory “/usr/share/webrtc” (you can use any name you want)
[root@sub ~]# mkdir /usr/share/webrtc3.2.- Copy the project to the directory we just created
[root@webrtc ~]# git clone https://github.com/InnovateAsterisk/Browser-Phone.git3.3.- Assign the appropriate permissions
[root@webrtc ~]# chown -R apache:apache /usr/share/webrtc3.4.- Create the Apache configuration file
[root@webrtc ~]# nano /etc/httpd/conf.d/webrtc_phone.confAdd the following information to the file:
Alias /Browser-Phone/Phone /usr/share/webrtc/Browser-Phone/Phone
Alias /Phone /usr/share/webrtc/Browser-Phone/Phone
<Directory "/usr/share/webrtc/Browser-Phone/Phone">
       AddDefaultCharset UTF-8
       php_value magic_quotes_gpc off
       <Files *>
       Header set Cache-Control: "private, pre-check=0, post-check=0, max-age=0"
       Header set Expires: 0
       Header set Pragma: no-cache
       </Files>
       Require all granted
       AllowOverride all
       Options +FollowSymLinks
</Directory>
Restart Apache:
[root@webrtc ~]# systemctl restart httpd3.5.- Create a couple of extensions with the WebRTC profile
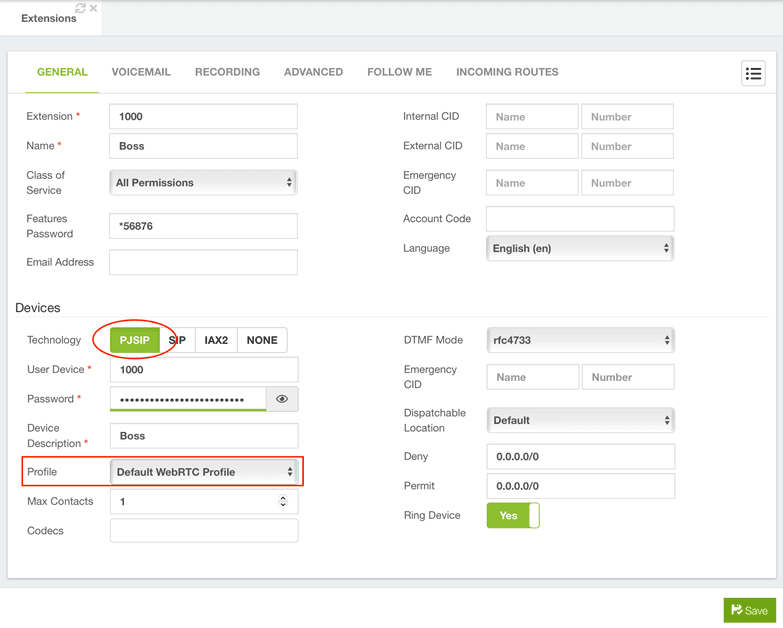
Create extensions that use the Profile “Default WebRTC Profile.” From VitalPBX 3 and onward we have a PJSIP Profile that already has the options needed to work with WebRTC.
3.6.- Connect the WebRTC Browser-Phone
We can now proceed to the following URL: https://your-server/Browser-Phone/Phone
We will enter the following information and click “Save.” Make sure that you enter all of the fields, including the WebSocket path with the value “/ws”.

After pressing “Save”, you will see that on the upper left-hand corner, your account will be registered.
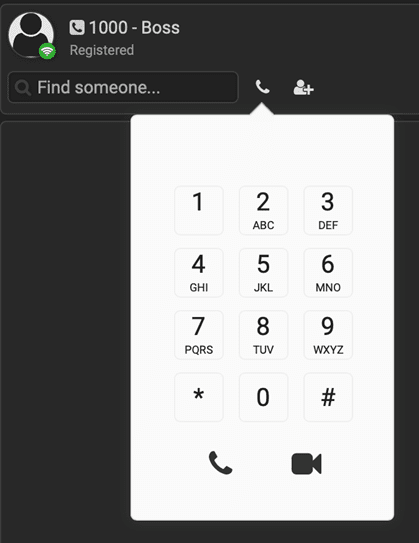
Congratulations! You have successfully implemented the WebRTC Softphone in VitalPBX in an easy and secure way.
Thanks to Innovate Asterisk for this contribution to Asterisk users. We believe that it will be of great use to our community.


