Nowadays one of the most common environments to test or run any APPs are Virtual Machines(VM) and Virtual Private Servers (VPS), among the most popular VPS stand out: Google Cloud, Amazon AWS EC2, Vultr, and Digital Ocean. For this reason, today, we will learn how to install VitalPBX on Amazon AWS EC2.
The first we have to do is create an AWS account at the following link: https://portal.aws.amazon.com/billing/signup#/start
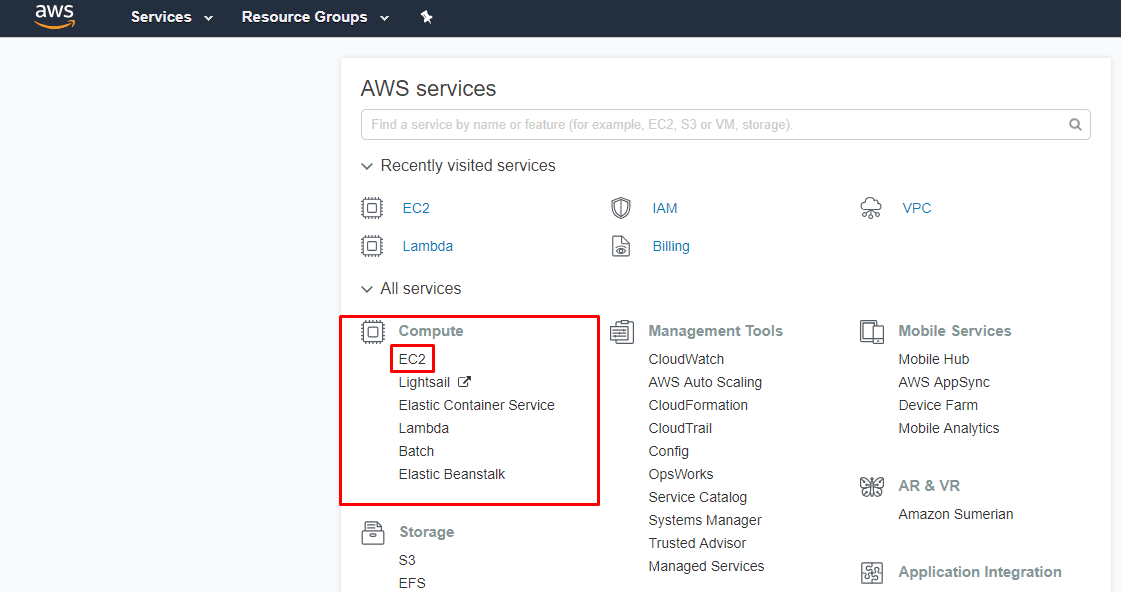
After we create our AWS account, we will log in and create our first EC2 Machine. After we log in, we will see a list of different services and tools that we can use for different purposes, but we will select the EC2 item under Compute menu like is shown below:
Configuring the Security Group
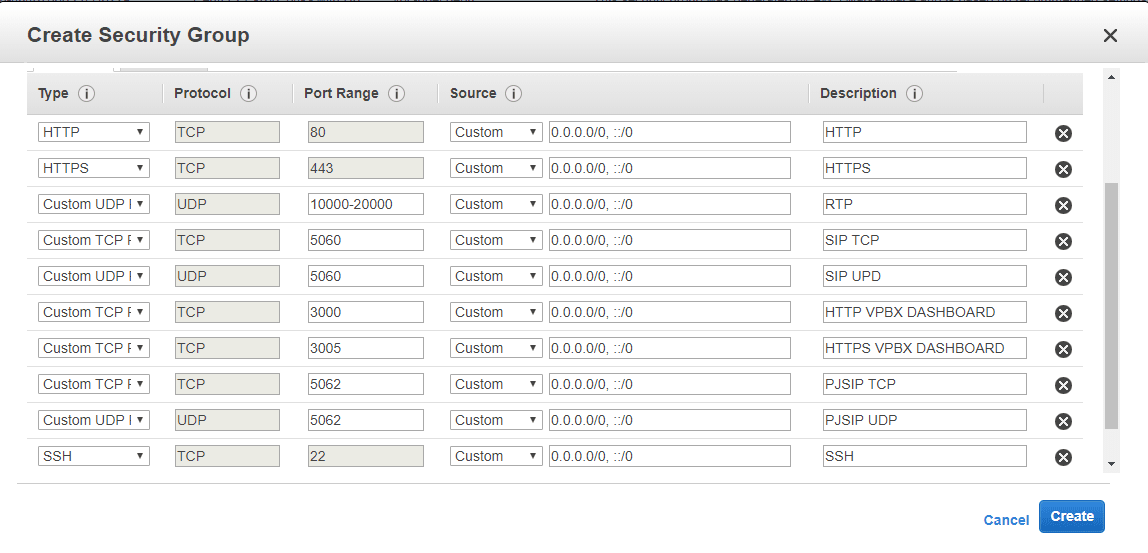
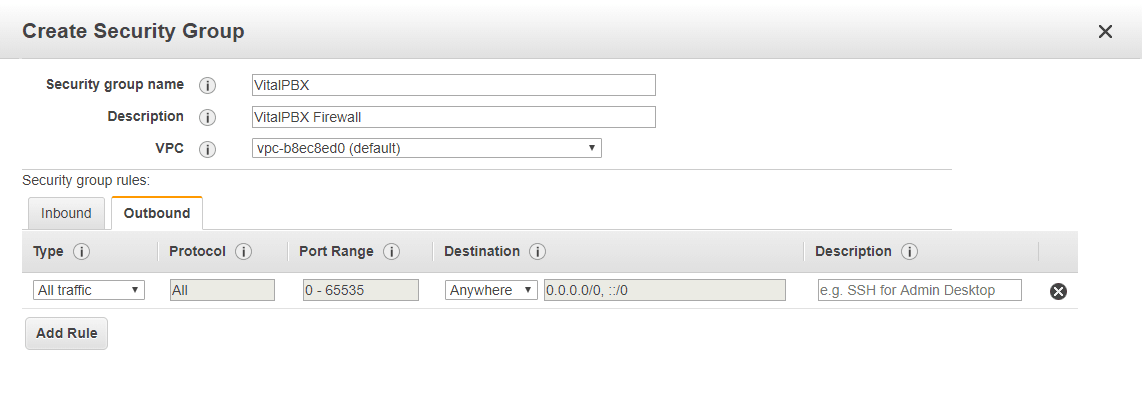
After we select the EC2 item, we will go to the left-hand menu and look for Network & Security >> Security Groups. On this section we will create a security group (Firewall Rules), that will be used for our EC2 Machine; here we will define the different ports that will be open for inbound and outbound connections. We must click the blue button “Create Security Group”, a modal will appear where we will put the desired firewall rules as is shown next:
Inbound Firewall Rules
Outbound Firewall Rules
Launching an Amazon AWS EC2 Machine Instance
Then we save our security group, and we will go to the left-hand menu and look for Instances >> Instances, here we will create our EC2 machine. To create the machine we will click the blue button “Launch Instance“, and a wizard will appear. The first step is to choose an Amazon Machine Image(AMI), we will search for a Centos 7 AMI, so, we will click the menu item “AWS Marketplace” to search for it as shown below:

We should select the first one(CentOS 7 (x86_64) – with Updates HVM) as shown above, afterwards click on the select button, a modal will appear with some specifications about the Centos 7 AMI, and we will click on the “continue” button. After clicking the button we will go to the next item of the wizard: “Choose Instance Type”. By default the “Free tier eligible” is chosen as shown below:

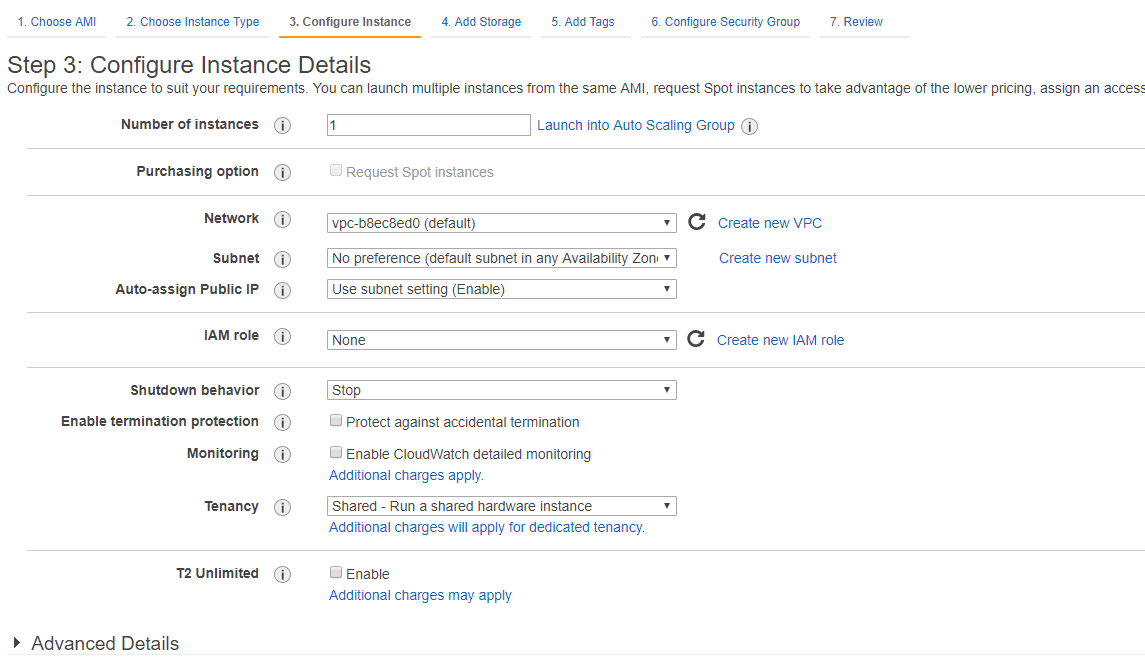
In step 2 (Choose instance type) we will leave everything as it is, and move on to the next step (Configure Instance). In this step, you can make any required change you need, but in my case, I will leave everything as it is:
The next step is to configure the storage of our EC2 Machine, an important notification is shown here for the free tier customer, and says the following: “Free tier eligible customers can get up to 30 GB of EBS General Purpose (SSD) or Magnetic storage”. Due that our account is a free tier account we are only capable to choose no more than 30 GB of space for our EC2 machine, I will leave my machine with 8 GB as it comes by default.

The next step is to configure tags for our EC2 machine, we will skip this step clicking on the “next” button and going directly to configure the security group. Here we can create a new security group or choose an existing one. In our case, we will choose the security group that we have created previously, as is shown below:

To finish, we will click on the button “Review and Launch”. Here you can check all the settings previously selected, like the security group, tags, storage, etc. If everything is OK, we will click the “Launch” button, and an important modal will appear asking us to create a key pair to access our EC2 machine through SSH. We will create a new one, set a name, and download as shown below:
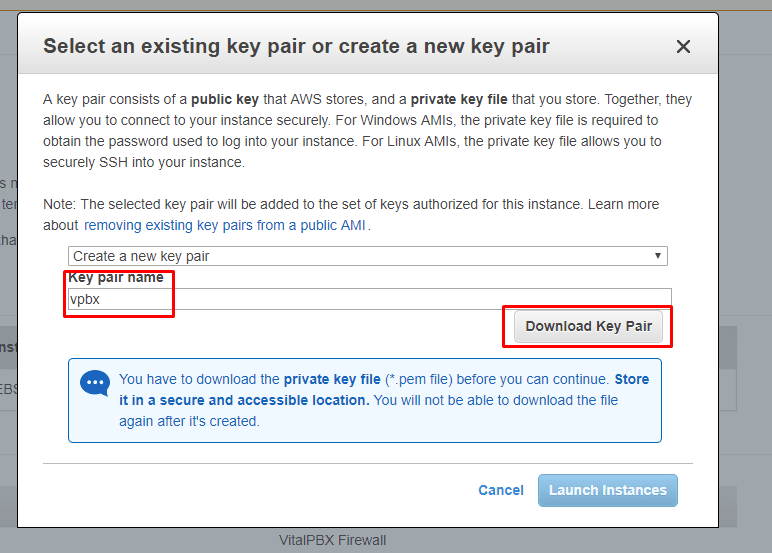
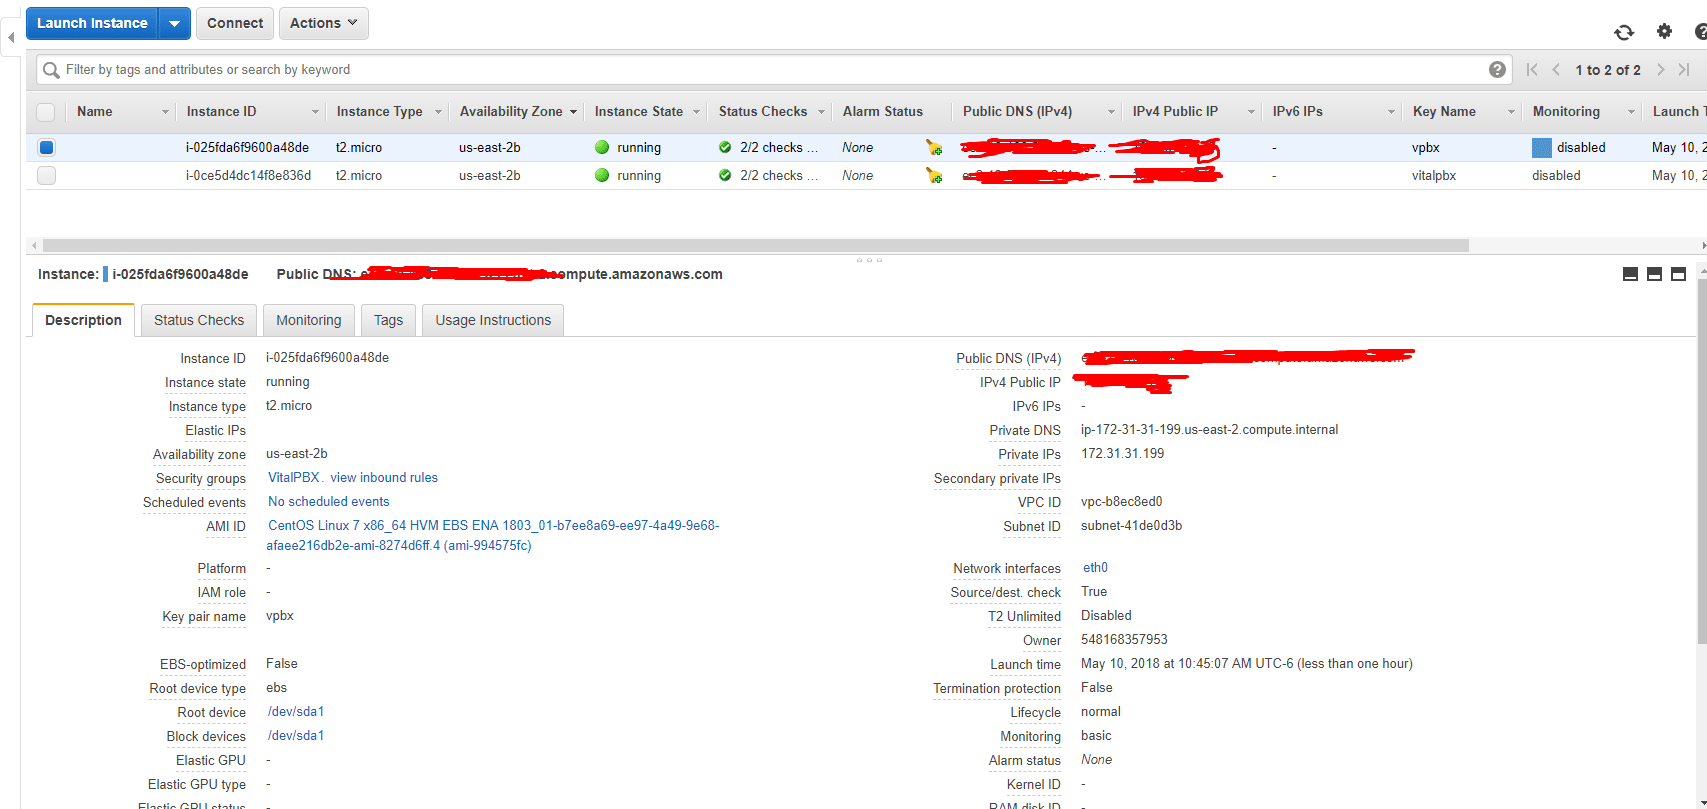
After we download our “Key Pair”, we will be able to launch the instances of our EC2 machine. After launching our instance we will click on the button “View instances” to see the list of all our created instances.

To see more information on any of your instance you can click on any of them and the following information will appear:
Connection to Our EC2 Machine through SSH
To connect to our EC2 machine we will use PuTTY, PuTTYgen and the “Key Pairs” previously downloaded.
The first step is convert our private key (Key pairs) to a supported PuTTY format. We will open the PuTTYgen app and click on the “load” button to locate and load our private key.
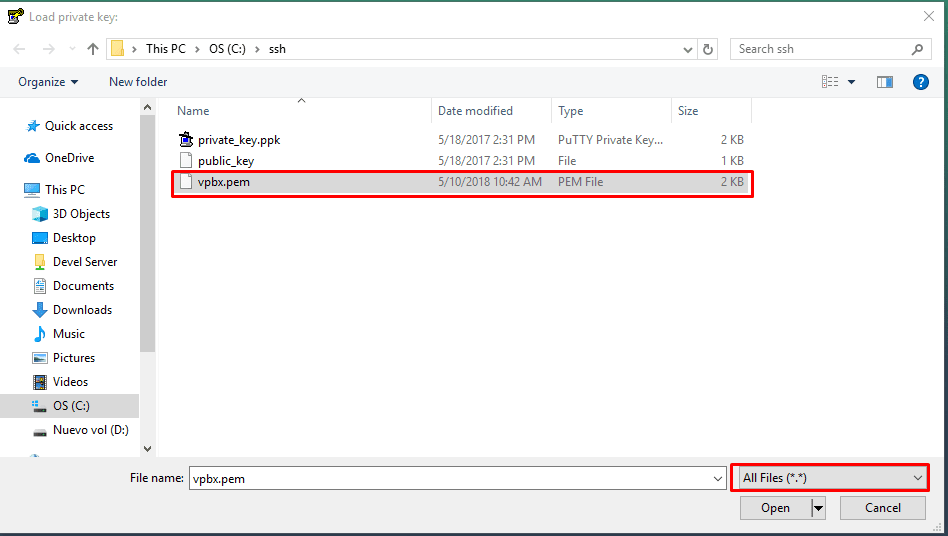
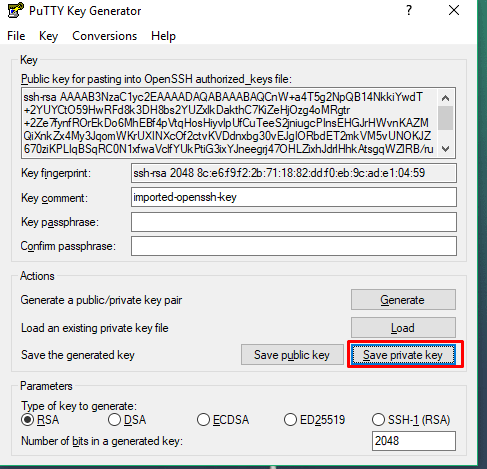
After opening the private key, select “Save private key” to save the key in a format that PuTTY can use. PuTTYgen displays a warning about saving the key without a passphrase. Select Yes. Specify the same name for the key that you used for the key pair (for example, vpbx). PuTTY automatically adds the .ppk file extension.
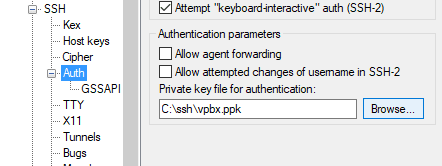
Now we are going to configure our putty to login to our EC2 Machine, first we have to specify the appropriate user name(centos) and public dns ip of our machine, and then load our SSH key as shown below:

After open the SSH session(Login) we need to escalate privileges to run commands as root, to do this we need to run the following command in the Linux CLI: sudo su –
Installing VitalPBX
After logging in and escalating privileges, we will execute the following sequence of commands to install VitalPBX:
- yum install -y wget
- wget https://raw.githubusercontent.com/VitalPBX/VPS/master/vps.sh
- chmod +x vps.sh
- ./vps.sh
- reboot
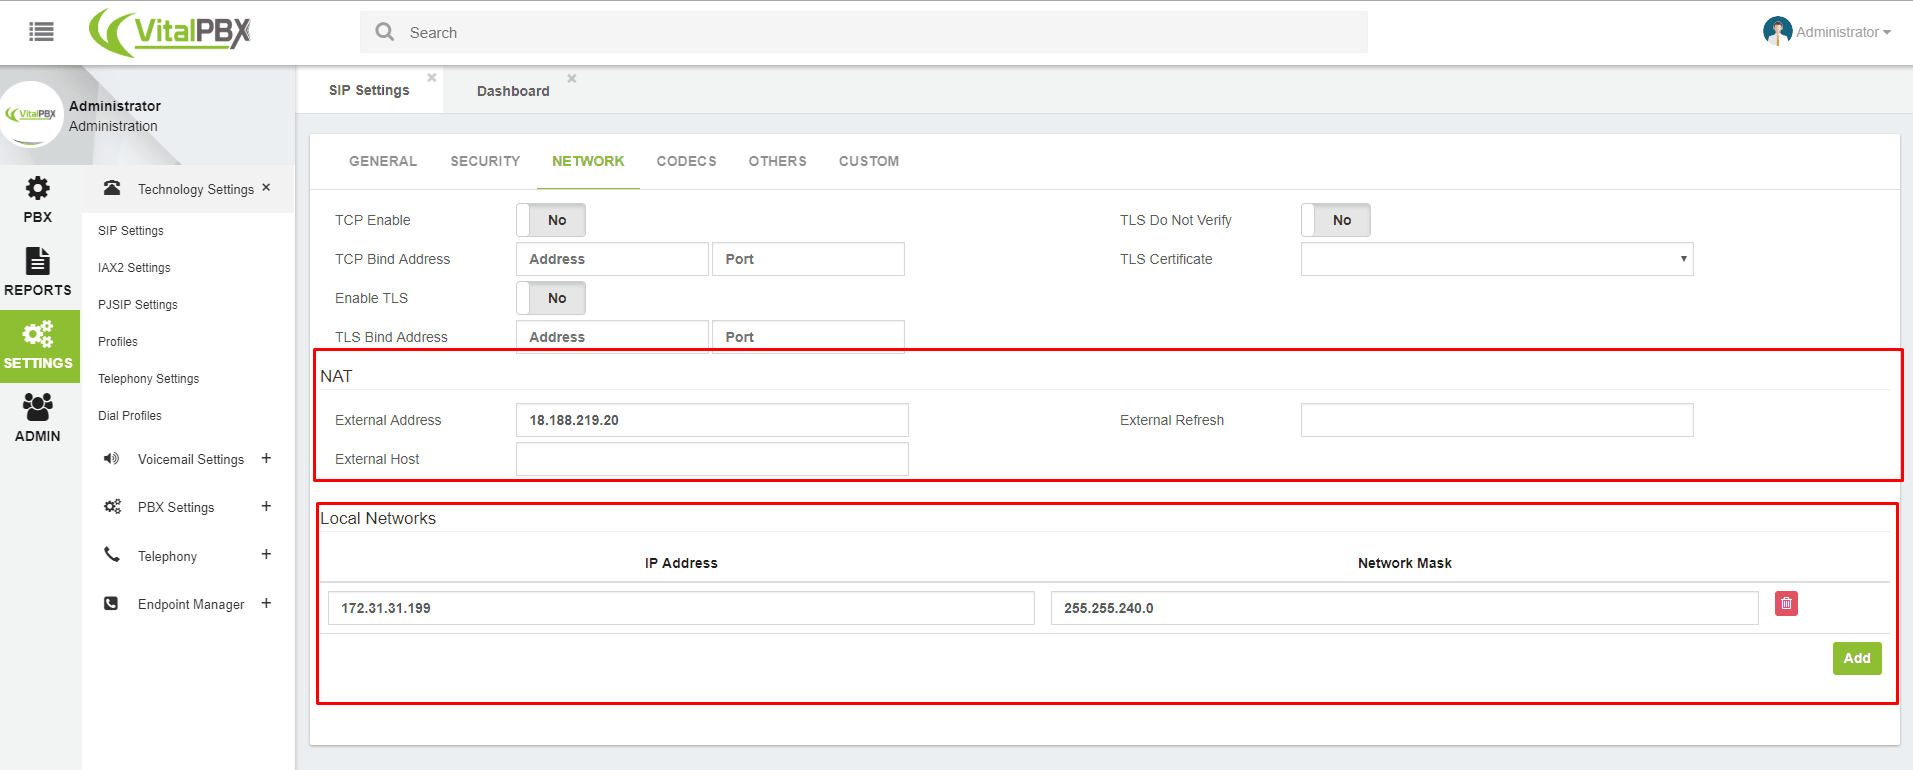
To configure your PBX, go to your Public DNS (IPv4), set up your admin password and login. To finish, configure the NAT settings on the SIP Settings module as shown below:
