Voxtelesys PJSIP Trunk Configuration with VitalPBX: Easy How-To Guide
Throughout this article, we will be talking about how you can connect your Voxtelesys trunk using PJSIP. Voxtelesys is another VoIP provider you can consider when doing your VitalPBX installations. Learn more about them on the VoxTelesys website.
Voxtelesys Management
First, you must go to the Voxtelesys website and register for a new account. To do so, click on the Portal Login button in the upper right-hand corner of the website. From there, click on the green Register Now button.
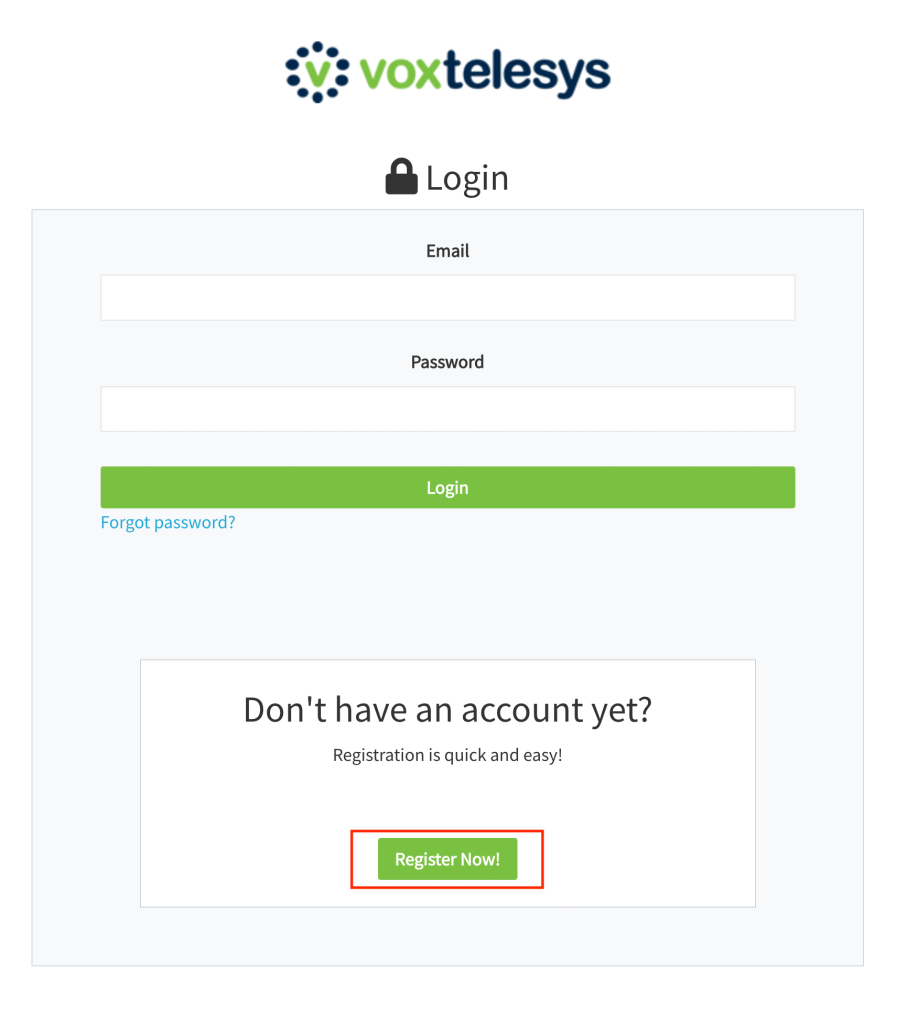
On the registration page, enter your information and your password. Once you have filled this out, you will receive a confirmation email. There, click on the Confirm Account link.
Once you have confirmed your account, you can log into the portal and continue with your account creation process. Here, you will select your phone numbers and have your initial setup for your trunk.
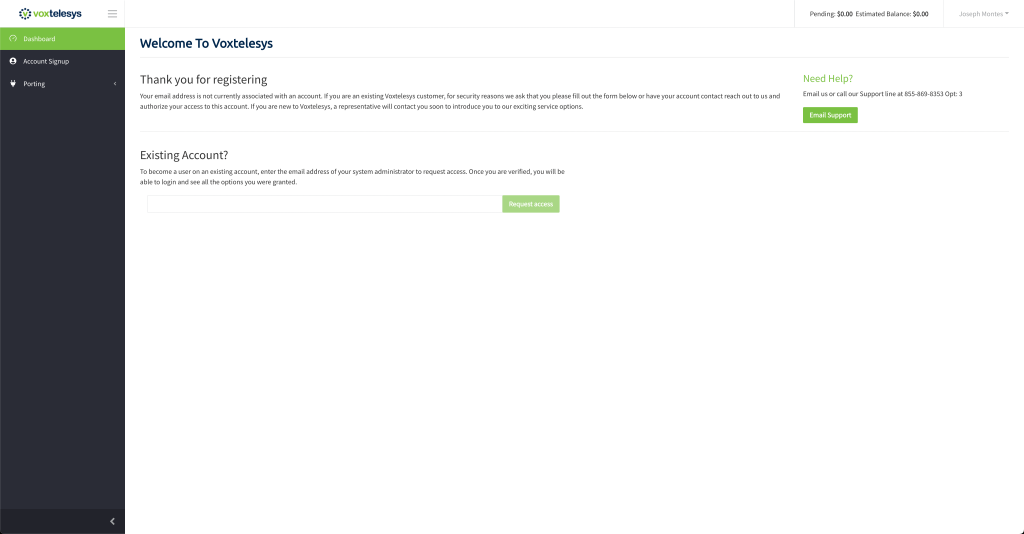
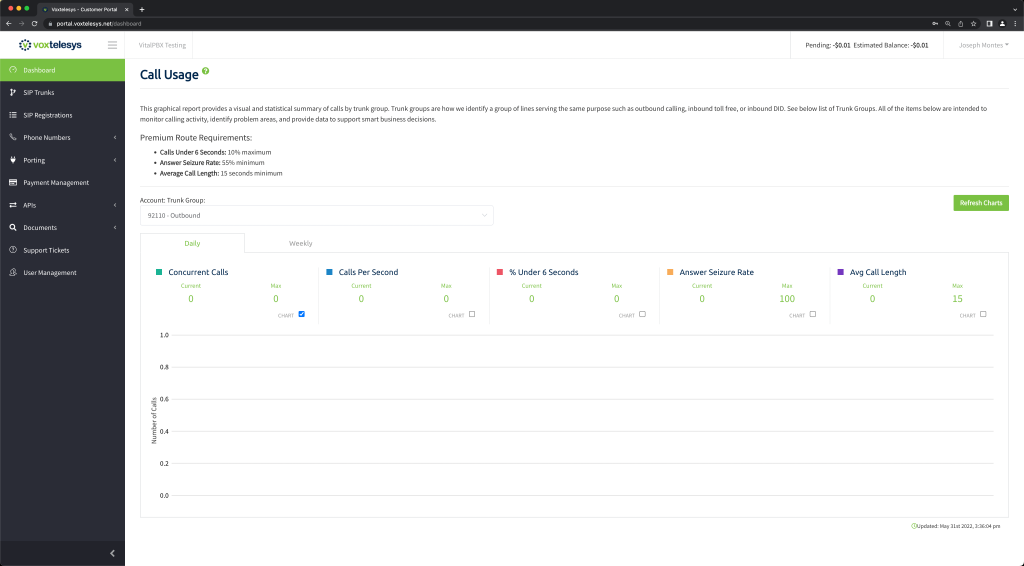
Logged in, you will first be greeted by the dashboard. If you are an existing user, you can enter the email address of that other account to request access. This way, multiple users can manage and monitor the same account.
From here, go to the Account Setup section on the left-hand side menu. There, you must fill out the forms on the steps to acquire your phone numbers to get your trunks created.
The first step is to fill out your basic information. This way, Voxtelesys will search for phone numbers in your area to automate the phone selection process.
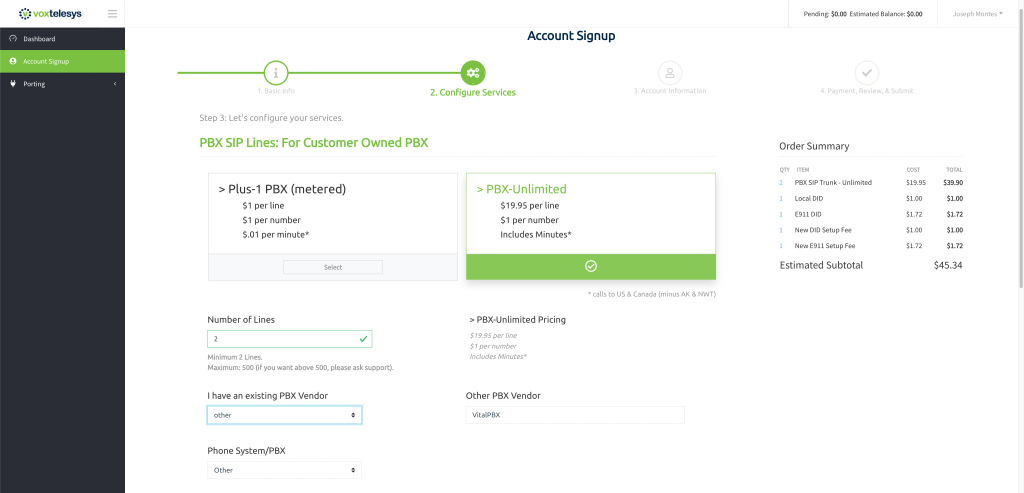
Once you have filled this, click on Next, and you will be taken to the Configure Services section. Here, you can your preferred plan, Number of Lines, and you can specify your PBX Vendor.
Then, if you scroll down, you can then enter your Caller ID Name for your phone numbers, add numbers, and add Toll-Free numbers, as well as the ability to port your numbers to Voxtelesys.
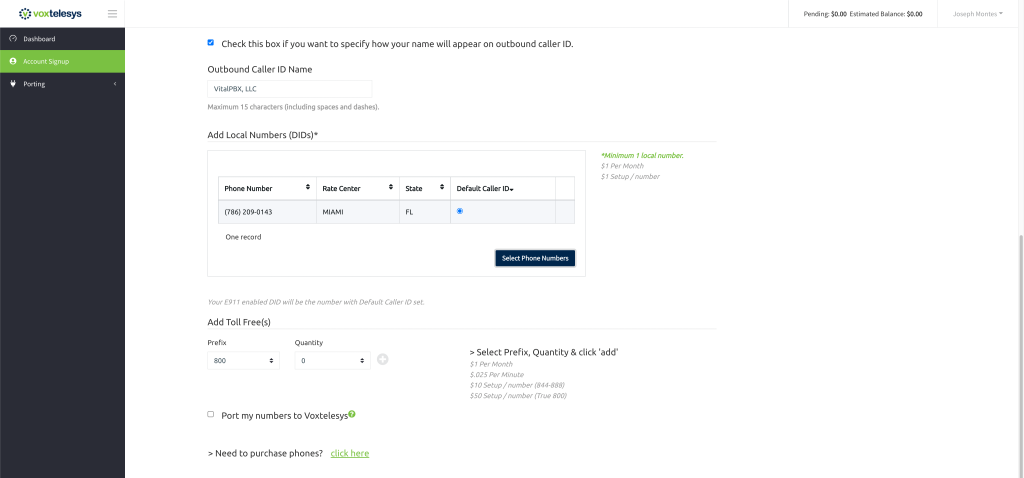
A number is automatically added, but you can change it by clicking on the Select Phone Numbers button. Here, you will be shown available numbers in your area.
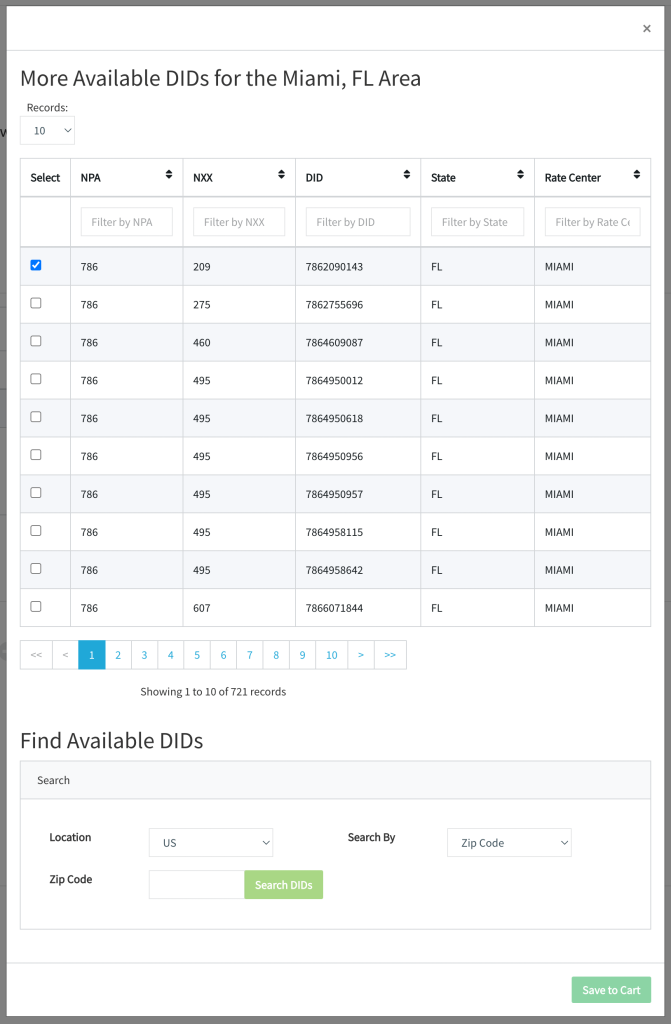
You can also specify other areas and search for numbers outside of your ZIP code.
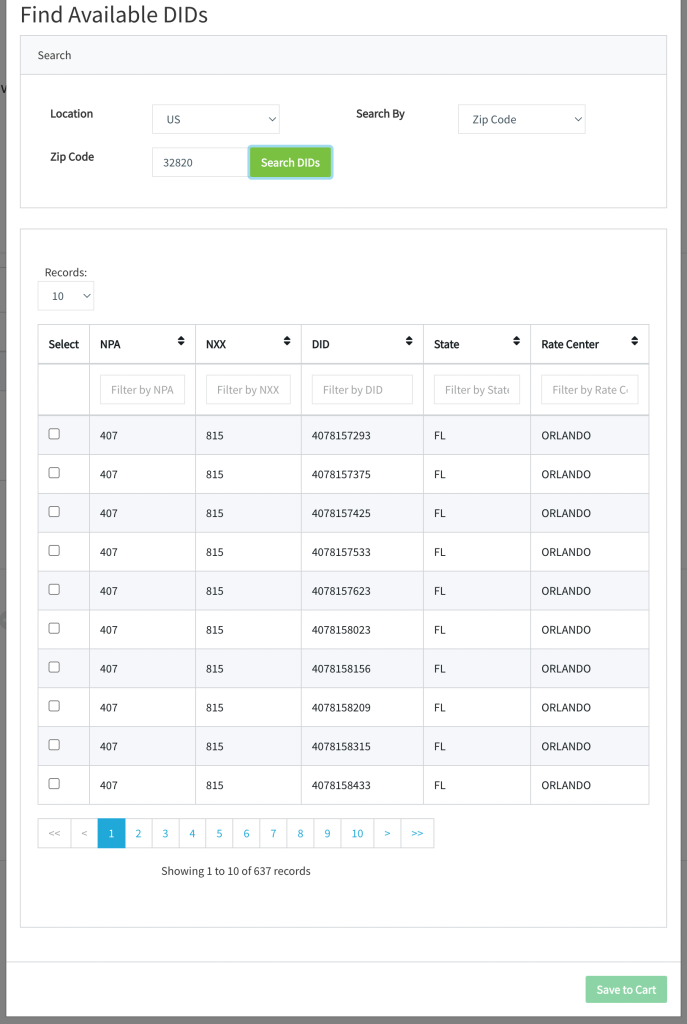
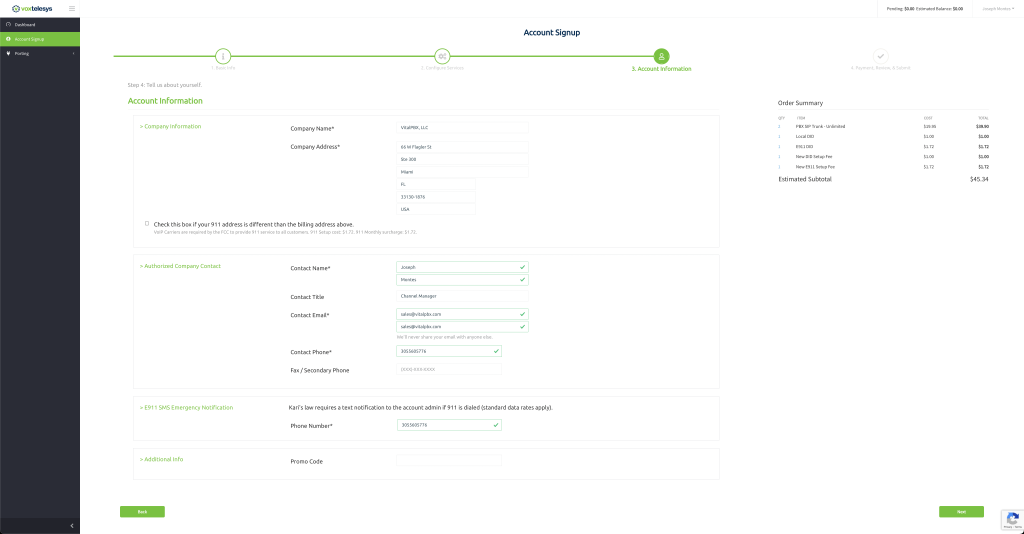
Once you have selected your phone numbers, you can click on Next. You will then be taken to the third step, where you can enter account information. This is general information to identify the company and authorized company contact.
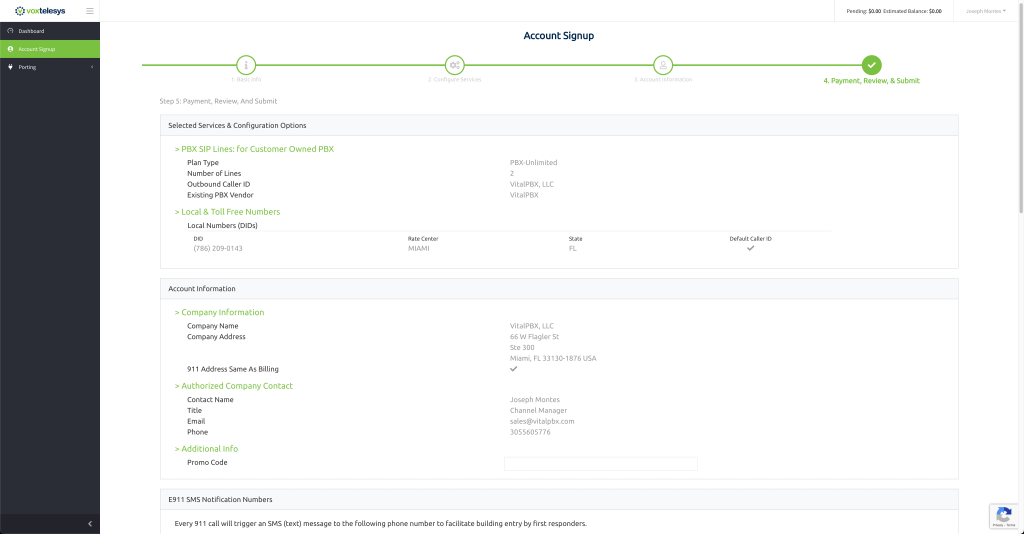
After this, you will be taken to the final step. Here, you can review your information and selections, as well as entering your payment method, and proceed to check out.
Once you have entered the payment information, you finish your checkout and go back to your account. There, you will find the new dashboard with information on your usage. From here, you will find new sections on the left-hand side you can explore. For this article, we will not be going through every one of them, just the ones we need to configure our PJSIP trunk with VitalPBX.
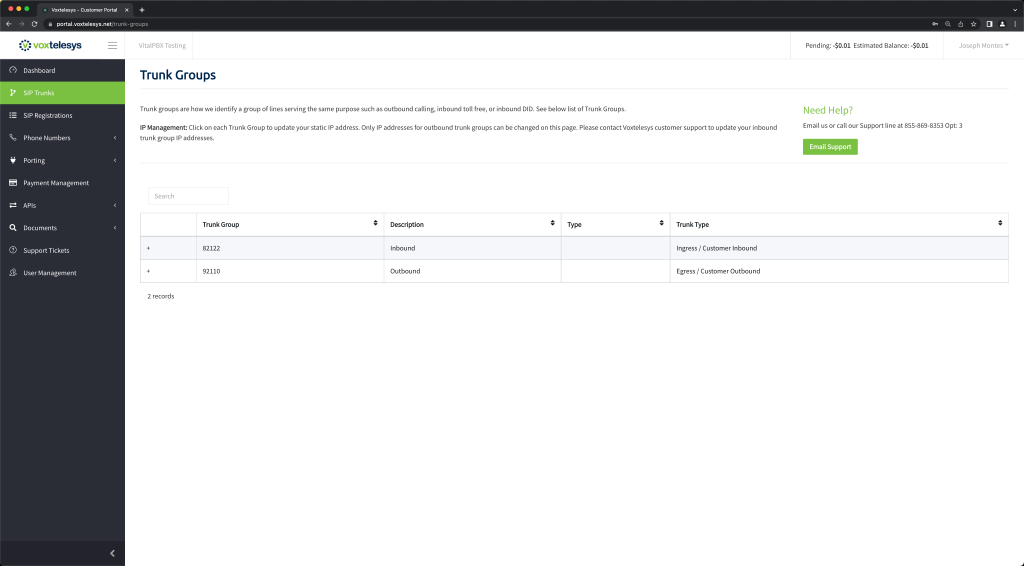
The first section we have is SIP Trunks. Here, we can see and manage our Inbound and Outbound SIP Trunks. These trunks are internal work for Voxtelesys, and they are created automatically. Since this is a test account provided by Voxtelesys, we cannot make changes here on this article, but you can manage IP access from here.
Next, we have the SIP Registrations section. Here, you can manage the different registrations you will use on your PBX systems. The first SIP Registration is made automatically, and this has generated a Domain, a Username, and a Password which we are going to use on our PJSIP Trunk. Once again, since this is a test account provided by Voxtelesys, we cannot create more registrations on this article, but you will be able to manage multiple SIP Registrations.
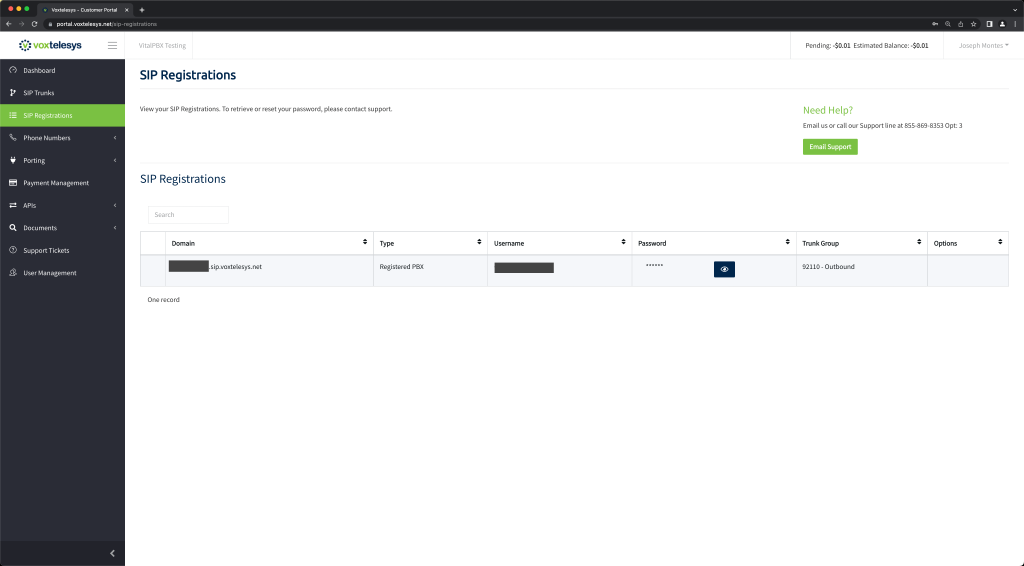
From here, this is all we need to do on Voxtelesys’s side of things. We can now move on to VitalPBX to configure our PJSIP trunk.
Configuring the PJSIP Trunk on VitalPBX
To start configuring our PJSIP Trunk, we will go to PBX > External > Trunks. We will configure the trunk as follows:
- Description: We give it a description to identify the trunk.
- Codecs: ulaw, alaw, and g729.
- Trunk CID: Enter the phone number you have acquired.
- Overwrite CID: We selected “If not provided,” so we always send a CID.
- Local Username: We choose any name to identify the trunk.
- Remote Host: Use the domain generated by Voxtelesys.
- Remote Port: 5060. You can also leave this blank, and it will use 5060 by default, since in VitalPBX, 5060 is the default port for PJSIP.
- Match: Use the domain generated by Voxtelesys.
- Remote Username: Use the username generated by Voxtelesys.
- Remote Secret: Use the password generated by Voxtelesys.
- From Domain: Use the domain generated by Voxtelesys.
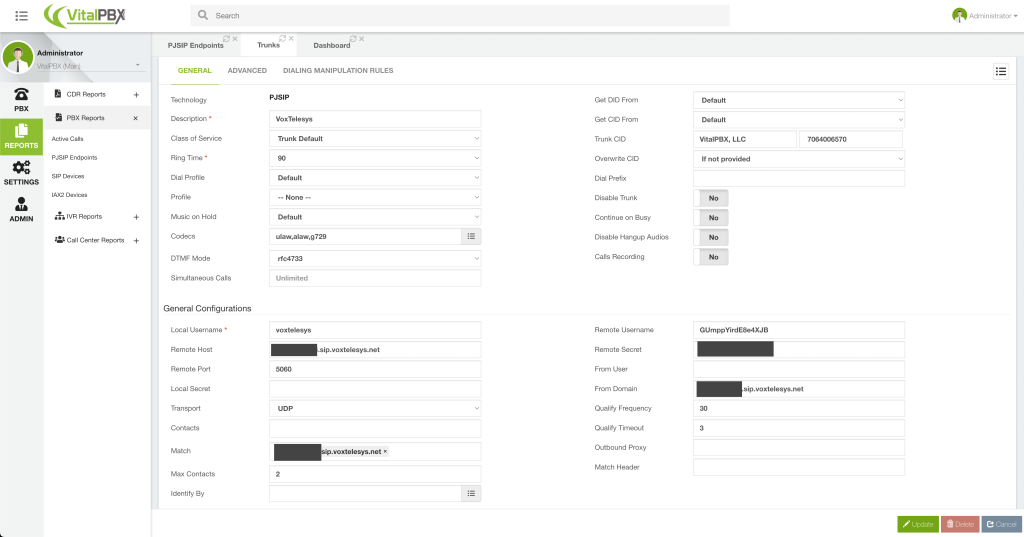
Also, make sure that Require Registration is set to yes.
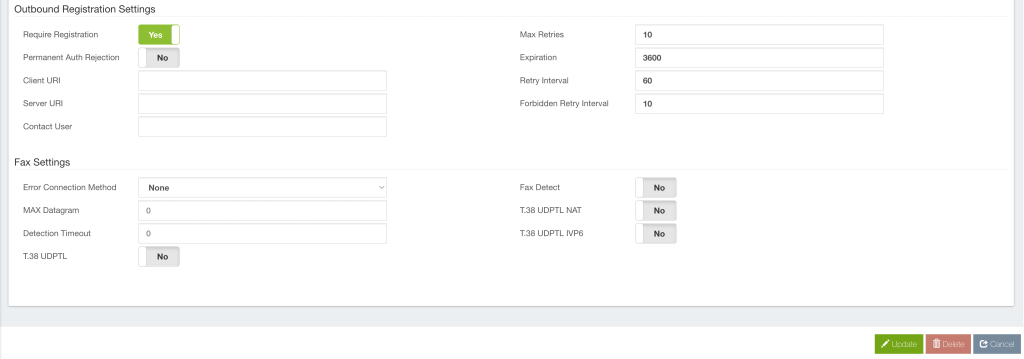
Once you have your Trunk configured, click on Save and then click on the arrow icon at the top to Apply Changes.
Next, go to PBX > External > Outbound Routes, create your Outbound Route, and add the Trunk we just created.
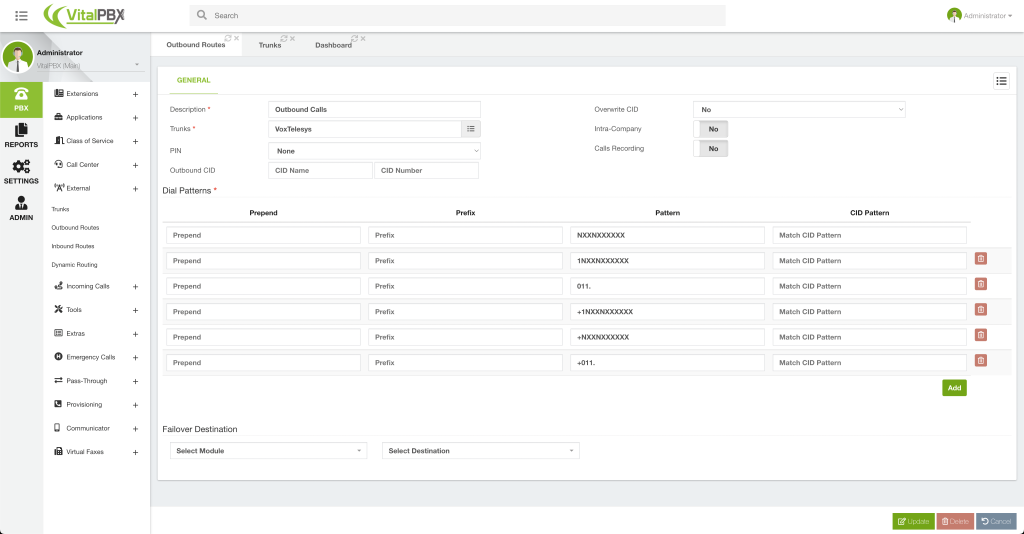
Click on Save and then on the arrow icon at the top to Apply Changes.
Then, go to PBX > External > Inbound Routes, and create the Inbound Route using the phone number you acquired on Voxtelesys. Note that numbers with Voxtelesys do not require the +1 when receiving or placing calls.
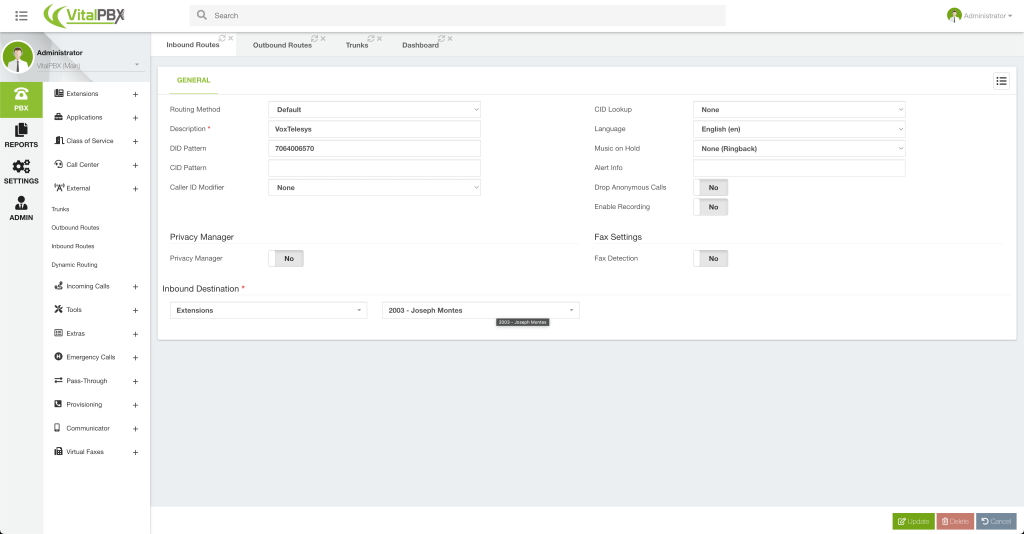
And with this, you have created your PJSIP trunk with Voxtelesys and can place incoming and outgoing calls.
Conclusion
As you can see, creating a PJSIP trunk with Voxtelesys and VitalPBX is a simple process. We would like to thank the people at Voxtelesys for providing a test account so we can validate and certify our connection with their trunks. We hope that this article has aided you in your PJSIP Trunk configuration.


