Today we are going to explain a topic, that many users have been asking for, and that is how to configure the VitalPBX for WebRTC clients.
Coming up, we will describe our current environment that we will use for this post:
- VitalPBX 2.3.3
- Asterisk 16.3.0
- sipML5 (as WebRTC Client)
- Google Chrome 74.0.3729.157
Read our tutorials and guides on how to implement new tools and technologies for your business with VitalPBX here.
1. Certificates
What we need first is to generate a certificate, due to most browsers requiring a TLS based WebSocket to be used. You may use a self-signed certificate, or if you have a valid FQDN, you may use a “Let’s Encrypt” certificate.
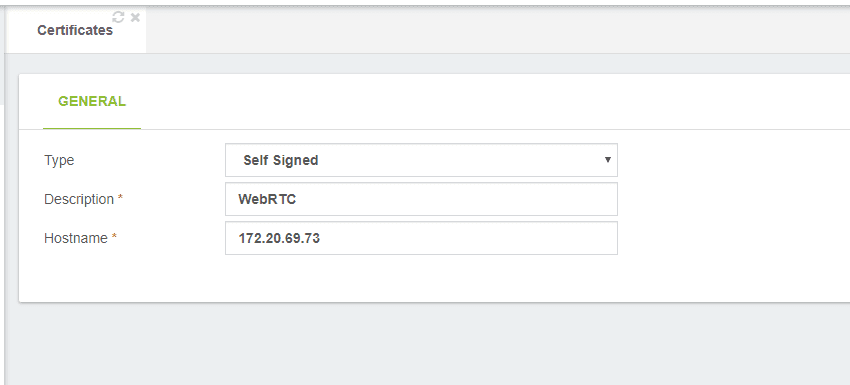
For this post, we will use a self-signed certificate from our VitalPBX server, for this, we will go to “Admin >> System Settings >> Certificates“. We input a small description and our PBX’s hostname.
2. Configure Asterisk’s built-in HTTP daemon (Mini HTTP Server)
To communicate with WebSocket clients, Asterisk uses its built-in HTTP daemon. To enable this daemon, we need to go to the following path on VitalPBX “Settings >> PBX Settings >>Mini HTTP Server“. Here, we will assign the certificate that we have created previously.

3. Firewall
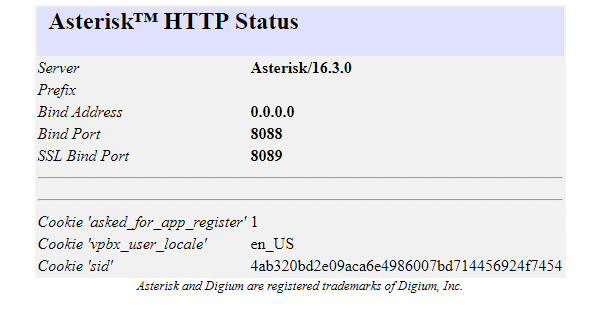
Due that Asterisk’s HTTP daemon use the port 8088 and 8089, we need to allow both ports in VitalPBX’s firewall. So, we need to go to the following path: Admin >> Security >> Firewall, and under the “RULES” tab add a new rule as shown in the picture below. don’t forget to save after adding the rule.

To check that the ports are working as expected we may go to the following link in our browser: https://YOURPBX-IPADDRESS:8089/httpstatus. We should see something like in the picture below.
4. RTP Settings
In order to avoid audio issues, we need to configure a STUN Server, which assists with NAT transversal through firewalls. So, to add the STUN Server, we need to go to “Settings >> PBX Settings >> RTP Settings” on our VitalPBX. For this post, we will use the google stun server (stun.l.google.com:19302). Our RTP configuration should look as in the picture below.

5. SIP Profile
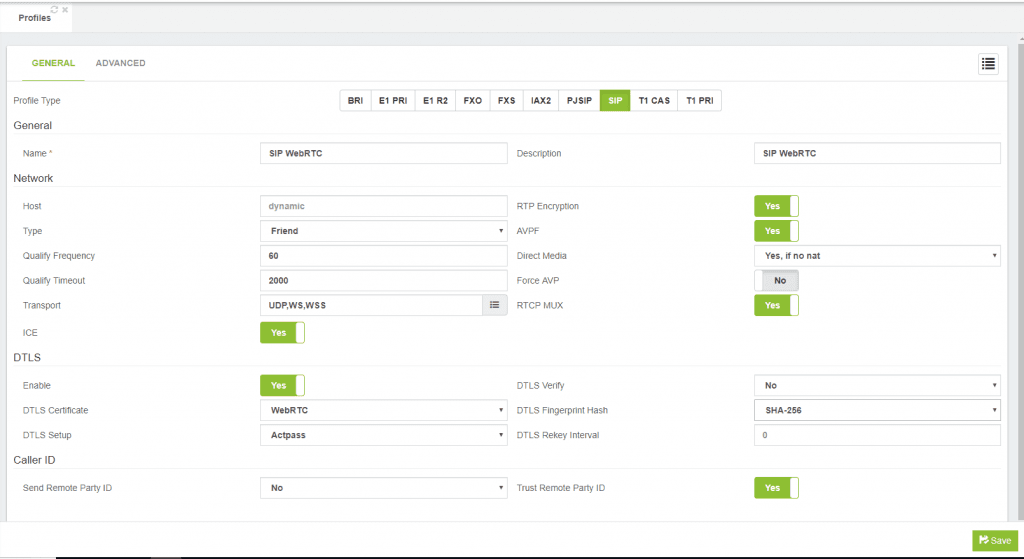
Now that we have configured all to enable WebSockets on Asterisk’s side, we need to define a profile for the WebRTC clients/devices. For this, we need to go to the following path: Settings >> Technology Settings >> Profiles. Here, we will create a SIP profile as shown in the picture below.
6. Extensions
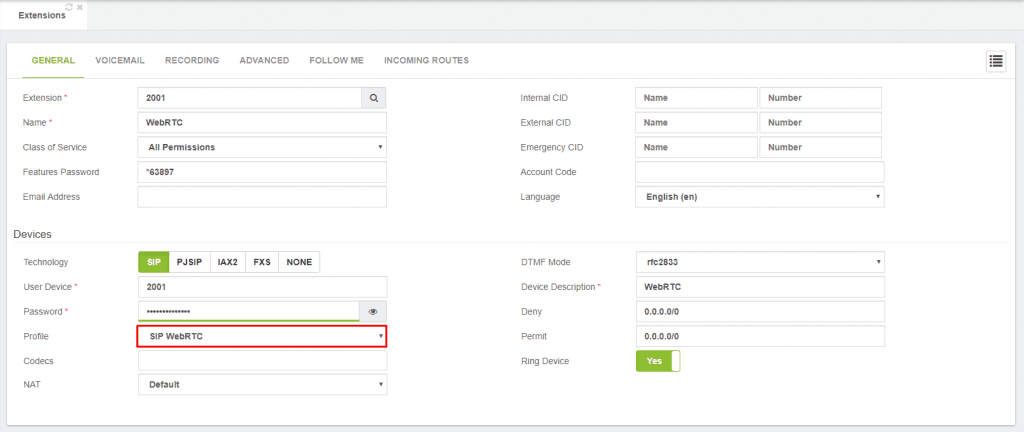
For this example we are going to create two SIP extensions, a regular one (2000), and the other one with the WebRTC profile (2001) that we have created previously.
In the picture below we show the configuration for WebRTC extension.
7. sipML5 Configurations
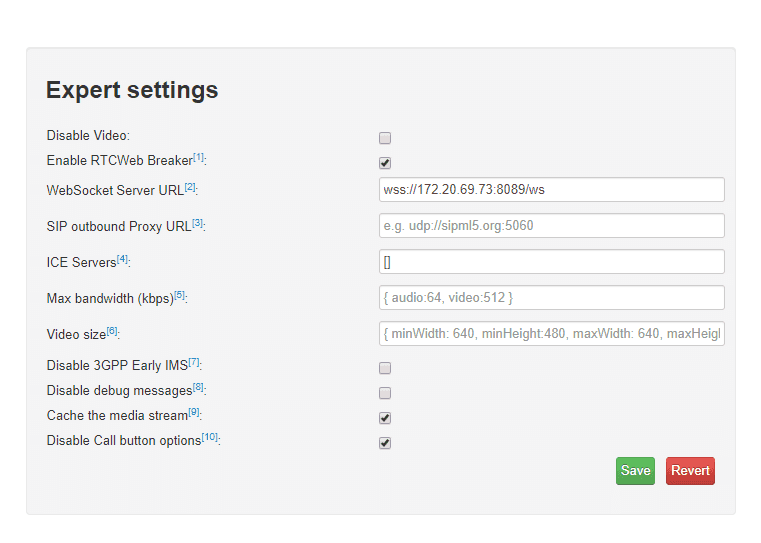
Now that we have configured all on VitalPBX’s side, we will proceed to configure the demo of the sipML5 client. Once we have accessed the demo, we will click on the expert mode button, where we will configure the following parameters:
- Enable RTCWeb Breaker: Checked
- WebSocket Server URL: wss://YOURPBX-IP:8089/ws
- ICE Servers: [] (This is for disabling STUN/TURN servers, and avoid delay in calls)
After we have made the configurations, we click the save button, and then, we reload the sipML5 Live Demo tab.
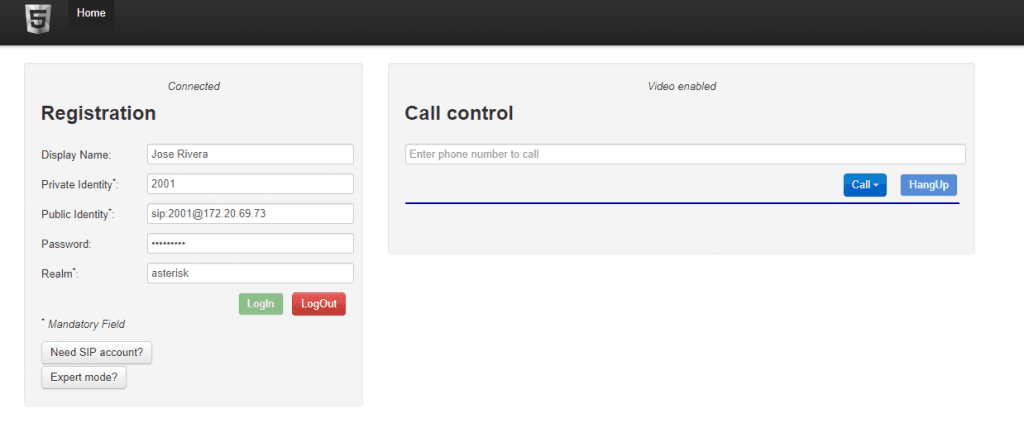
These are the required configurations in the sipML5 client:
- Display Name: A name of your choosing.
- Private Identity: Your device name (Usually the same as the extension number)
- Public Identity (SIP URI): sip:DEVICE_NAME@YOURPBX-IP
- Password: The password configured for your device
- Realm: Realm for digest authentication defaults to “asterisk”.
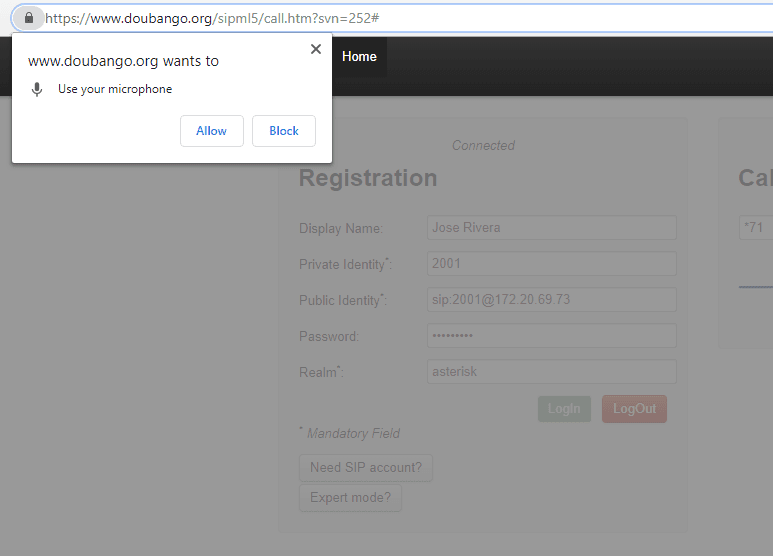
If everything has been configured correctly, we can make both audio and video calls without a problem. When making the call, don’t forget to allow the microphone and the camera.
8. Important Notes
- Since we are using a self-signed certificate, we need to access the following link: https://YOURPBX-IPADDRESS:8089/ws in order to add the certificate to the browser exceptions.
- Don’t forget to apply changes when changing or configure something on VitalPBX Side.
9. Conclusion
And just like that, we have connected a WebRTC client to our VitalPBX. WebRTC opens a whole new world of possibilities for your installations, enabling you to connect with other people in a different way.
Learn more about VitalPBX, our services and how we can help you achieve your goals in our official website.

