Previously we explained the procedures to install VitalPBX on Amazon AWS EC2, today we will install VitalPBX in a virtual machine on Google Cloud and show you how to configure it. It’s the turn of the internet industry mogul, so let’s start!
Read our tutorials and guides on how to implement new tools and technologies for your business with VitalPBX here.
Configuring the Environment
- The first thing we have to do is comply with all the requirements: have a Gmail account, a credit card (which will be requested in the process). But don’t worry, the trial version gives us around three hundred dollars of credit for a year to try the platform.
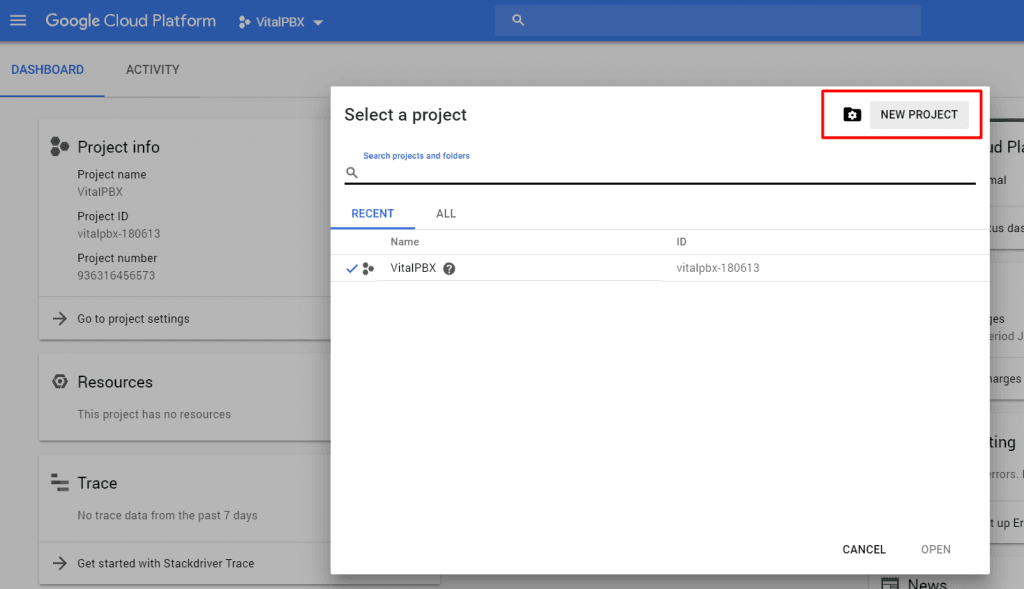
- After we have registered, we will proceed to the Google Console where we will create our virtual machine. The first thing that we have to do here is to create a new project. I will name my project “VitalPBX”.
Configuring the Firewall
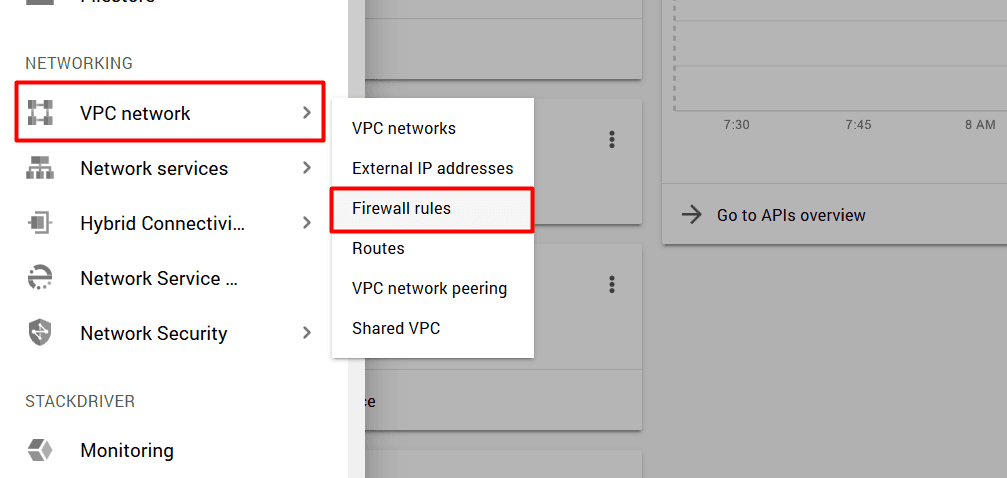
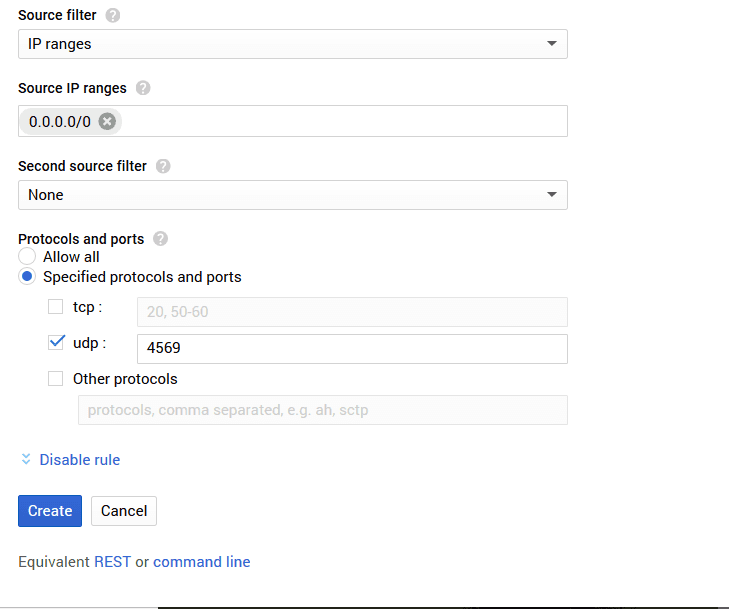
- Before create our VM instance, we will configure the firewall to allow the most important ports. To configure the firewall we must to go to: Networking >> VPC Network >> Firewall Rules
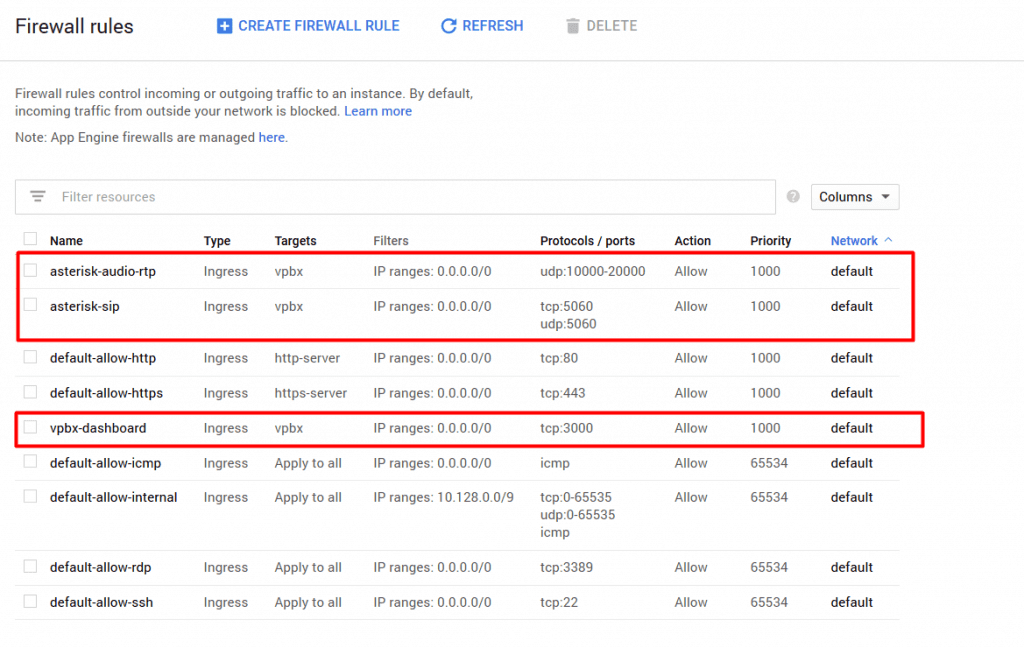
The ports we will configure are the following: udp:5060, tcp:5060, udp:10000-20000, tcp:3000. You can configure more ports according to your needs.
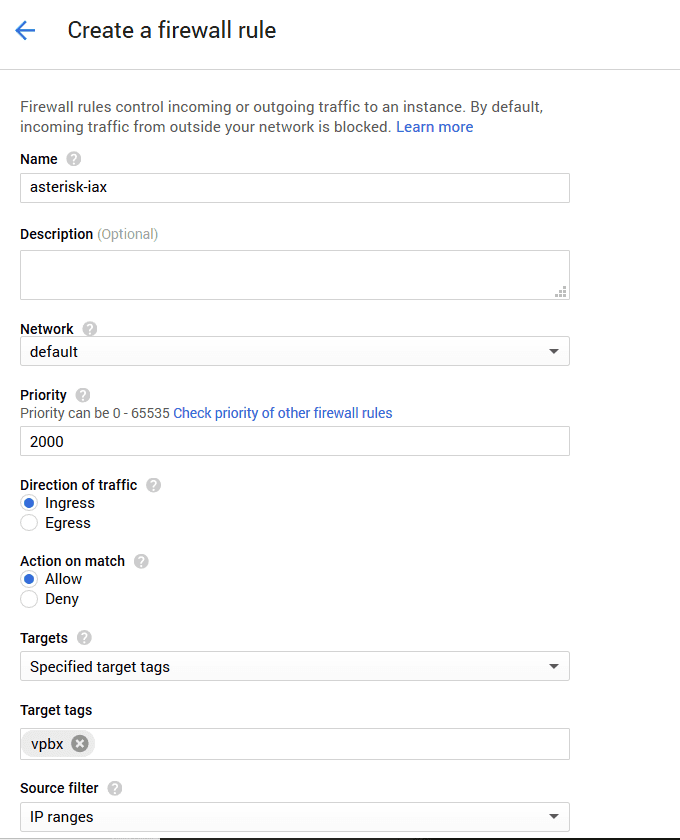
The fields we must configure at the moment of creating a new firewall rule are:
- Name: It could be any name.
- Priority: To define the order of the rules. Rules with lower numbers get prioritized first.
- Targets: It allows you to define if the new rule will be applied to all the instances, specific target tags or a specific service account. We will choose the “Specific Target Tags” option and set the value to “vpbx“, this is with the aim of applying this rule only to specific instances as we will see later.
- Source IP Ranges: It allows you to define from which IP ranges (in CIDR notation) will allow the traffic to the defined ports on this rule. To allow traffic from any IP address we can set the value to 0.0.0.0/0
- Protocols and Ports: Here we will define the ports allowed for this rule.
Building the VM Instance
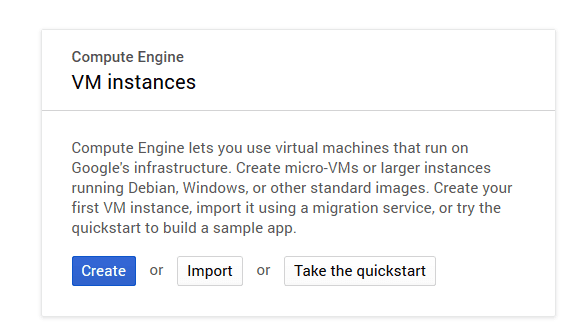
- Now that we have configured the firewall, we will proceed to create the VM instance (Compute >> Compute Engine >> VM Instances).
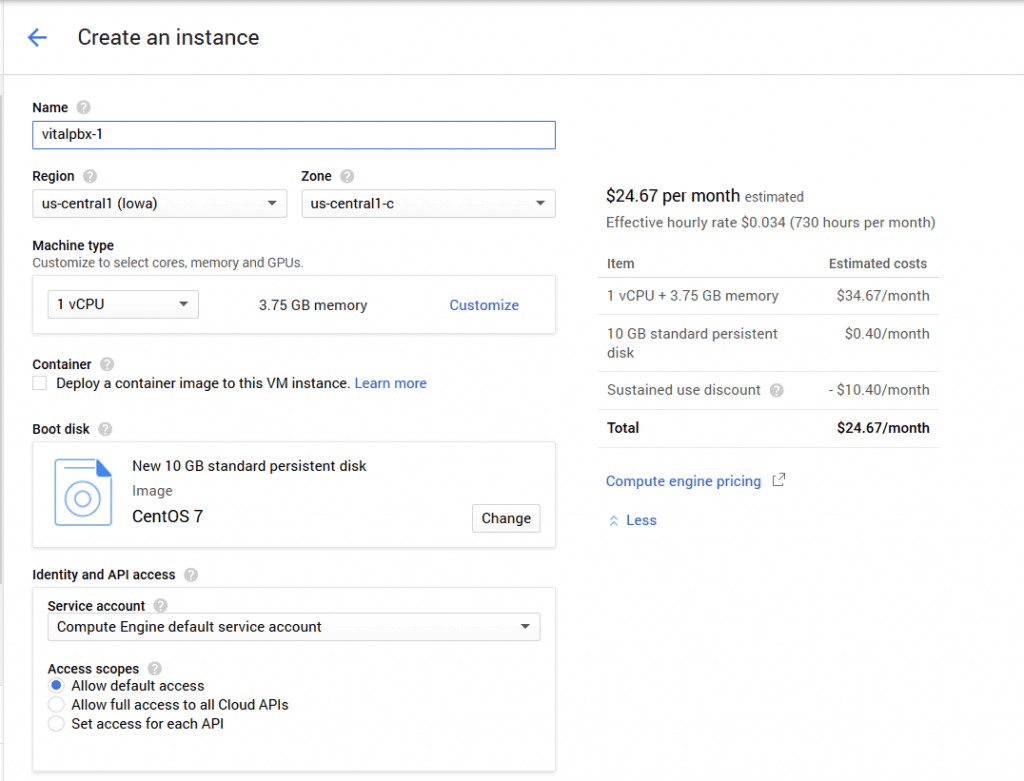
These are the settings that we must select for our new VM instance:
- Boot Disk: we must to select a “Centos 7” image
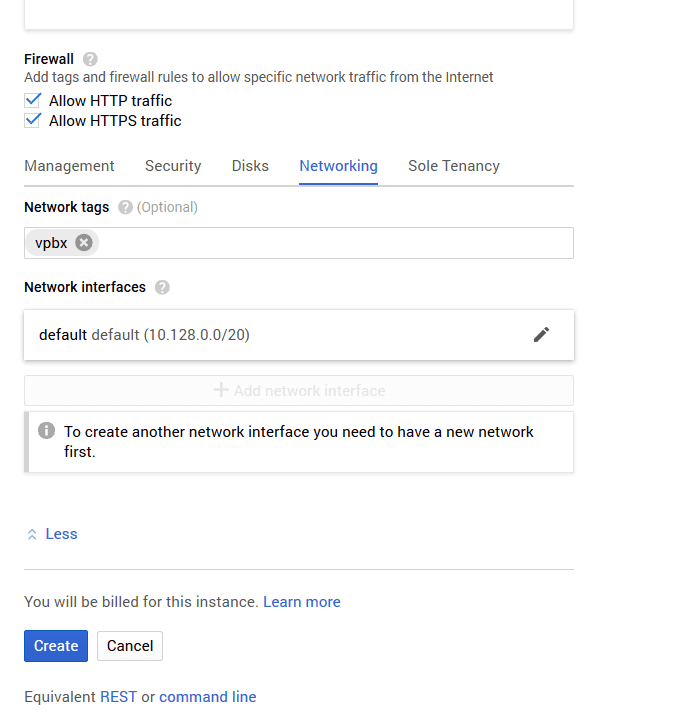
- Firewall: Check the options: Allow HTTP Traffic , Allow HTTPS Traffic
- Networking: we will set the value of “Network Tags” field to “vpbx” to match with the firewall rules that we have created previously
We are configuring this VM instance with the most basic settings. You can configure the rest of the settings according to your needs. E.g: you may increase the memory or the disk space.
- After the instance has been created, we will proceed to connect through SSH, pressing the button labeled “SSH”, as shown below.

Installing VitalPBX
- After we have connected through SSH, we will proceed to scale privileges and authenticate as root, for this we will execute the following command: sudo su
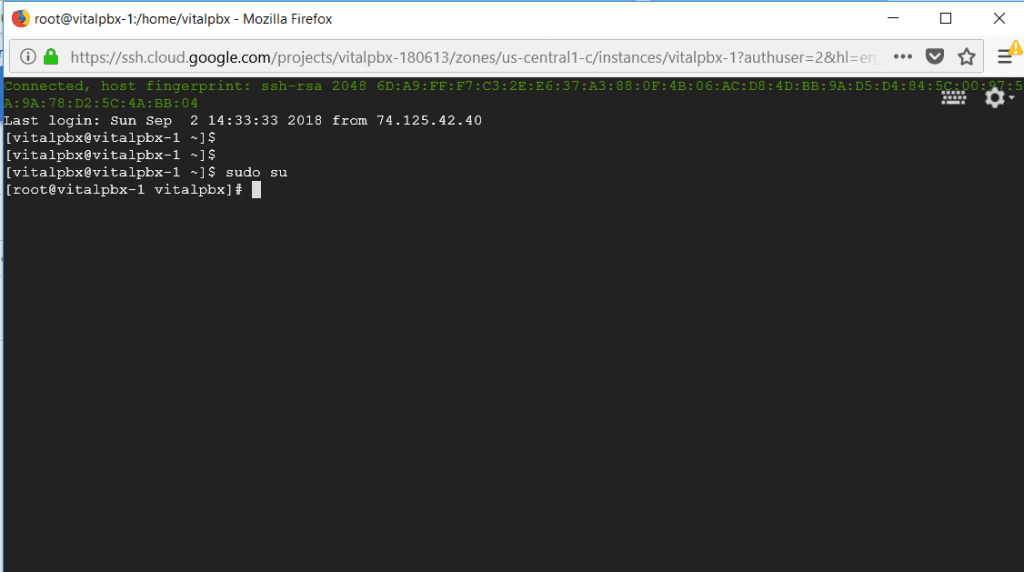
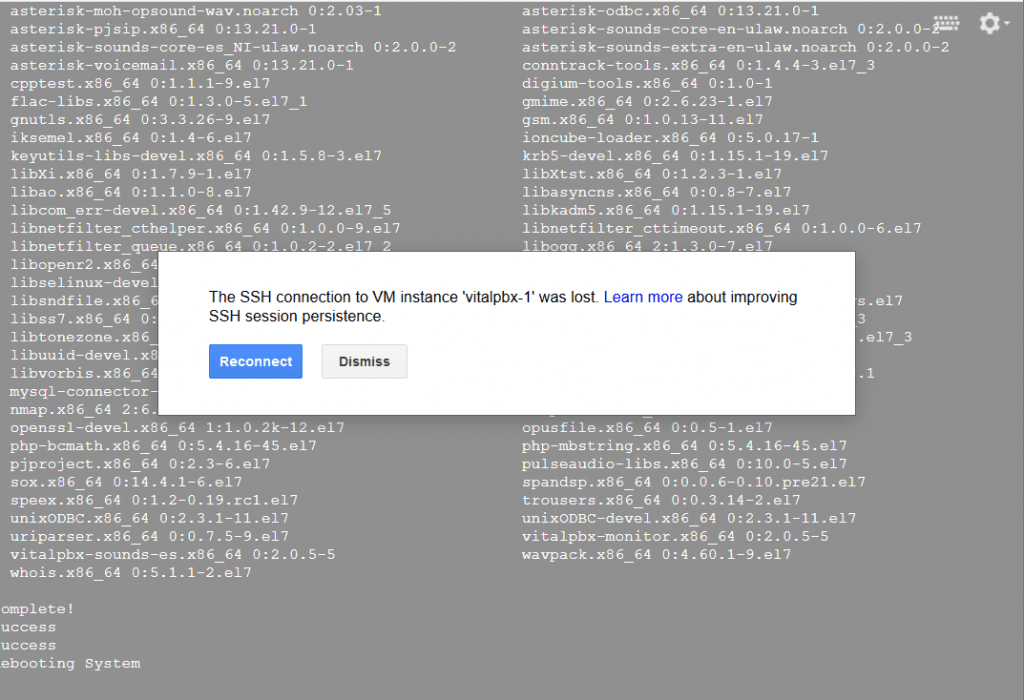
- Once inside the console we will follow the steps on the following link: Installing VitalPBX on a VPS. Once the installation is complete, the system will restart automatically.
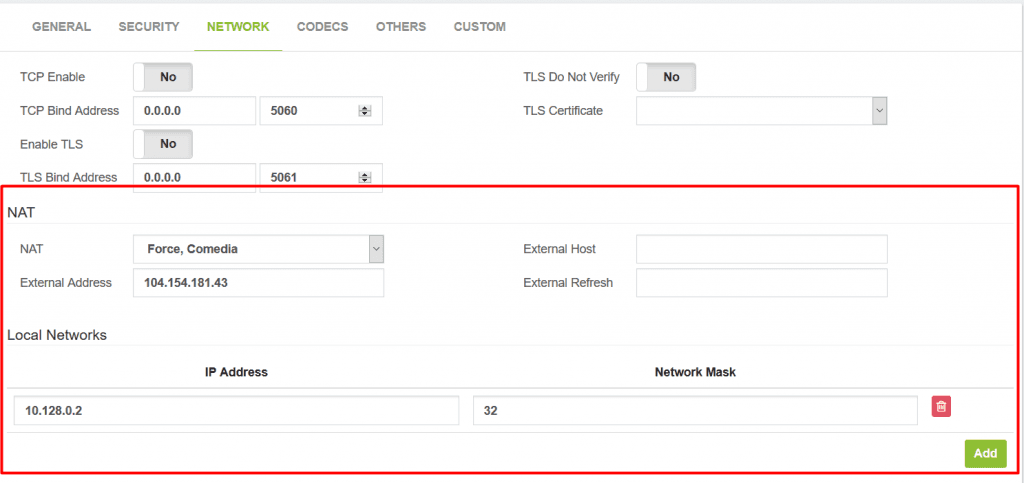
Configuring NAT Settings
So that there is audio while having a call, we will have to configure in the global SIP configurations, the private network and the public network of our server in the following way:
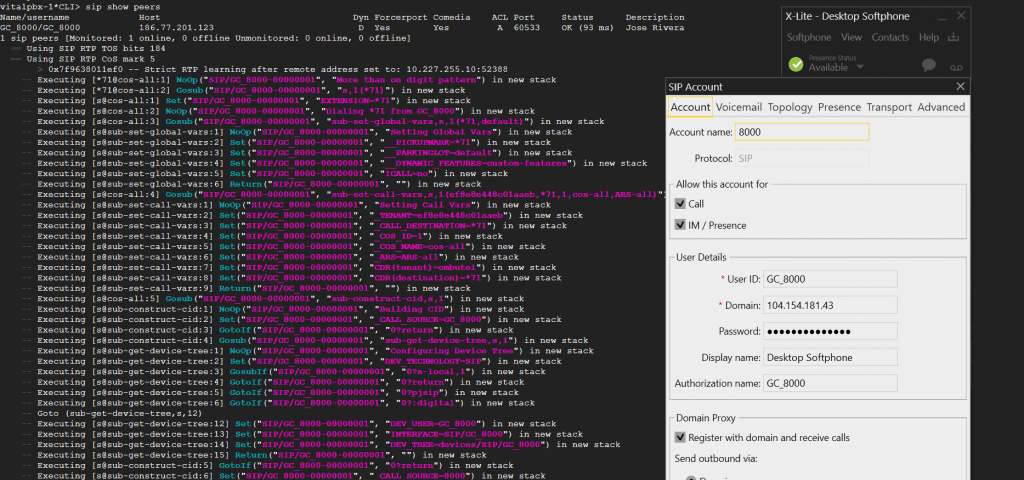
Test Call
Learn more about VitalPBX, our services and how we can help you achieve your goals in our official website.

