It’s been a minute since we published a blog explaining how to integrate a VoIP provider with VitalPBX. Today, we’ll go over the steps for setting up a trunk between Flowroute and VitalPBX.
We will use the IP Auth method for this tutorial. Hence, we will configure both sides accordingly.
Environment
- VPS Hosting: DigitalOcean
- VitalPBX v3.1.5-4
- Asterisk 18.6.0
- PJSIP
- Centos 7
Flowroute Set up
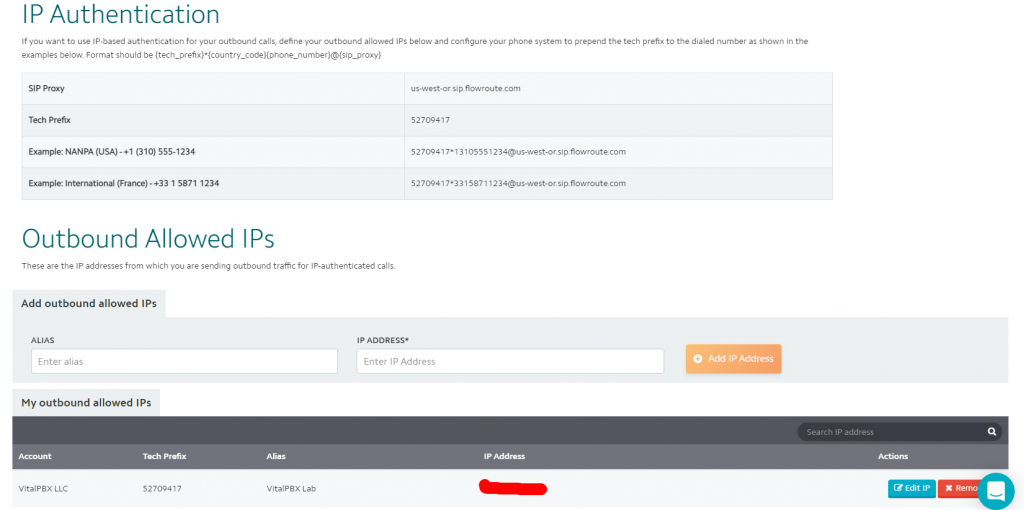
There are two main sections that we have to configure in the Flowroute portal. We’re talking about the Interconnection menu’s Inbound Routes and IP Authentication sections.
In the IP Authentication section, we will set up the IP of our VitalPBX. Additionally, we will get from this section the SIP Proxy or Host for our trunk and the Call Prefix that we will use later in our outbound route on VitalPBX.
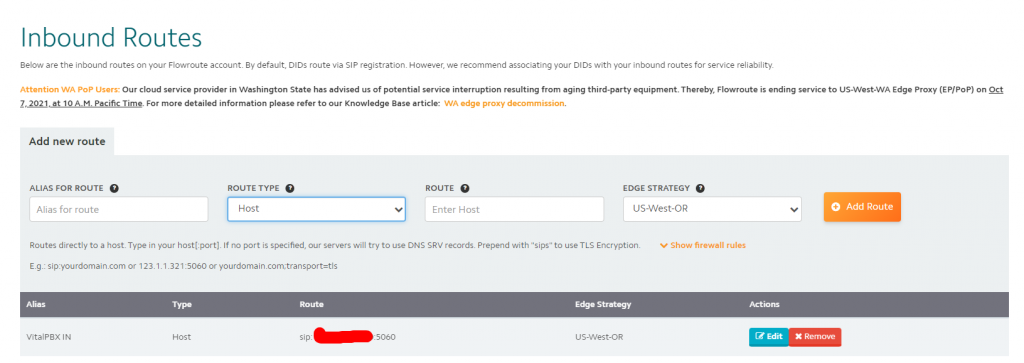
In the Inbound Routes section, we will add a route that points to our server. The route type to use would be “Host,” and the field “Route” should contain the IP of our server in the format “sip:1.2.3.4:5060.” In the case of the drop-down “Edge Strategy,” it should match with the SIP Proxy host located in the IP Authentication section.
In this section, if you are using a port different than 5060, you should use that port in the field “Route” instead. e.g.: “sip:1.2.3.4:5070.”
Finally, in the DIDs menu, don’t forget to associate your DIDs with your inbounds routes.
VitalPBX Set up
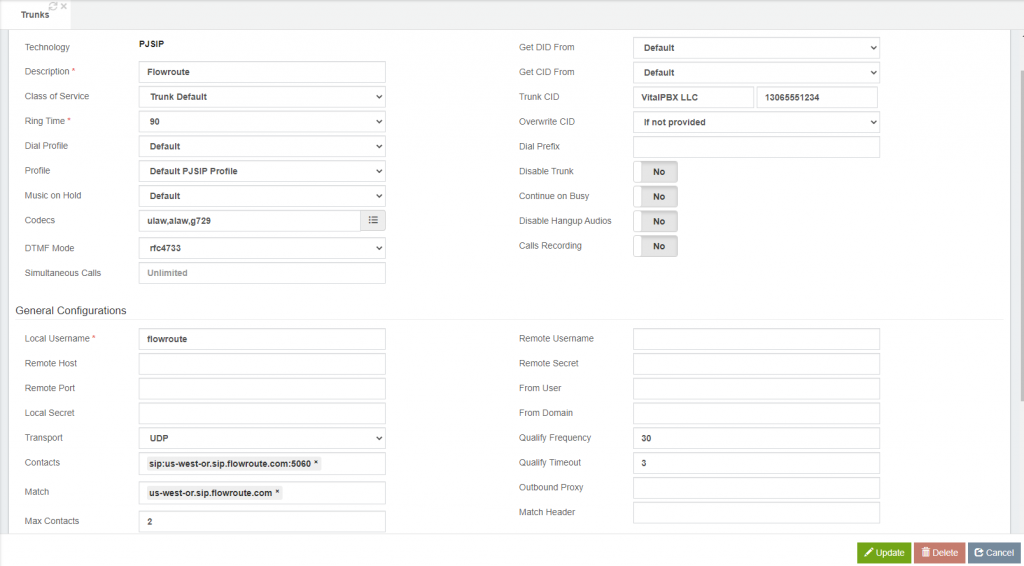
On VitalPBX, the first thing to do is to create the trunk. The parameters to use are the ones below.
- Technology: PJSIP
- Description: Flowroute
- Profile: Default PJSIP Profile
- Codecs: ulaw,alaw,g729
- Trunk CID: VitalPBX LLC 13065551234
- Overwrite CID: If not Provided
- Local Username: flowroute
- Transport: UDP
- Contacts: sip:us-west-or.sip.flowroute.com:5060
- Match: us-west-or.sip.flowroute.com
- Identify By: IP
- Require Registration: No
Remember that the domain “us-west-or.sip.flowroute.com” used in the fields “Contacts” and “Match” was gotten from the IP Authentication section in the Flowroute portal.
Now, about the Caller ID, it has to be in the format E.164. Moreover, it has to be a valid DID number purchased in the Flowroute portal.
Once we have our trunk up and running, the next step is to create our outbound route. For this, we will need to get the “Tech Prefix” from the IP Authentication section in the Flowroute portal; this prefix has to be prepended on each call when using the IP Auth method.
We have to configure our Outbound Route like in the screenshot below.
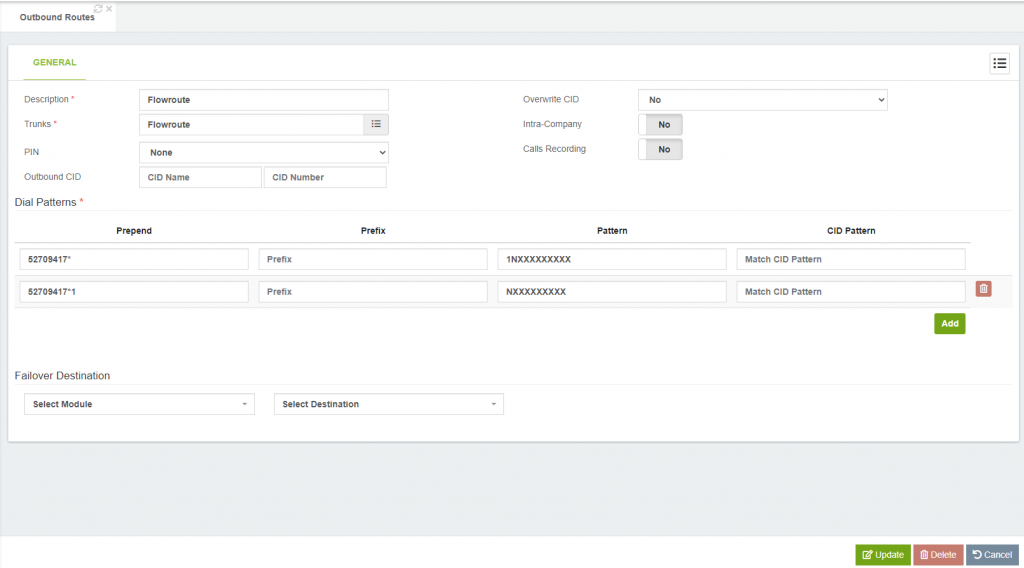
With the above configurations, you can dial USA numbers in the format 13055551234 and 3055551234.
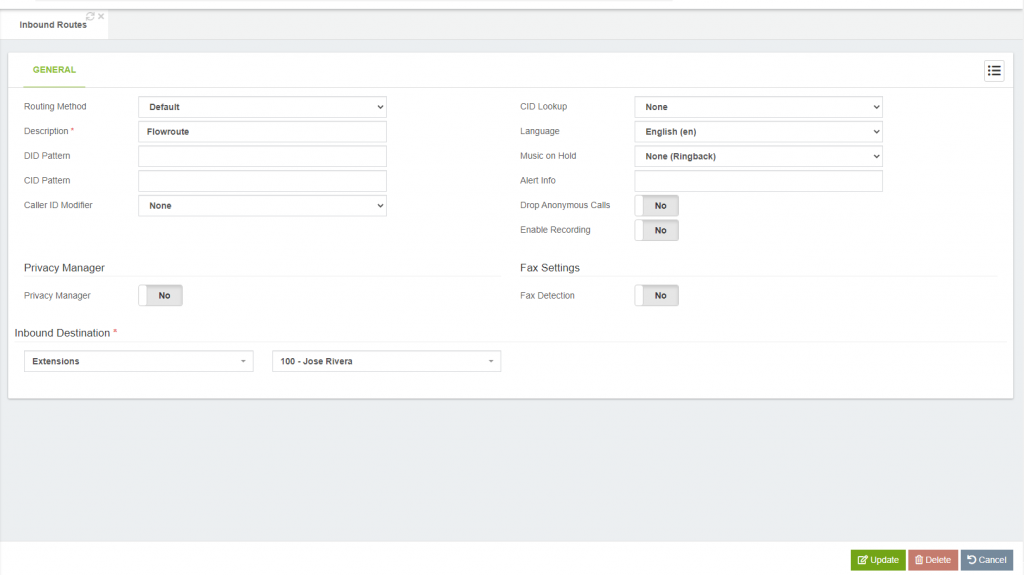
Finally, we have to configure our inbound route with our desired destination. For this blog, we will use the Any DID/Any CID inbound route to catch the incoming calls from Flowroute.
To sum things up, configuring the Flowroute VoIP provider with VitalPBX is quite straightforward.
Hopefully, this blog post will guide you in the proper route when it comes to setting up trunks with Flowroute.


