
Unlock Enhanced System Management with VitalPBX 4.1.0 R1
The VitalPBX team is thrilled to announce the rollout of VitalPBX 4.1 R1, a significant update that brings cutting-edge features and improvements to your communication
VitalPBX One is the all-in-one solution designed to improve your business's collaboration and communication to new levels
Ideal for any size and type of business.
Get features that cover all your call center needs
Manage multiple PBX's on the same server
Experience a fully featured Switchboard, Recording Manager, Call Center Statistics, Call Account, and Call Center Dialer, system,
The add-ons module allows you to install new modules in order to expand the PBX capabilities and add new features.
Communicate anywhere with VitXi, our full WebRTC client exclusively for your VitalPBX installation.
With VitalPBX Connect, you can make and receive business calls on your smartphone.
An advanced windows softphone for call center which integrates presence, chat, video call, BLF, and much more.
We can help with everything from implementation assistance to upgrades and production down emergencies.
Read our tutorials and guides on how to implement new tools and technologies for your business with VitalPBX here.
OpenVPN Access Server supports a wide range of configurations, including secure and granular remote access to the internal network and/ or private cloud network resources and applications with fine-grained access control. To install the OpenVPN module you must go to the Admin/Add-ons/Add-ons menu. Press Check-Online and install VitalPBX OpenVPN. The free version is limited only to the creation of two VPN Clients.
In this tab, you may configure the OpenVPN server and monitor its status
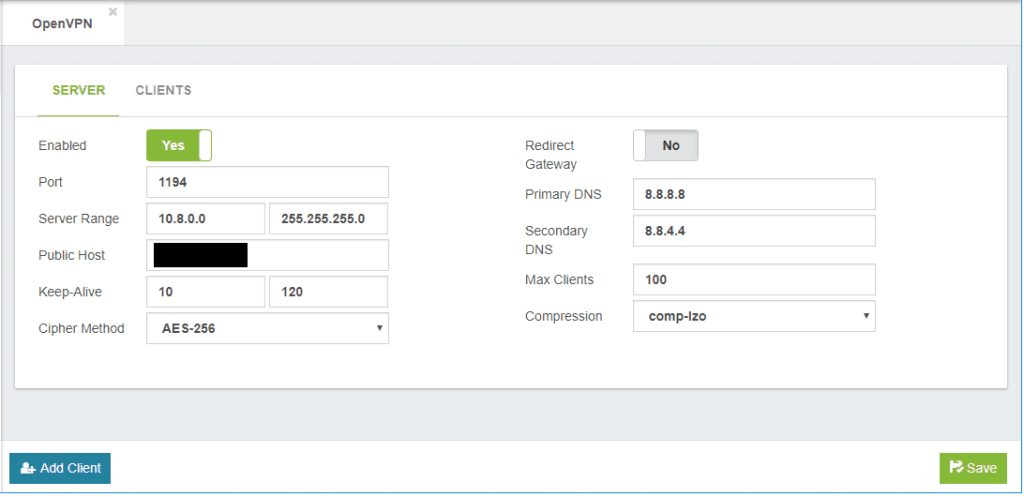
We will explain the meaning of all the fields who compounds the server configuration:

In this tab you may monitor the configured clients, also you may execute some actions that we will explain below
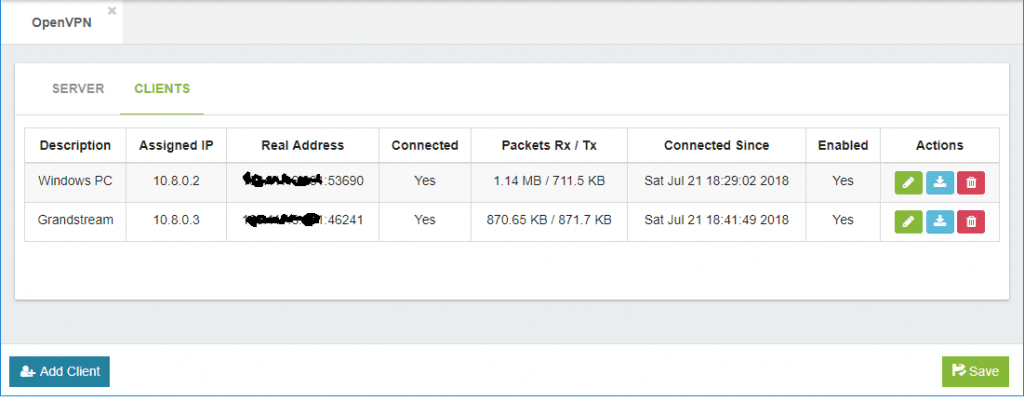
Edit, modify the client
Download, download the config file to be installed on the client.
Delete, delete the client.
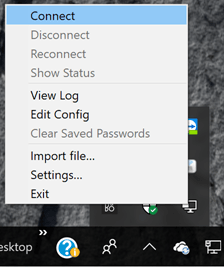
Notes:
An IP Address will be assigned corresponding to the range programmed in the Server section. Remember that the IP Address to reach VitalPBX is the first Address in that range, that is, if we have the range 10.8.0.0, the IP Address of the PBX will be 10.8.0.1.
When you create the SIP extension to connect remember that to have audio it is necessary for the configuration of NAT to be Force, Comedia.
If you experience audio problems, add in SETTINGS/Technology Settings/PJSIP Settings the Local Net with the range declared in OpenVPN.
In future articles, we will explain how to connect as Client phones for brands such as Grandstream, Yealink, etc. as well as Android and iPhone phones.
Learn more about VitalPBX, our services and how we can help you achieve your goals in our official website.

The VitalPBX team is thrilled to announce the rollout of VitalPBX 4.1 R1, a significant update that brings cutting-edge features and improvements to your communication

PBX System Recognized for Industry Innovation Miami, Florida, 02/27/24 — VitalPBX announced today that TMC, a global, integrated media company, has named VitalPBX Unified Communications

Introduction The Private Branch Exchange, or PBX, has been a fundamental pillar in business communication for decades. As technology has advanced, so have the capabilities

VitalPBX provides a robust and scalable platform, which will allow you to manage your PBX in an easy and intuitive way.