If you aim to configure a QuestBlue trunk on VitalPBX, you’ve come to the right place! QuestBlue is a popular provider of VoIP services, including SIP trunks. So, we’ll walk you through the steps to configure a SIP trunk on VitalPBX using the IP Authentication method.
Setting up QuestBlue
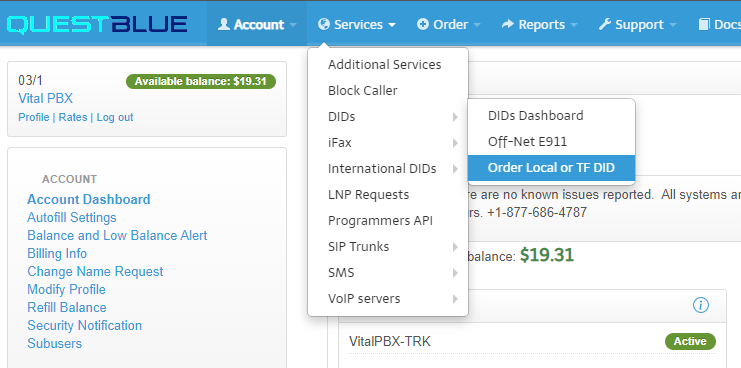
Our first step would be creating a trial account on the QuestBlue website. Once we get signed up, we will purchase our first number from the portal. So, once logged in, to purchase our number, we will navigate to “Services / DIDs / Order Local or TF DID.”
Once in the DID purchasing section, you can use the different filters to find numbers with specific features and locations.
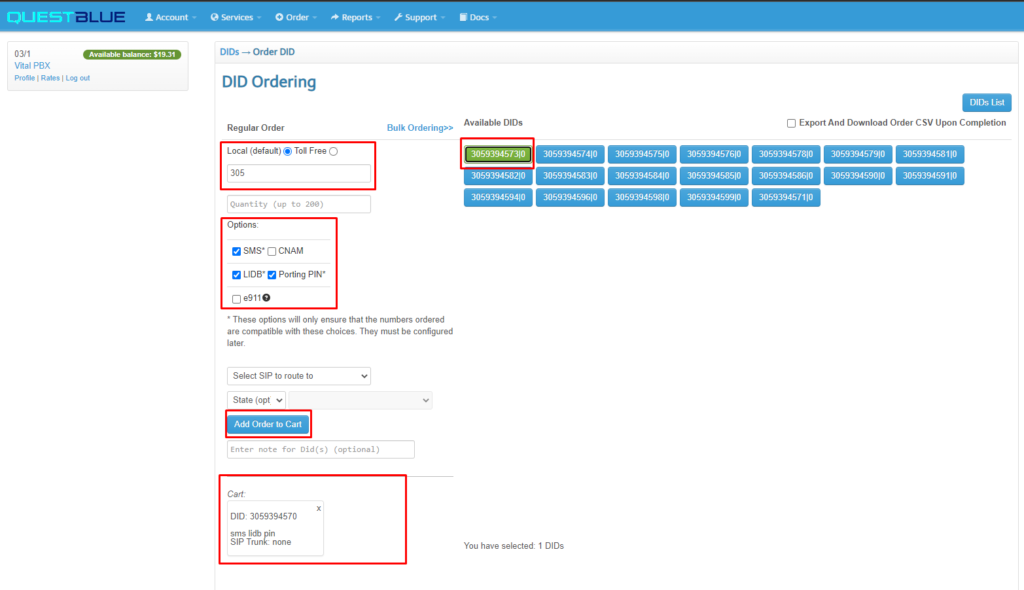
After finishing the purchase, you can find the list of your numbers in the DIDs Dashboard (Services / DIDs / DIDs Dashboard).

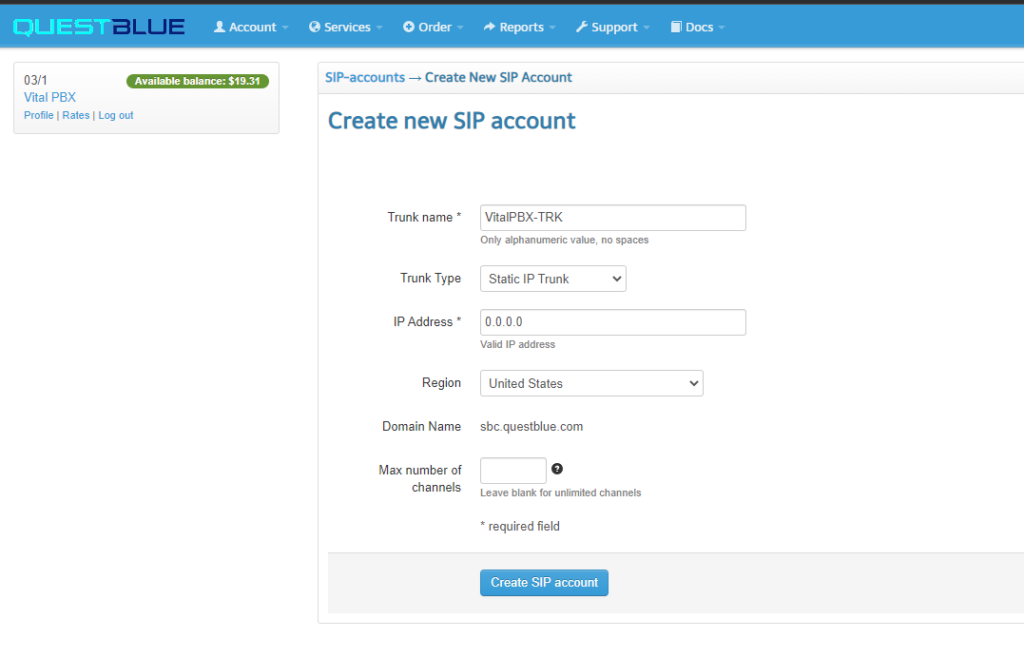
Now that we have our first DID number, we will navigate to “Services / SIP Trunks / Add SIP Trunk.” Once there, we will fill in the parameters below.
- Trunk Name: It can be any alphanumeric string but without spaces.
- Trunk Type: We will select from the dropdown the value “Static IP Trunk” because we want to use IP authentication.
- IP Address: Here goes the public IP address of your VitalPBX server.
- Region: We will select “United States” for this field.
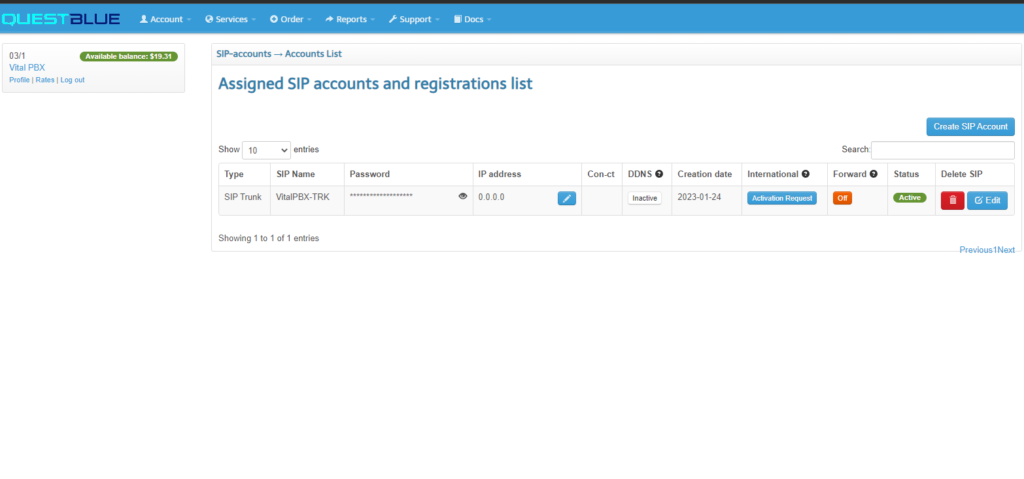
After creating the SIP account, you will get routed to your SIP accounts list, where you will find more details about your QuestBlue trunks.
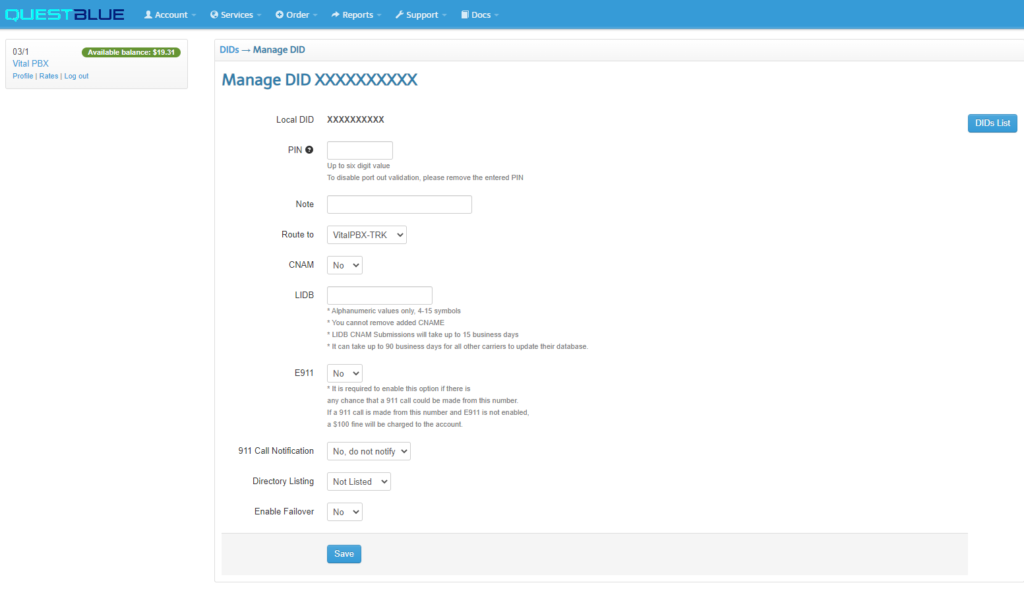
Now that we’ve our first trunk, we will navigate to “Services / DIDs / DIDs Dashboard” to edit the number we purchased and assign it to the SIP trunk we created in the previous step. So, once in the edition dialog, we must select our trunk in the field “Route to” and then save.
Setting Up VitalPBX
With the above steps, we’ve prepared the ground to interconnect our VitalPBX with QuestBlue. So, next, we will dive into the required configurations on the VitalPBX side to finally start placing and receiving calls using QuestBlue as our VoIP provider.
Our first step on VitalPBX would be creating the trunk. As always, In the top section of the Trunk definition, we will provide a description, select the profile(usually the Default PJSIP Profile), and the Trunk CID. Keep in mind that the CID Number must be in 11-digit format.

Next, we will configure the general section and fill in the fields below.
- Local Username: it can be any alphanumeric string without spaces.
- Remote Host: must be set up with the value “sbc.questblue.com”
- Match: must be filled in with the value “sbc.questblue.com”
- Identify By: we must select the IP value because we’re implementing IP authentication for the trunk.
- Qualify Frequency: we must set it up with 60 seconds.
- From Domain: it must have the value “sbc.questblue.com”

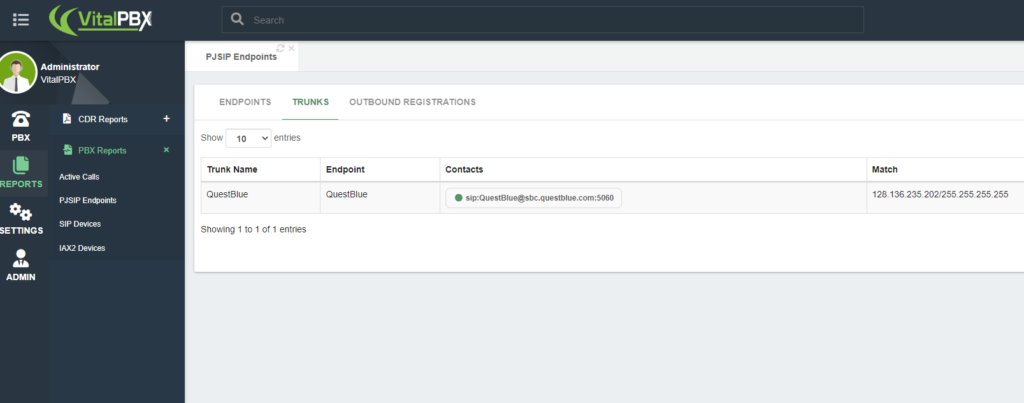
After saving the trunk and applying changes, you can monitor the trunk status by navigating to “Reports / PBX Reports / PJSIP Endpoints.” Once there, you must select the “Trunks” tab.
Now that the trunk is up and running, our next step would be creating the outbound route for placing calls using QuestBlue.
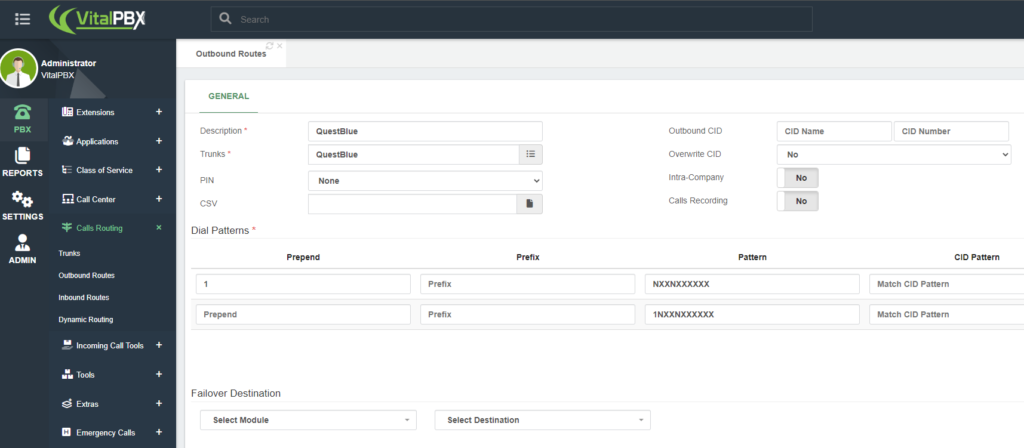
With the above patterns, we could dial in 10-digit and 11-digit formats (e.g., 5615550129 or 15615550129).
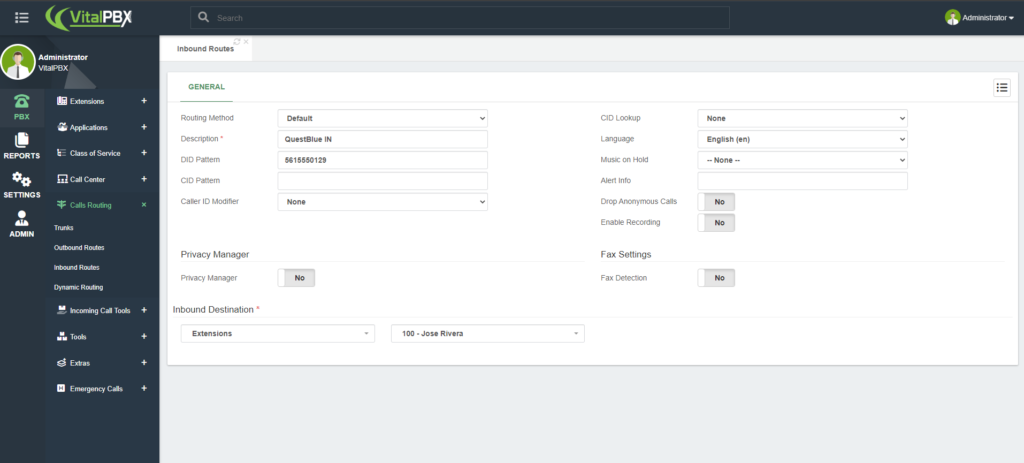
Finally, to receive calls, we must create our inbound routes with our QuestBlue DIDs using the 10-digit format.
Testing the configurations
Now the configurations are done, the final step is to test the trunk to ensure it’s properly working.
For testing outbound calls, you can place a test call to a phone number outside of your network; it can be your mobile number, for instance.
For inbound call testing, you can call from your mobile to any of your QuestBlue DIDs.
So, if both tests go through successfully, congratulations! You’ve successfully configured a QuestBlue trunk on VitalPBX.
Conclusions
In conclusion, configuring a QuestBlue trunk on VitalPBX is a straightforward process. By completing the steps outlined above, you will interconnect VitalPBX with QuestBlue in just a few minutes to start making and receiving calls using QuestBlue as your VoIP provider.

