VitalPBX includes a new OpenVPN module that together with the current Yealink firmware includes support for it (server/client mode) which allows you to tunnel the whole SIP/RTP traffic over an encrypted channel. This is also the best solution to avoid any kind of NAT/routing issues because all the devices are directly accessible within the virtual IP subnet.
Read our tutorials and guides on how to implement new tools and technologies for your business with VitalPBX here.
Next, we will show you how to configure a Yealink phone.
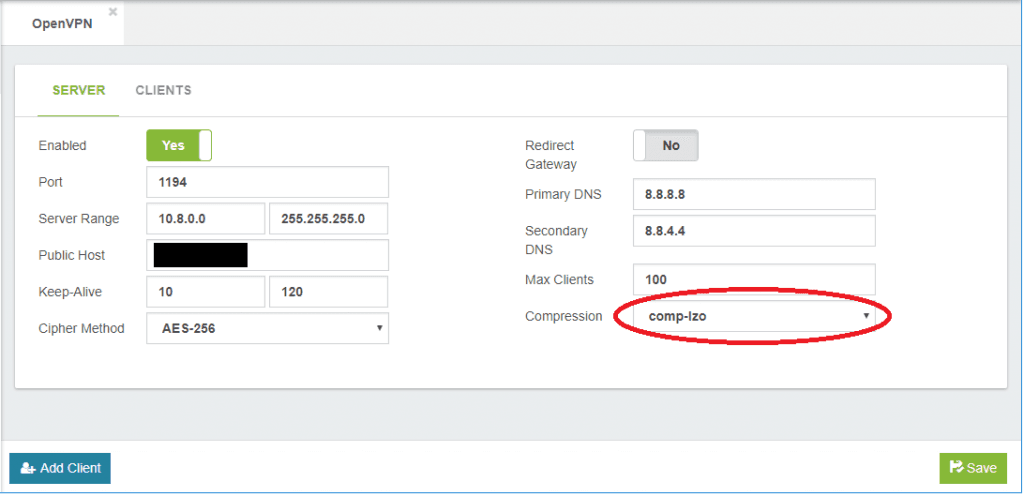
1.- First make sure that the compression is set to “comp-lzo”, in the server configuration tab
Server

2.- Add an OpenVPN client by pressing the blue button at the bottom of the left corner. Select Type: Yealink.

Add Client

3.- After we have created the client, we can download the OpenVPN configuration of our client from the client’s tab.

4.- A compressed tar file will be downloaded.
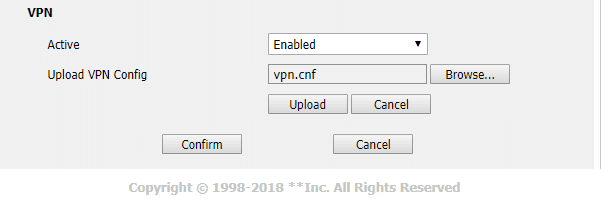
5.- Now we are going to configure a Yealink phone, uploading the tar file in Network/Advanced VPN Section

- Active: enable the VPN option.
- Upload VPN Config:upload the previously downloaded tar file.
Notes:
After establishing the tunnel, it is necessary to configure the SIP account of the telephone. Remember that the IP Address to reach VitalPBX is the first in that range, that is, if we have the range 10.8.0.0, the IP Address of the PBX is 10.8.0.1.
When you create the SIP extension to connect, remember that to have audio it is necessary for the configuration of NAT must be Force, Comedia.
For other phone brands or integrations please visit our blog (Grandstream, Htek, IOS) or download the complete VitalPBX manual. Learn more about VitalPBX, our services and how we can help you achieve your goals in our official website.


