
We’ve published the “Hotel Management” add-on. This add-on allows you to integrate your PBX with CHAR PMSLINK, which is the glue between the PBX and the PMS and other hotel systems.
Installing the add-on
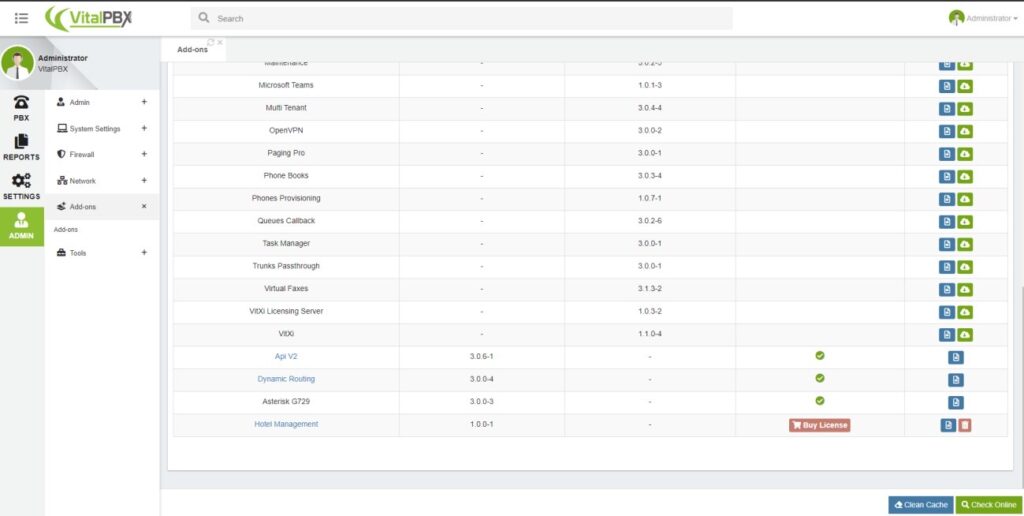
To install this add-on, you have to go to the add-ons module, click the green button “Check Online,” and then search for the add-on in the list of items generated by this module. If you cannot find the add-on in the list, please, contact [email protected]. For further details about installing add-ons, please, visit this link.
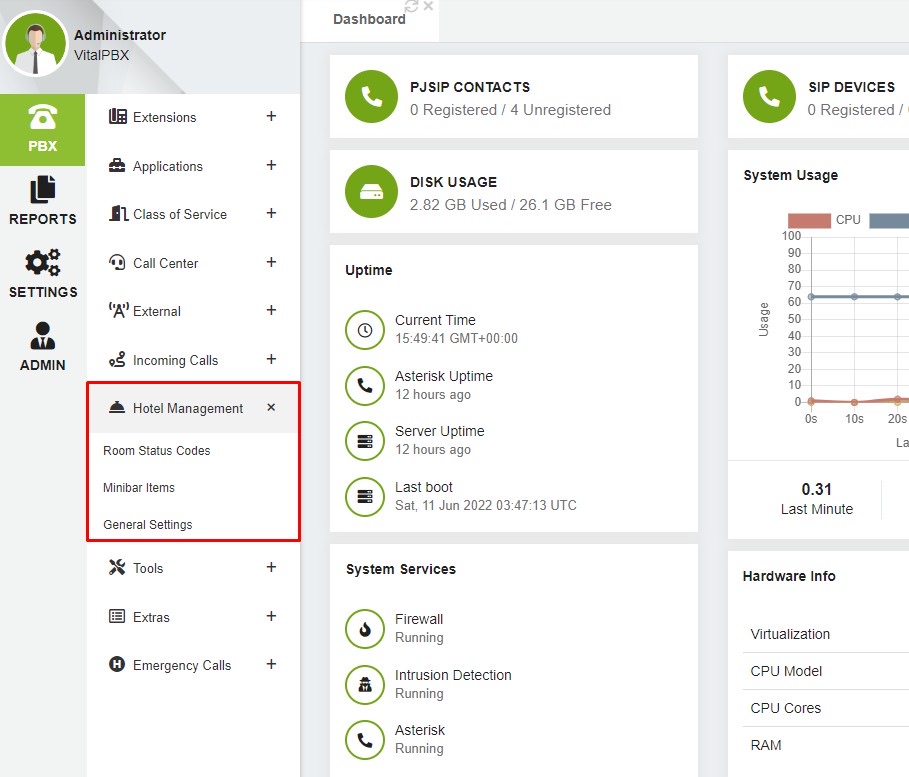
After installing the add-on, you have to reload the page to get the PBX menu updated. After this, you will find the menu options for this add-on under “PBX / Hotel Management.”
Pre-configuring VitalPBX
Before diving into the configurations of the Hotel Management modules, let’s configure the Classes of Service and the extensions.
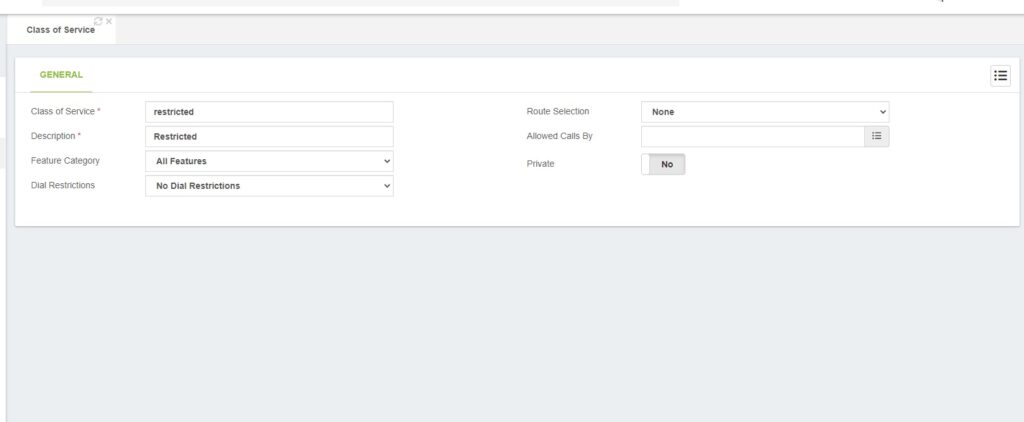
Let’s start with the CoS. In short, the CoS are the restrictions/permissions to apply to an extension or a group of extensions. We recommend you create at least one additional CoS for the extensions assigned to the Hotel Rooms; this has to have all the restrictions apply to unoccupied rooms to avoid undesired calls.
If you need more information about configuring the Classes of Services, check the links below:
• Classes of Service blog post.
• What are Classes of Service in VitalPBX?
• Classes of Service Overview
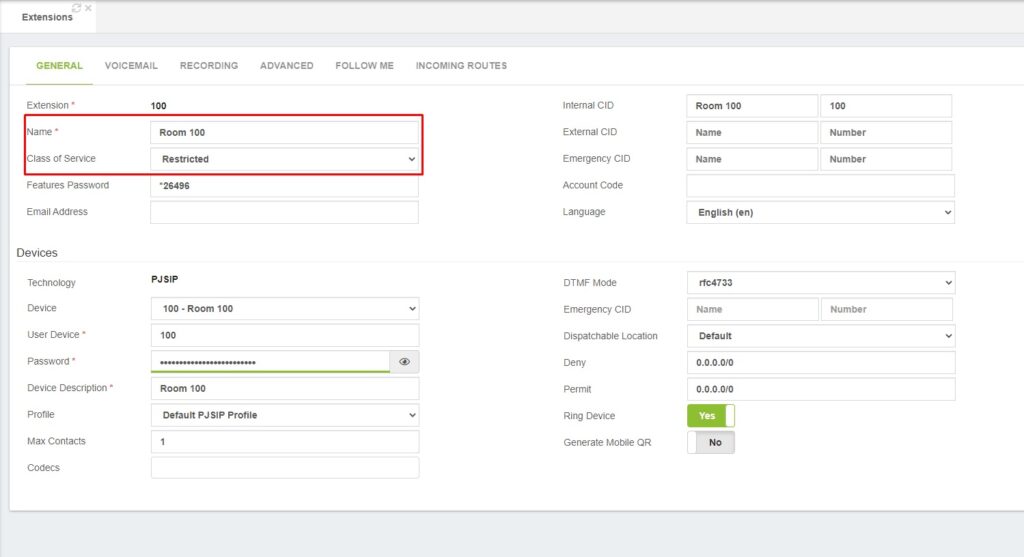
Now that we have created and configured our Classes of Service, the next step is creating our extensions. The only thing we must establish while creating our extensions is to assign a restricted CoS to all those extensions that will be part of the hotel rooms.
Moreover, we recommend providing a descriptive name because it will be used as the default internal CID name after a room checkout.
For further information about configuring extensions, please, check the video at this link.
Configuring the Hotel Management add-on
Now that we have accomplished all the steps in the pre-configuring section, we will proceed with the configuration of the hotel management modules.
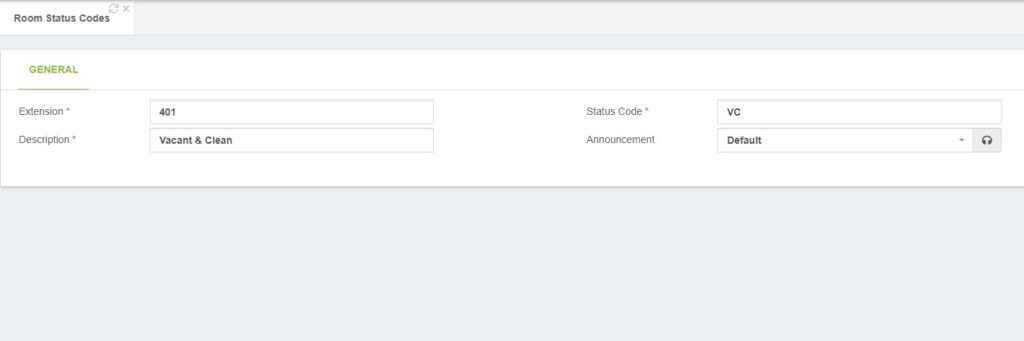
Room Status Codes
Room Status Codes
This module allows you to create the room status codes used by the housekeeping to notify about the current status of a specific room. This module has the fields below.
• Extension: the number to dial to notify about the room status; has to be unique.
• Description: a short descriptive name to make it easy to find the status code or know what it represents.
• Status Code: this is the code that will receive the PMS; it must be unique.
• Announcement: the audio to play after updating the room status. By default, it plays a beep sound.
Minibar Items
Here, you can create a list of items a customer might find in the room’s minibar. Later, the hotel employees can dial the codes assigned to these items to charge them to the room’s account. Let’s find out the meaning of each field in the list below.
• Extension: the number/code to dial to charge an item to a room. It must be unique.
• Description: a short descriptive name to make it easy to find the minibar’s item or know what it represents.
• Code: this is the code that will receive the PMS; it must be unique.
• Announcement: the audio to play after adding the minibar items to the room consumption. By default, it plays a beep sound.

It is worth mentioning that the employee can dial in the format 002*2 to add more than one item of the same product.
In the preceding example, 002 is the extension, and two (2) is the number of things to charge to the room.
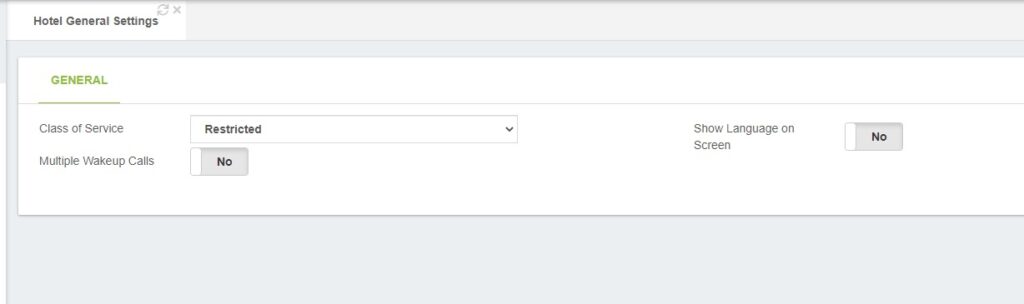
General Settings
Finally, in the General Settings module, we will configure a couple of parameters to define the API behavior.
This module has a few fields, but they are essential. Let’s get to know them.
• Class of Service: Class of Service to configure in an extension after a successful room checkout action. If you select the value “Default,” the system will use the default class of service that comes with the PBX.
• Multiple Wake-up Calls: If set to “Yes,” a room would be able to have more than one wake-up call service.
• Show Language on Screen: If set to “Yes,” the language configured for the extension will get prepended as part of the Caller ID name.
VitalPBX API
And last but not least, we have to create an API key to authorize the requests from the CHAR PMSLINK team.
To create the API Key, go to “Admin / Admin / Application Keys.” Once there, fill in the description and select the desired tenant. In order to get the key, you must edit the item you just have created.
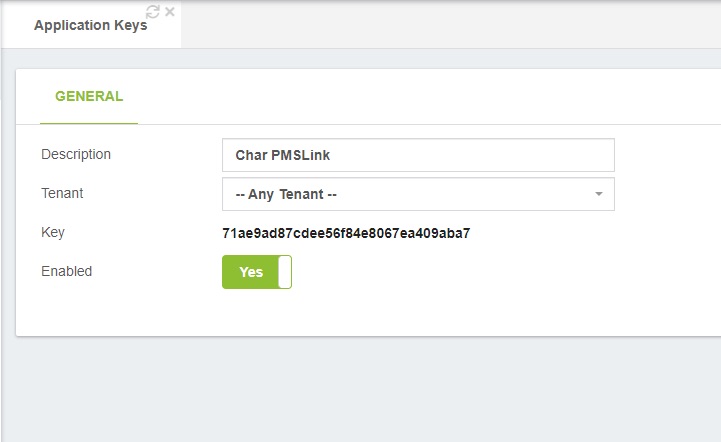
Now, regarding the “Tenant” field, you can select a specific tenant if you have a single hotel customer hosted as a tenant; or set the value to “Any Tenant” in case you have multiple hotel customers hosted on the same PBX.