Seamless Salesforce Integration with the VitalPBX CRM Module: Step-by-Step Guide
Looking to supercharge your CRM experience? With VitalPBX’s CRM module, you can integrate Salesforce to streamline your sales and customer service operations. This guide walks you through the step-by-step process of configuring Salesforce for seamless integration with VitalPBX.
Step 1: Get Started with Salesforce
If you don’t already have a Salesforce account, start by signing up for a free trial:
👉 Get your Free Salesforce Trial
After signing up:
- Confirm your email address.
- Update your Salesforce login credentials.
Navigate to the Advanced Setup Interface within Salesforce.
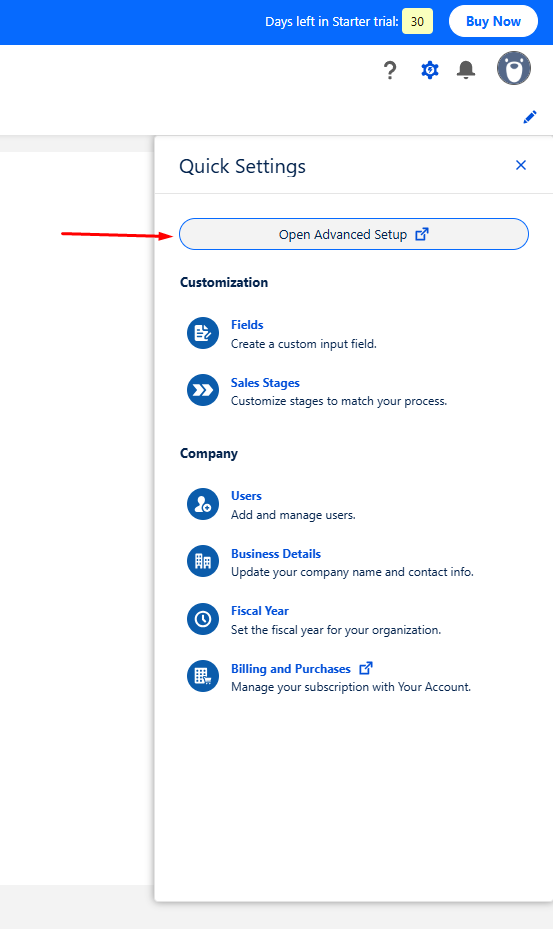
Step 2: Create a New Connected App
In the Advanced Setup area:
- Create a New Connected App.
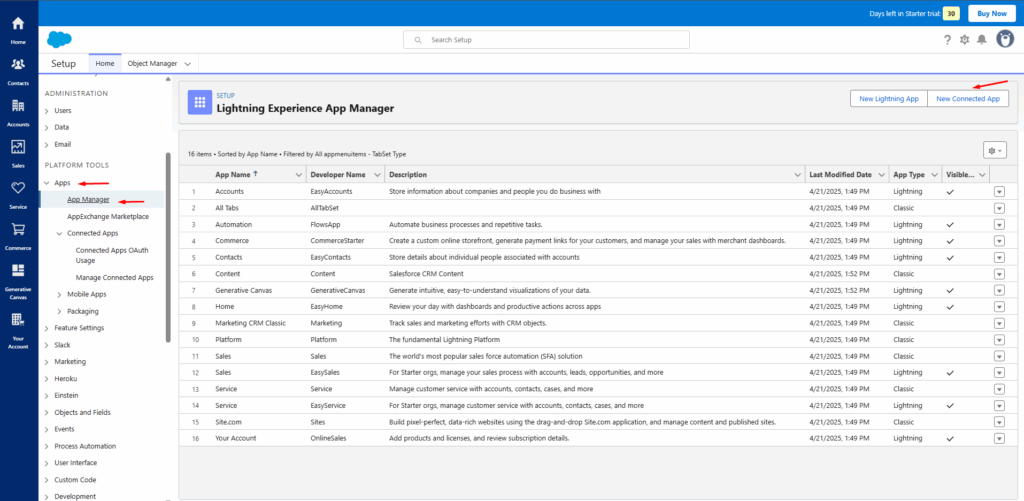
2. Select the first Connected App type option.
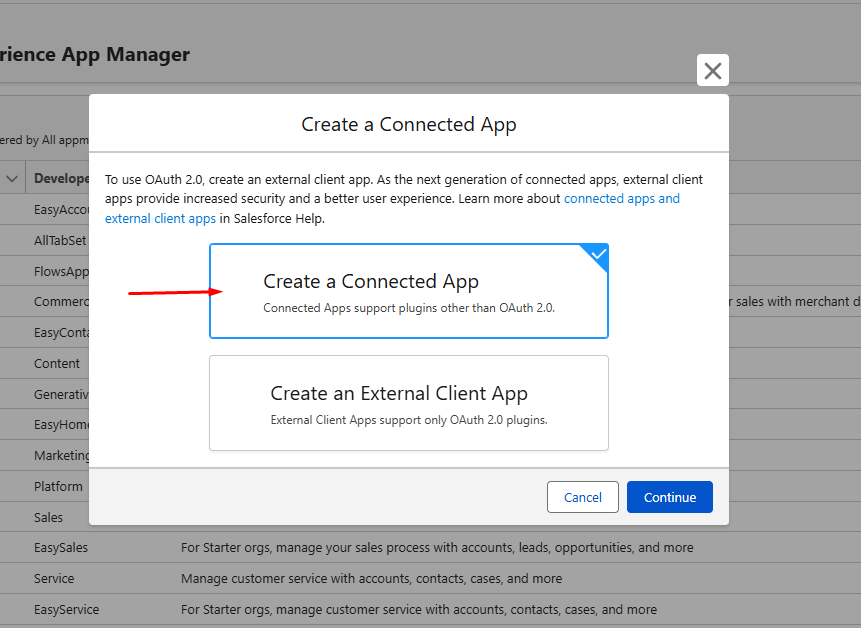
Basic Information
Fill out the Basic Information section with your preferred application name and details.

API (OAuth) Settings
- Enable OAuth Settings.
- Set the Callback URL to the one generated by the VitalPBX CRM Integration module.
- Under Selected OAuth Scopes, add the following permissions:
- Access the identity URL service
- Access unique user identifiers
- Full access
- Manage user data via APIs
- Manage user data via web browsers
- Perform requests at any time
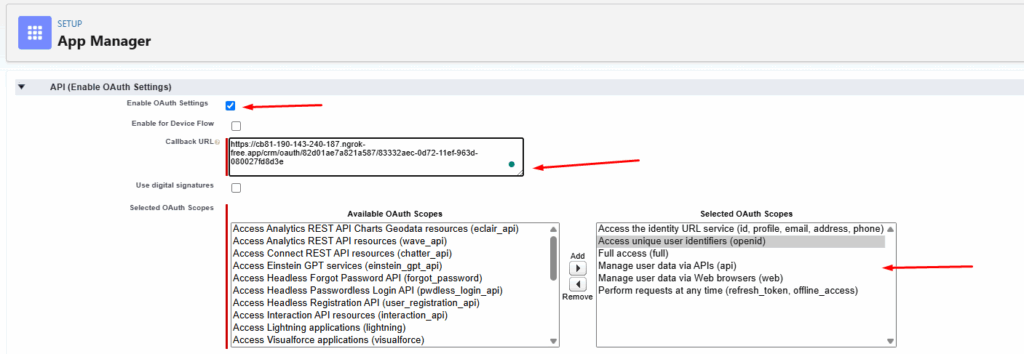
- Finally, disable the “Require Proof Key for Code Exchange (PKCE)” option.
Step 3: Get Your Consumer Key and Secret
After saving the app:
- Click Manage Consumer Details.
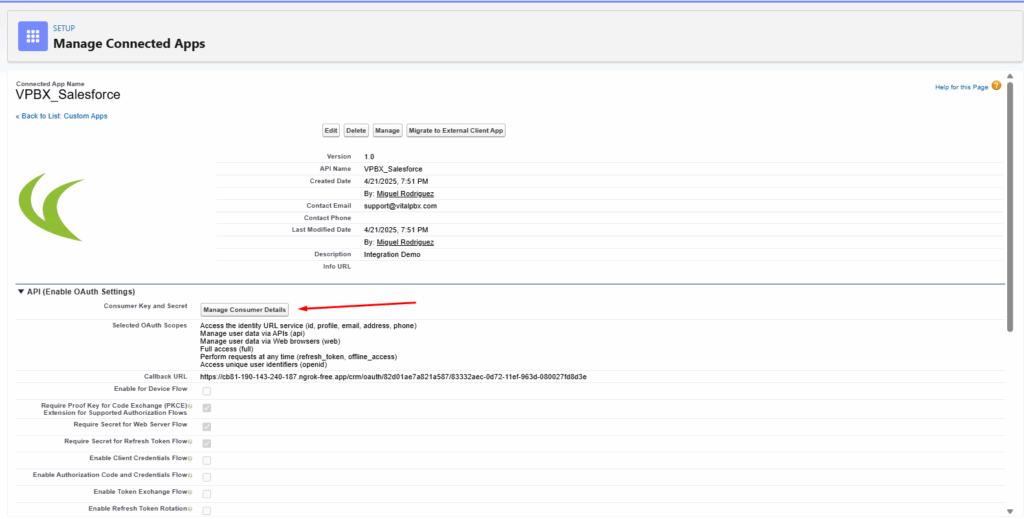
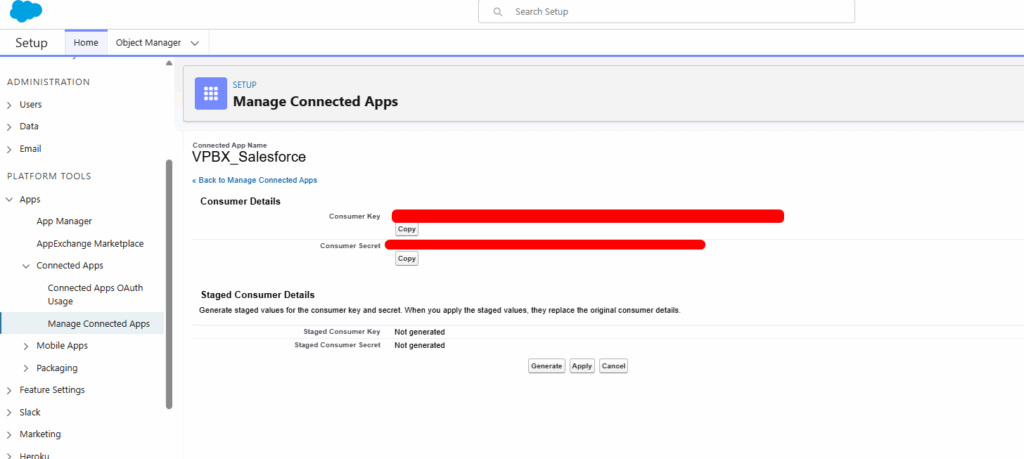
- Retrieve the Consumer Key and Consumer Secret.
You’ll need these credentials to configure the integration inside VitalPBX.
Step 4: Set Up the VitalPBX CRM Module
Now, go to your VitalPBX CRM integration module:
- Paste the Consumer Key and Consumer Secret obtained from Salesforce.
- Click Authorize.
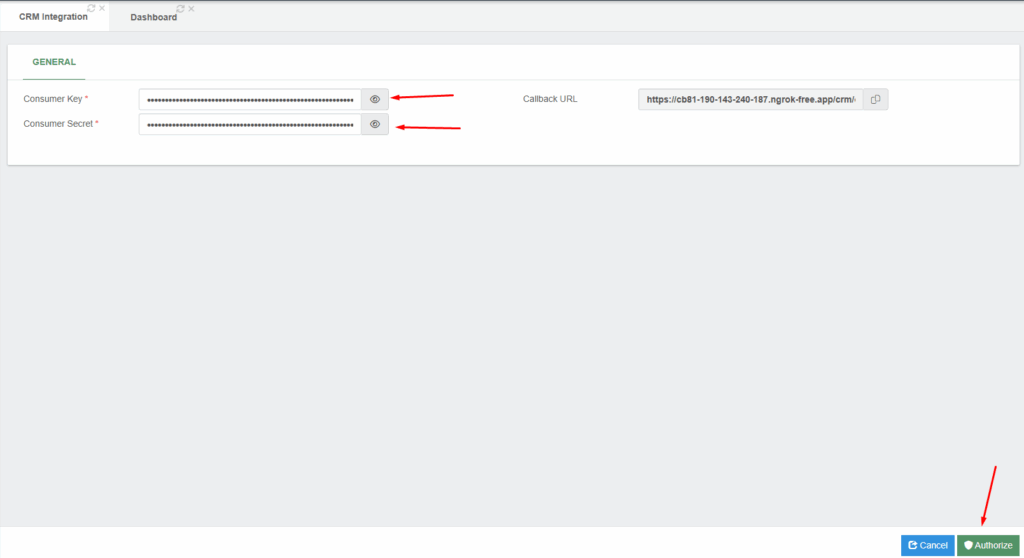
⚡ Note: If authorization fails, wait about 10 minutes and try again—Salesforce sometimes takes a few minutes to provision new app permissions.
Step 5: Finalize the Integration Settings
Once authentication is successful:
- Configure your CRM settings according to your business needs within VitalPBX.
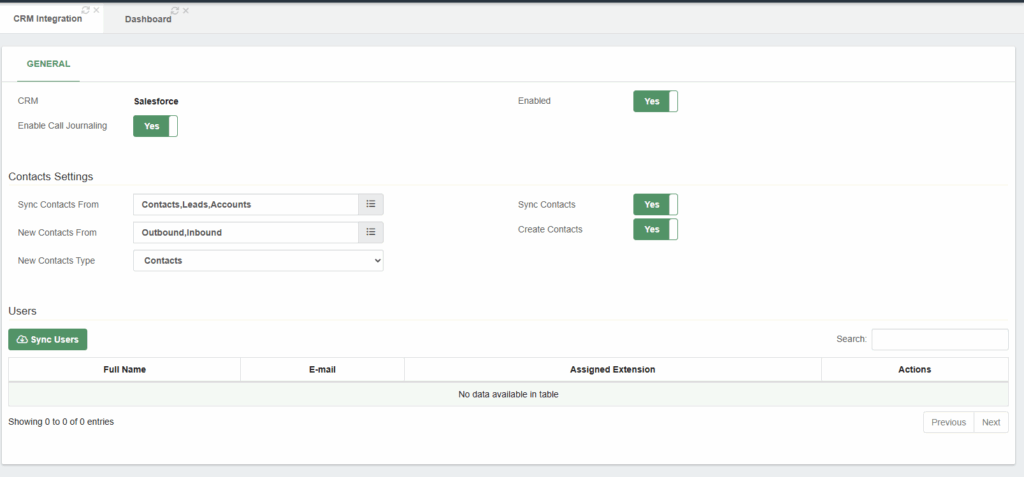
- Sync Salesforce Users and assign them to their respective PBX extensions.

🚨 Important: Only calls made or received by extensions associated with Salesforce users will generate CRM events such as call logs, new contacts, and contact syncing.
What You Can Do After Integration
By integrating Salesforce with VitalPBX, you unlock powerful features:
- Create CRM Contacts Automatically: For inbound and outbound calls.
- Sync Contacts: From Salesforce into your local PBX phonebook.
- Call Journaling: Automatically log tasks and activities under Salesforce Contacts, Leads, or Accounts. Each log can include a call recording link.
Making Call Recordings Visible in Activity Timelines
Salesforce’s standard “Activity Timeline” might not show attached files like call recordings by default. To fix this:
- Go to Object Manager > Task > Page Layouts inside Salesforce.
Edit your Task layout and add the “Files” related list to the layout.
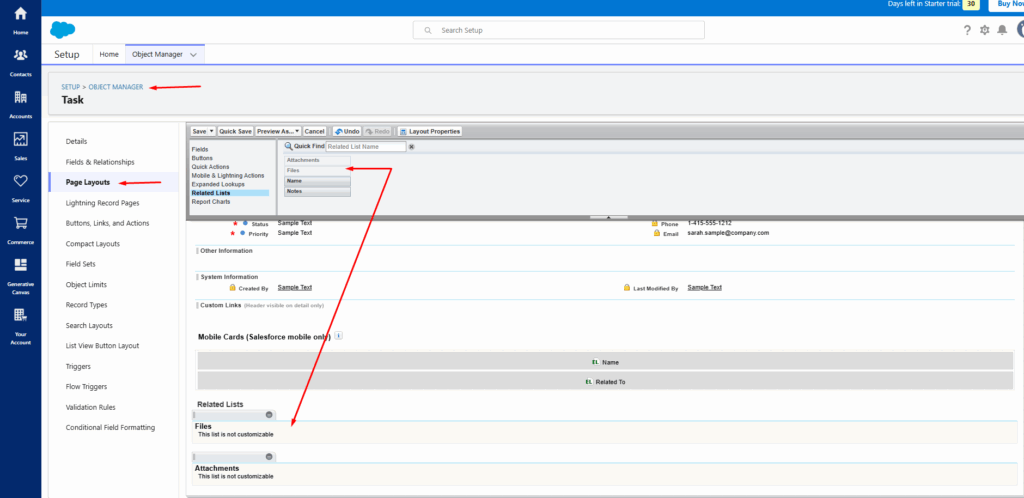
This ensures call recordings are visible directly within each CRM activity entry.
Conclusion
Integrating Salesforce with VitalPBX CRM Module allows your organization to centralize call activities, automate customer data management, and boost overall productivity. Follow the simple steps outlined above to start leveraging the full power of your CRM and PBX systems—together!
If you encounter any issues or have questions, don’t hesitate to contact the VitalPBX support team.

