This last year, Video Conference calls have now become more part of our lives than ever. So, up next we will show step by step how to install your own Zoom-like Video Conferencing server. In order to do this installation we will use an open source project called Jitsi (Jitsi was acquired by 8×8 in 2018).
Once the installation is complete we will show you how to change the logos and names to put our own brand.
If you do not have any cloud server provider we recommend Digital Ocean which offers $ 100.00 of courtesy credit to be used within 60 days. That is to say we can try Digital Ocean without investing a single penny and also use it for two months; a great offer you cannot ignore. To obtain this offer you can go to the following link:
Digital Ocean gives you $ 100.00 in credit
1.- Prepare a Server Machine
1.1.-Hardware Minimum Requirements
- 1GB RAM
- 2GHz CPU
- 25GB Disk
- 100MB Net
1.2.- Software Requirements
- Debian 10 recommended
- A Valid FQDN Domain
1.3.- Update the OS
| root@meet:~# apt -y update |
1.4.- Install the Firewall
| root@meet:~# apt -y install ufw |
1.4.1.- Set Firewall Rules (Recommended)
- 80 TCP (HTTP)
- 443 TCP (HTTPS)
- 10000-20000 UDP
- ssh
| root@meet:~# ufw allow in ssh |
| root@meet:~# ufw allow in 80/tcp |
| root@meet:~# ufw allow in 443/tcp |
| root@meet:~# ufw allow in 10000:20000/udp |
| root@meet:~# ufw enable Command may disrupt existing ssh connections. Proceed with operation (y|n)? y |
The Firewall is now activated and enabled on system startup
1.5.- Install Dependencies
| root@meet:~# apt -y install gnupg2 |
2.- Install Jitsi
2.1.- Add Jitsi Repository
| root@meet:~# wget https://download.jitsi.org/jitsi-key.gpg.key |
| root@meet:~# apt-key add jitsi-key.gpg.key OK |
| root@meet:~# echo ‘deb https://download.jitsi.org stable/’ > /etc/apt/sources.list.d/jitsi-stable.list |
| root@meet:~# apt -y update |
2.2.- Install Jitsi
| root@meet:~# apt -y install jitsi-meet |
2.2.1.- Hostname
Enter the hostname
Note: For Jitsi to work well, you must have a valid hostname such as example meet.mycompany.com
2.2.2.- SSL Certificate
Generate a new self-signed certificate… (Temporary)

2.2.3.- Generate a free Let’s Encrypt certificate
Before proceeding, make sure that your domain name is pointing to the IP address of your server.
root@meet:~# sudo /usr/share/jitsi-meet/scripts/install-letsencrypt-cert.sh ————————————————————————- This script will: – Need a working DNS record pointing to this machine(for domain zoom.new.vitalpbx.org) – Download certbot-auto from https://dl.eff.org to /usr/local/sbin – Install additional dependencies in order to request Let’s Encrypt certificate – If running with jetty serving web content, will stop Jitsi Videobridge – Configure and reload nginx or apache2, whichever is used – Configure the coturn server to use Let’s Encrypt certificate and add required deploy hooks – Add command in weekly cron job to renew certificates regularly
You need to agree to the ACME server’s Subscriber Agreement (https://letsencrypt.org/documents/LE-SA-v1.1.1-August-1-2016.pdf) by providing an email address for important account notifications Enter your email and press [ENTER]: your@email |
3.- Now customize Meet (White Label)
With a few changes we are going to customize the new Video Conferencing System that we have just installed with our logo and name.
3.1.- Change Watermark and Favicon
Change the watermark.png and favicon.ico in the following directory:
| /usr/share/jitsi-meet/images |
3.2.- Change favicon
Change the favicon.ico in the following directory:
| /usr/share/jitsi-meet/ |
3.3.- Change configuration file (replace Jitsi for you Company name)
In /usr/share/jitsi-meet/interface_config.js
APP_NAME: ‘Jitsi Meet’, to APP_NAME: ‘VitXi Meet’, |
DEFAULT_REMOTE_DISPLAY_NAME: ‘Fellow Jitster’, to DEFAULT_REMOTE_DISPLAY_NAME: ‘Fellow VitXi’, |
JITSI_WATERMARK_LINK: ‘https://jitsi.org’, to JITSI_WATERMARK_LINK: ‘https://vitalpbx.com’, |
NATIVE_APP_NAME: ‘Jitsi Meet’, to NATIVE_APP_NAME: ‘VitXi Meet’, |
4.- Some features of your new Video Conferencing Server
Jitsi is a complete Video Conference application, below we list some of its main features.
- HD Audio/Video
- Unlimited free meeting access for up to 50 participants at a time
- End-to-End encryption
- Multiple participants can share their screen simultaneously
- Remote control other participants desktop
- Integrations (google, Microsoft, Slack)
- Lobby Mode (Waiting Room)
- Password Protection
- and much more….
5.- Integrate with VitalPBX
To Integrate VitalPBX with the Video Conferencing Solution that we have just installed, you must follow the following steps:
5.1.- In VitalPX Install the Branding Module
Go to Admin > Add-ons > Add-ons and Install the Branding module
5.2.- Branding Module Configuration
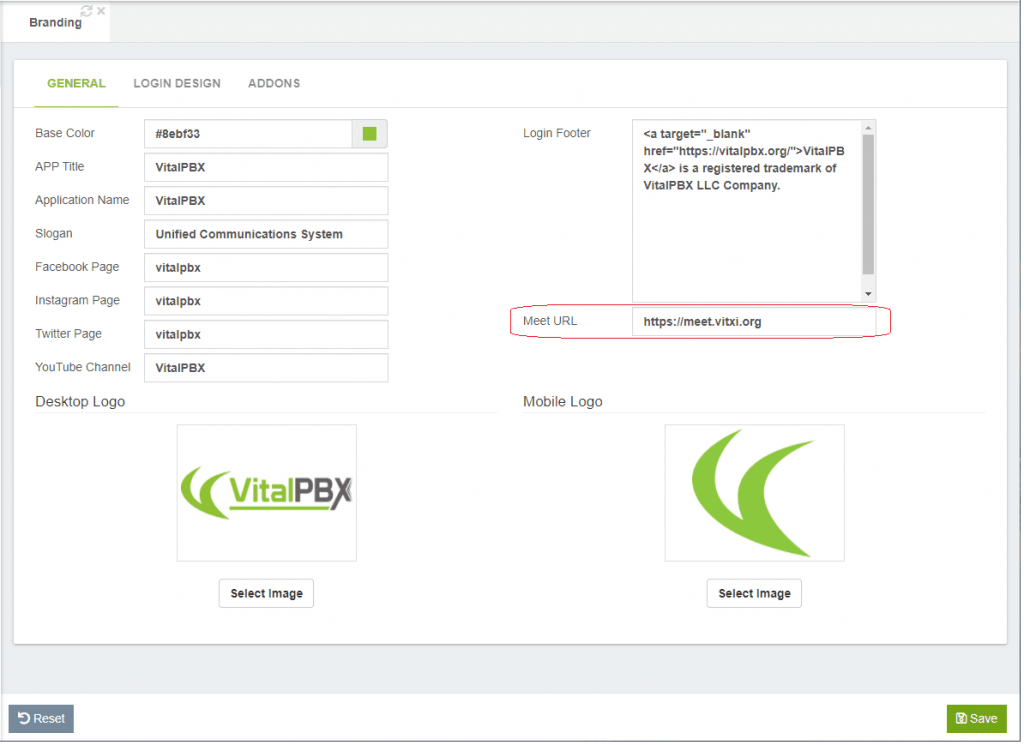
Go to Admin > Tools >Branding in the Meet URL field type your URL, for example: meet.vitxi.org. (If you can’t see this module, remember to refresh your browser after installing the add-on.)

5.3.- Creating the Video Conference from VitalPBX
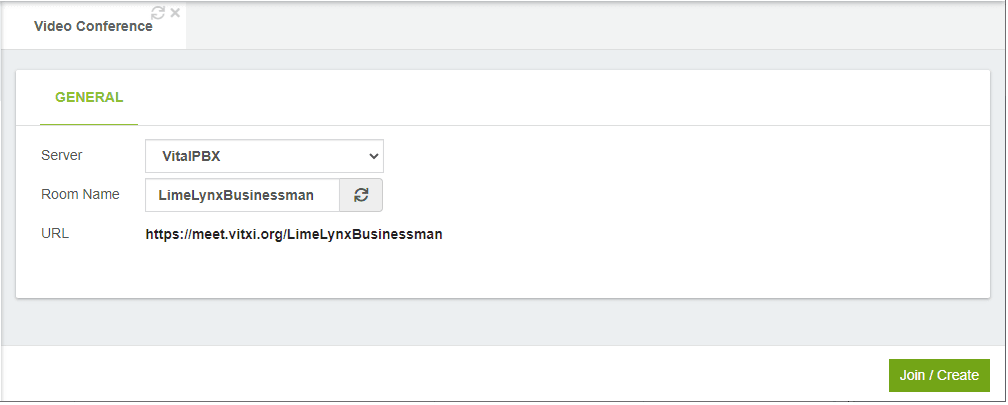
Finally, go to PBX > Extras > Video Conference and create the URL of your Video Conference

6.- Update your Video Conference Server
If you want to update Jitsi Meet, go to the console, and execute the following command:
| root@meet:~# apt -y install jitsi-meet |
Remember that after updating it, you may have to reconfigure the White Label.
We hope you have enjoyed installing your new Video Conference server. As we said in the beginning, video conferencing has become part of our lives, and it is a very important tool for us to work remotely and safely. This is a great solution to give your business a more professional look and safety by hosting your own Video Conferencing Server. And the integration with VitalPBX makes it even easier to have your users and customers take advantage of generating Video Conferencing Rooms from one single space.
Do not forget to leave your comments or suggestions, these will help us to improve the VitalPBX project even more.


