
Exciting Product Updates to Enhance Your Communication Systems: 4.1.0 R2
We’re thrilled to share a series of updates and improvements we’ve rolled out to ensure that your experience with our communication solutions is not only
VitalPBX One is the all-in-one solution designed to improve your business's collaboration and communication to new levels
Ideal for any size and type of business.
Get features that cover all your call center needs
Manage multiple PBX's on the same server
Experience a fully featured Switchboard, Recording Manager, Call Center Statistics, Call Account, and Call Center Dialer, system,
The add-ons module allows you to install new modules in order to expand the PBX capabilities and add new features.
Communicate anywhere with VitXi, our full WebRTC client exclusively for your VitalPBX installation.
With VitalPBX Connect, you can make and receive business calls on your smartphone.
An advanced windows softphone for call center which integrates presence, chat, video call, BLF, and much more.
We can help with everything from implementation assistance to upgrades and production down emergencies.

As a VitalPBX administrator, integrating a SIP trunking service like Wavix can provide significant benefits for your organization. By linking your phone system to Wavix, you gain access to a robust set of calling features and reliability that enhances your communications.
One of the primary advantages of trunking with Wavix is its greatly expanded geographic reach. Wavix provides connectivity across 170+ countries, allowing you to make and receive calls around the globe. Your callers and customers worldwide can connect with your business at local rates.
Below, we will show you how to integrate Wavix voice/trunking services with VitalPBX and enhance your business communication capabilities.
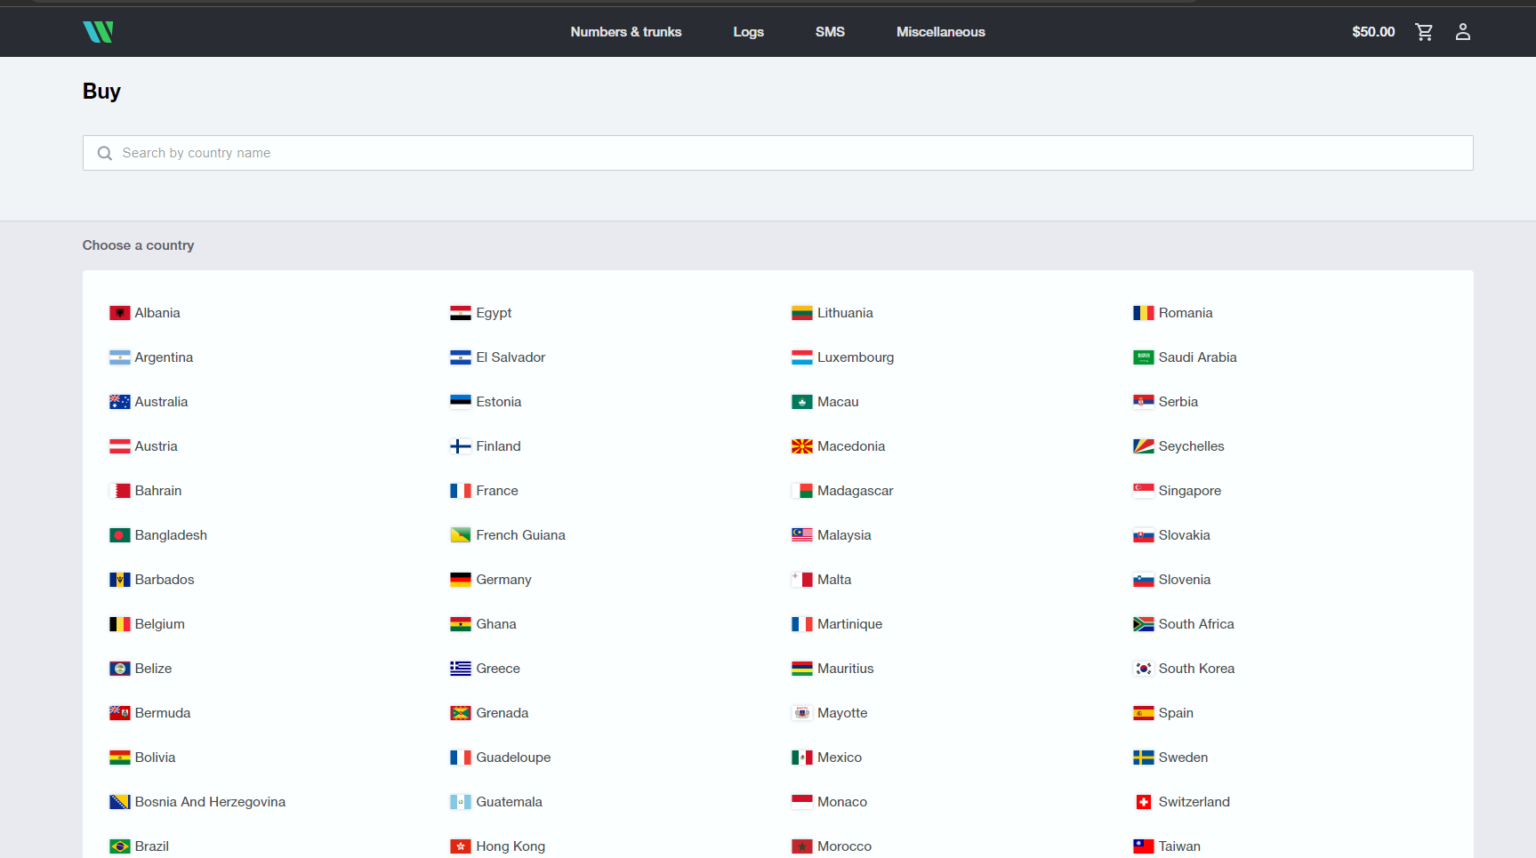
After signing up and getting your account from Wavix’s website, we will purchase our DIDs by navigating to “Numbers & Trunks / Buy.” Once there, we will select the country, the city, and finally, the number or numbers to buy.
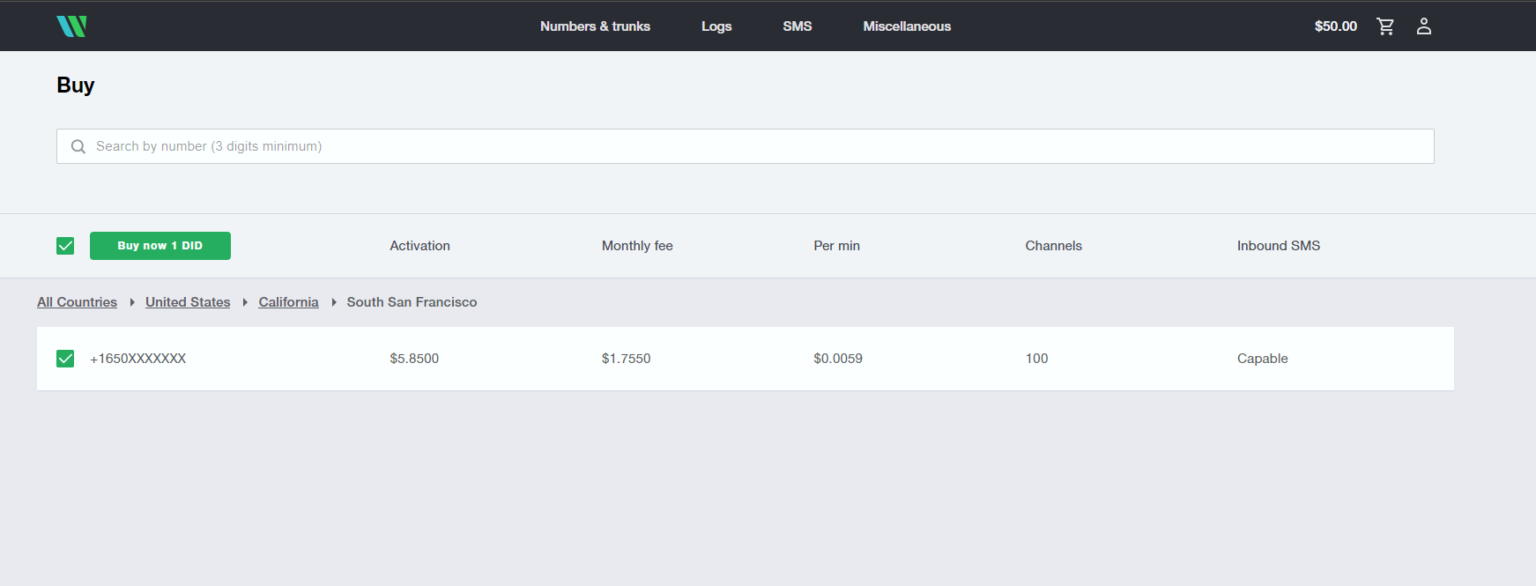
Now that we got our DIDs, our next step would be defining the trunk. We must navigate to “Numbers & Trunks / Trunks” to create it. Once there, we will hit the “Create new” button to open a modal with all the settings to configure to make our first Wavix trunk.
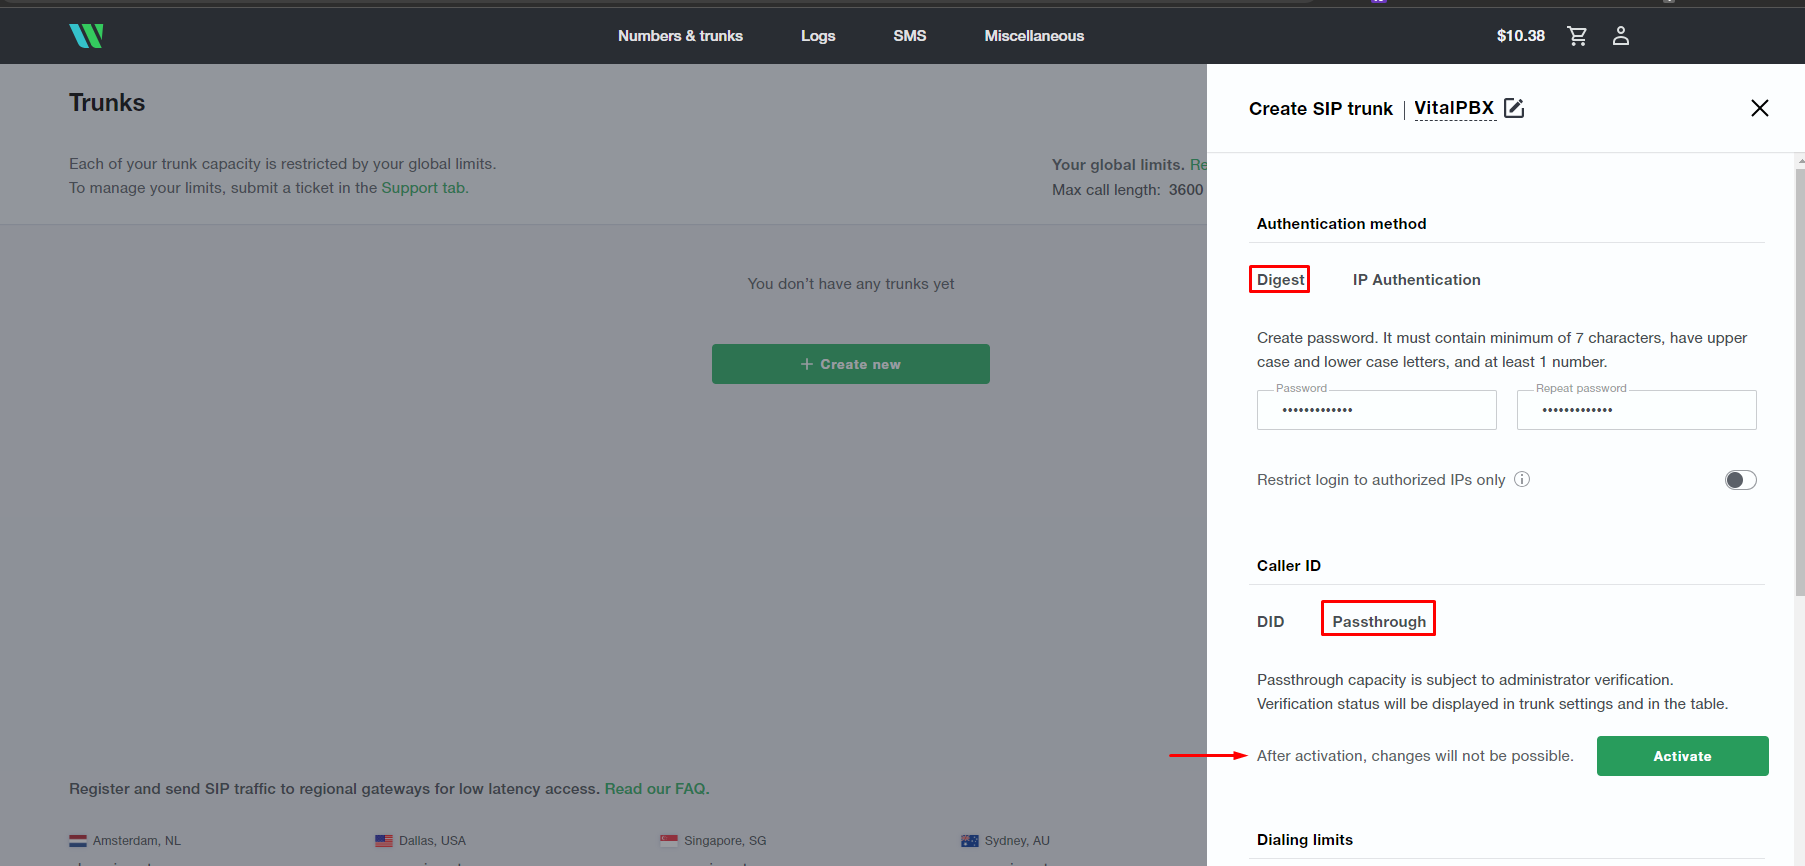
You can provide any alphanumeric string in the description field for your trunk. Nonetheless, for the “Authentication Method,” select “Digest,” and for the Caller ID, select and activate the “Passthrough” option.
The reason for selecting “Digest” as our authentication method over the “IP Auth” is that the “IP Auth” only allows outbound calls.
About the “Passthrough” option for the Caller ID, we require this option for two reasons.
The downside of enabling the “Passthrough” feature is that you must wait for Wavix’s approval before using it.

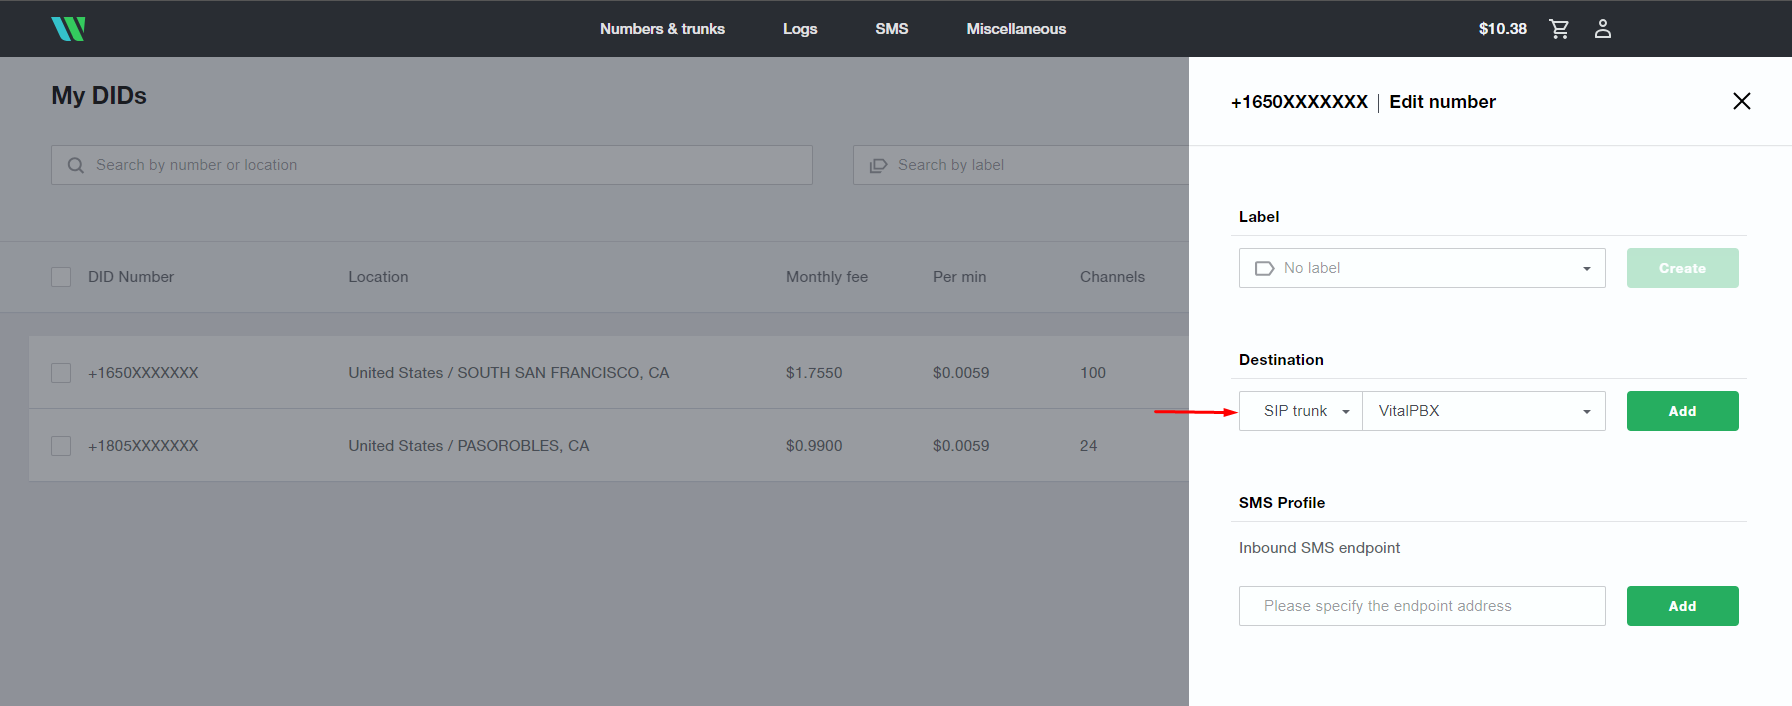
Finally, to receive calls in our VitalPBX, we must attach our “Trunk” to our DID numbers. To edit them, navigate to the “Numbers & Trunks / My DIDs” menu, click the vertical dots icon, then select the option “Edit DID,” and add your trunk in the “Destination” section.
After concluding the Wavix portal configurations, we will proceed with the Trunk creation on VitalPBX.
To start with our trunk setup, we will define the fields below in the top section.
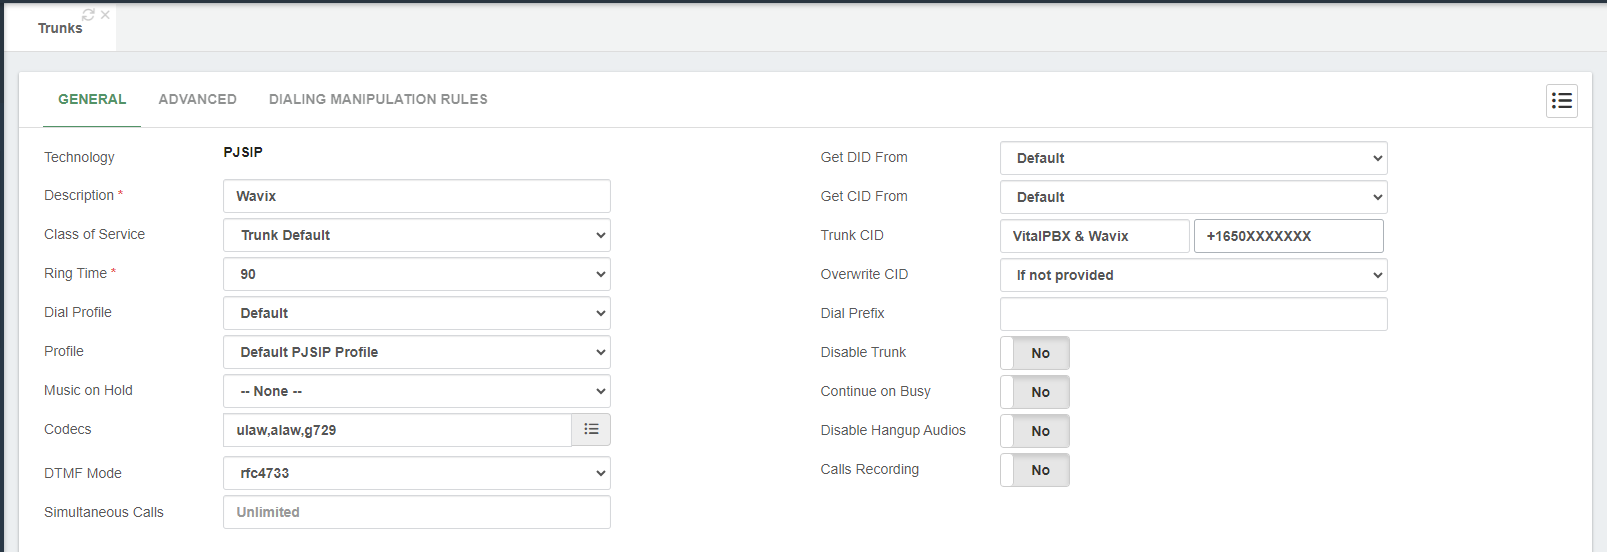
Next, in the sections “General Configurations and Outbound Registration Settings,” we must define the fields below.
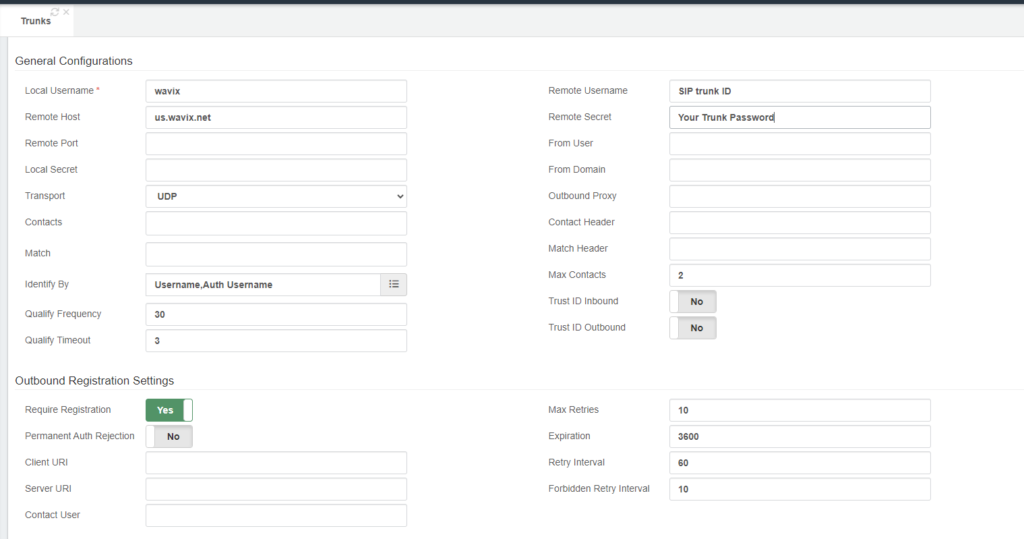
After saving the trunk and applying changes, you can monitor the trunk status by navigating to “Reports / PBX Reports / PJSIP Endpoints.” Once there, you must select the “Trunks” tab.

Additionally, you can check the trunk registration status by selecting the “Outbound Registrations” tab in the “PJSIP Endpoints” module.

Now that we verified that our trunk is up and running, we will create the outbound route to place calls using our Wavix PJSIP trunk.
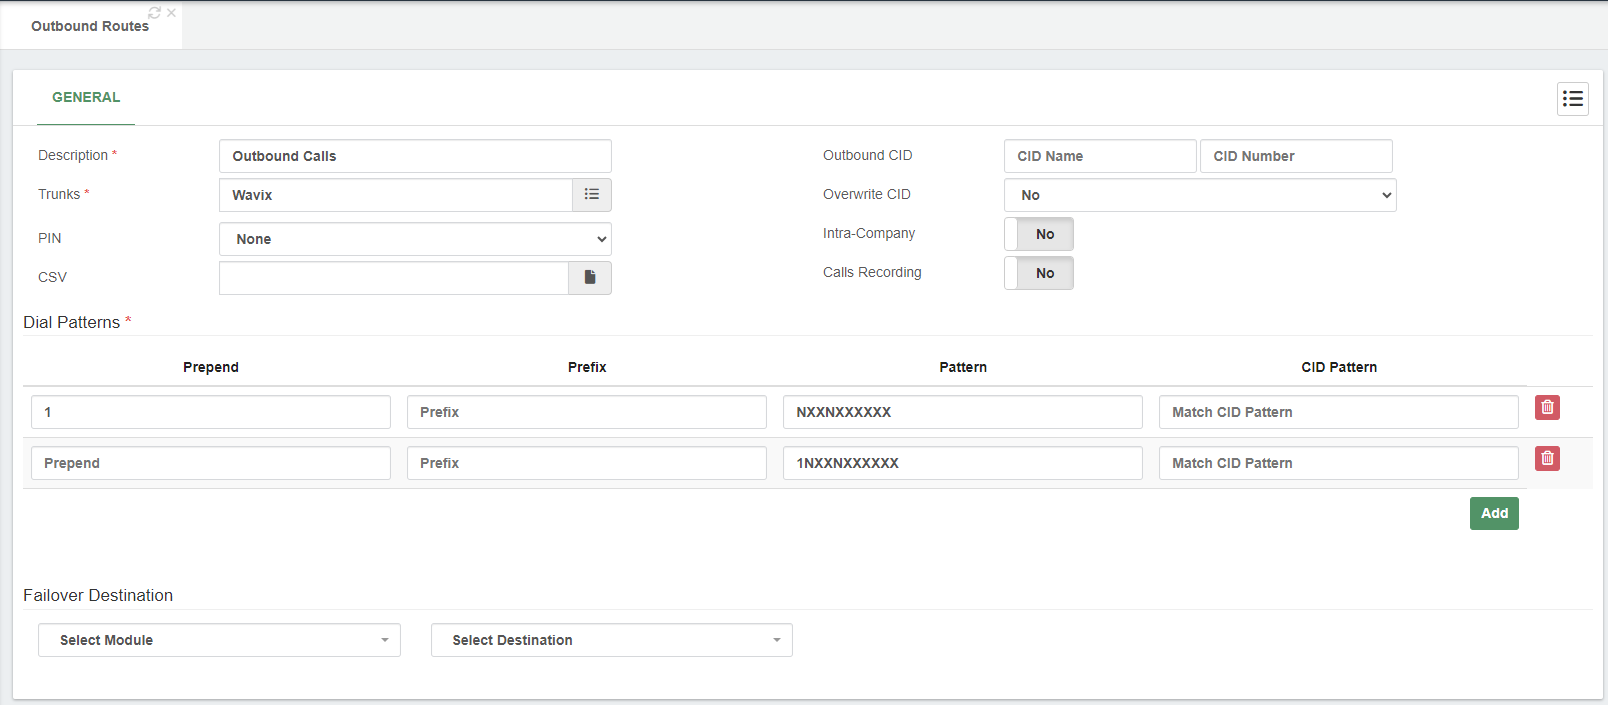
Finally, to receive calls in our VitalPBX, we must create our inbound routes with our Wavix DIDs using the +E.164 format (e.g., +1652221111).
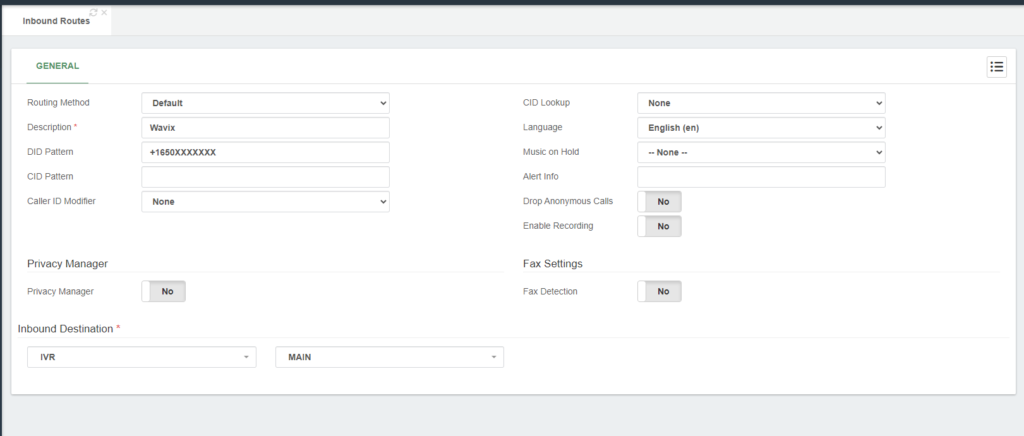
Now that the settings are complete, we can place test calls to confirm that our trunk is working.
For testing outbound calls, you can place a test call to a phone number outside of your network; it can be your mobile number, for instance.
You can call from your mobile to any of your Wavix DIDs to test inbound calls.
Thus, if both tests went well, you have successfully interconnected Wavix trunking/voice service with VitalPBX.
Linking your VitalPBX phone system to the Wavix voice network using PJSIP gives you access to enterprise-level capabilities and reliability that enhance your business communications. The combination of global reach, redundancy, and high availability provides a robust unified communications solution for organizations of any size. Integrating Wavix trunking services with your VitalPBX platform is a strategic step towards future-proofing your phone system.

We’re thrilled to share a series of updates and improvements we’ve rolled out to ensure that your experience with our communication solutions is not only

The VitalPBX team is thrilled to announce the rollout of VitalPBX 4.1 R1, a significant update that brings cutting-edge features and improvements to your communication

PBX System Recognized for Industry Innovation Miami, Florida, 02/27/24 — VitalPBX announced today that TMC, a global, integrated media company, has named VitalPBX Unified Communications

VitalPBX provides a robust and scalable platform, which will allow you to manage your PBX in an easy and intuitive way.