Exciting Product Updates to Enhance Your Communication Systems: 4.1.0 R2
We’re thrilled to share a series of updates and improvements we’ve rolled out to ensure that your experience with our communication solutions is not only
VitalPBX One is the all-in-one solution designed to improve your business's collaboration and communication to new levels
Ideal for any size and type of business.
Get features that cover all your call center needs
Manage multiple PBX's on the same server
Experience a fully featured Switchboard, Recording Manager, Call Center Statistics, Call Account, and Call Center Dialer, system,
The add-ons module allows you to install new modules in order to expand the PBX capabilities and add new features.
Communicate anywhere with VitXi, our full WebRTC client exclusively for your VitalPBX installation.
With VitalPBX Connect, you can make and receive business calls on your smartphone.
An advanced windows softphone for call center which integrates presence, chat, video call, BLF, and much more.
We can help with everything from implementation assistance to upgrades and production down emergencies.

In today’s digital world, the ability to seamlessly convert text to speech in a fluid and natural manner is more crucial than ever, especially for applications aiming to enhance accessibility or provide richer, more interactive user experiences.
Microsoft Azure offers a robust solution through its Text To Speech (TTS) service, part of Azure Cognitive Services, enabling developers to easily integrate voice capabilities into their applications.
However, the first step to accessing this powerful service is creating an API Key in Microsoft Azure. In this blog, I will guide you step-by-step through the process of obtaining your API Key for Azure’s TTS service, from setting up your initial Azure account to creating and configuring your Cognitive Services resource.
This journey will equip you with the necessary tools to transform text into enriched speech, opening a world of possibilities for your applications.
To create a Free Azure account, you need to have a credit card on hand. We begin by entering the following link:
You press the Free account button (note: it may have changed)
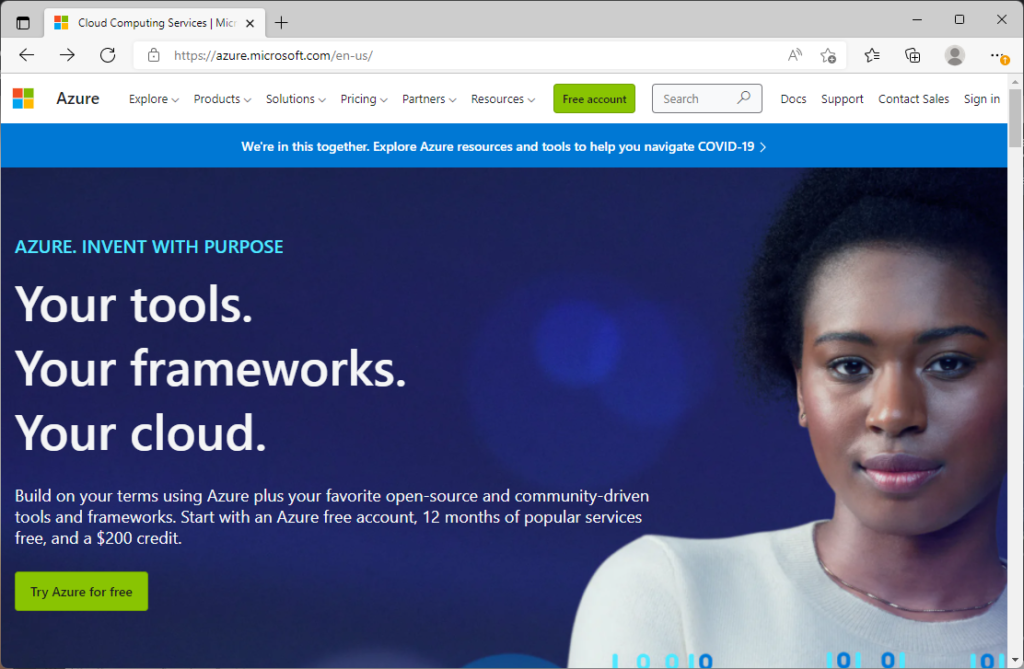
You press “Pay as you go”, since in order to create the API to use it asks us for a credit card in case, we exceed the allowed monthly consumption.
Now press “Get started”, you can use an existing email or create one from Outlook.
Follow these steps and finish creating your account.
Now that we have created our account, we will proceed to create our API Key to be able to use TTS from the application.
Now we go to the Azure portal to create our API Key.
We press where it says Create a Resources and then we look for the “Speech” resource and proceed to press the Create button.
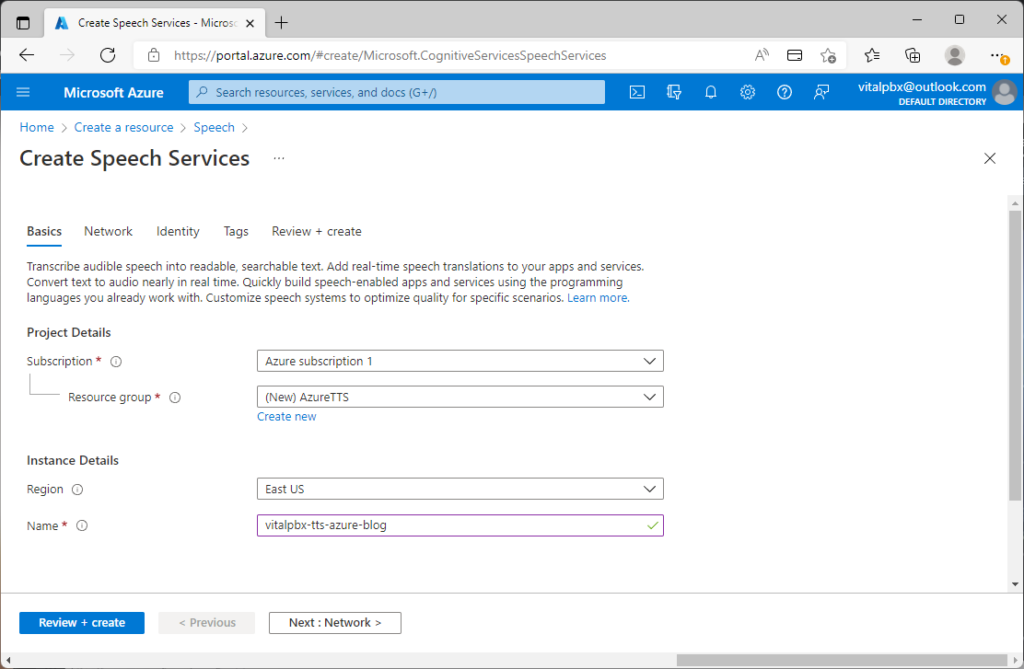
Now we press Review + créate
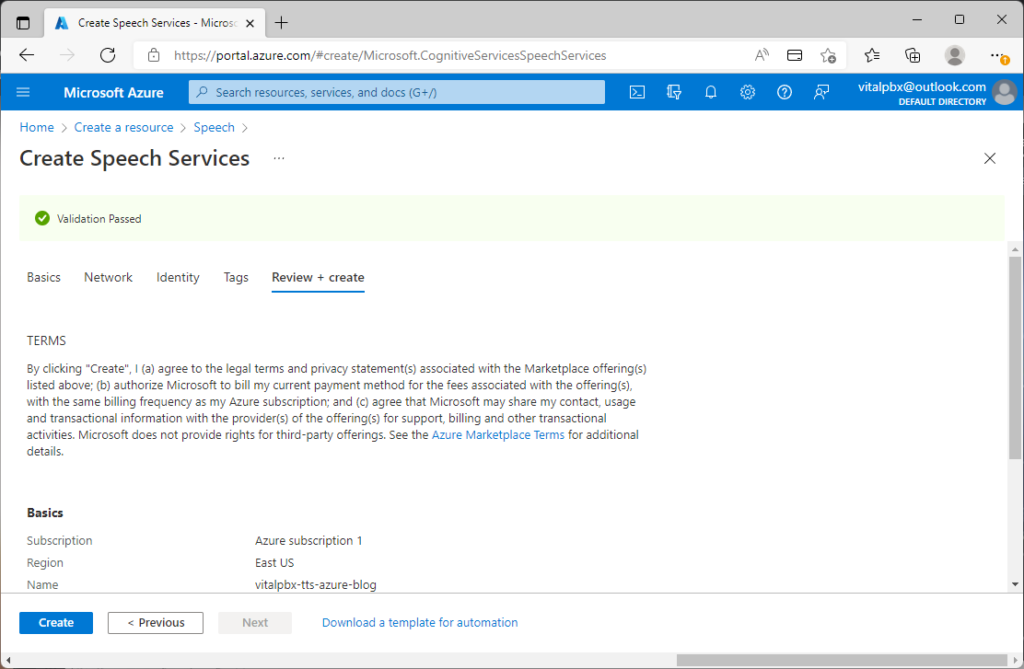
Finally, we press Create and it will show us the following screen.

Now we go to Go to resource and press Keys and Endpoint.
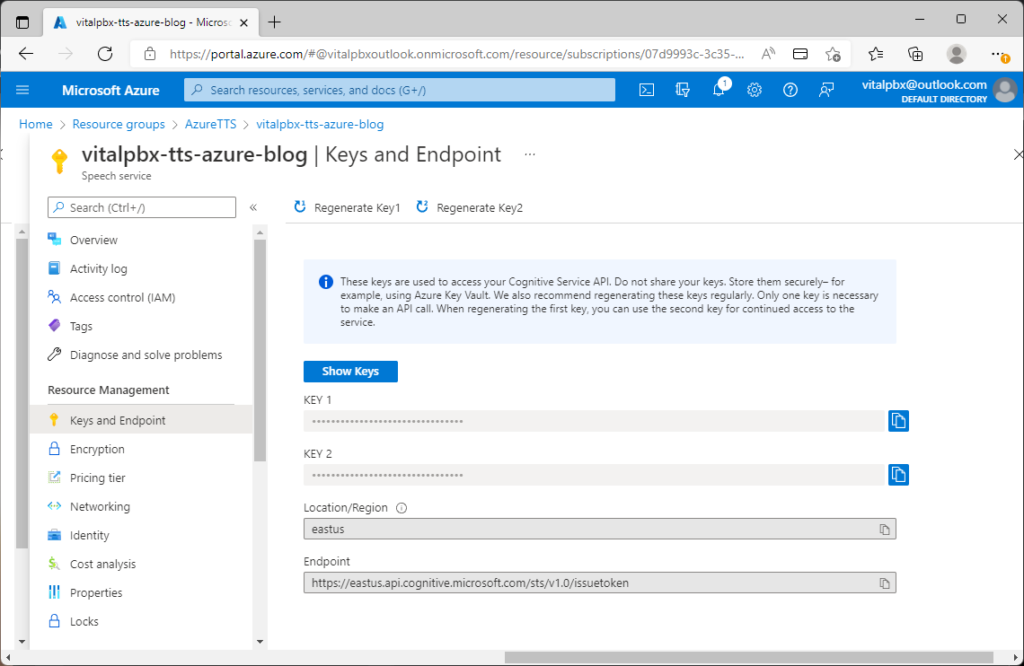
Now we have the API Key that we are going to use in our App. Select Key 1, the content should be something like the one shown below.
f051a6f4c65b6ebe899033de78fffd5e
Creating an API Key in Microsoft Azure to use the Text To Speech service is a straightforward but essential process for unlocking advanced voice capabilities in your applications.
By following the detailed steps in this blog, you not only learned how to obtain your API Key but also how to set up your Cognitive Services resource to start implementing TTS functionalities.
This service can significantly enrich user experience, from enhancing accessibility to offering new ways of interaction. With your API Key in hand, you are now ready to explore the broad spectrum of possibilities that Azure TTS offers, innovating and taking your applications to the next level.
Remember, experimentation and practice are key to mastering cloud services usage, so do not hesitate to experiment with different configurations and options to find the voice and style that best suit your needs.

We’re thrilled to share a series of updates and improvements we’ve rolled out to ensure that your experience with our communication solutions is not only

The VitalPBX team is thrilled to announce the rollout of VitalPBX 4.1 R1, a significant update that brings cutting-edge features and improvements to your communication

PBX System Recognized for Industry Innovation Miami, Florida, 02/27/24 — VitalPBX announced today that TMC, a global, integrated media company, has named VitalPBX Unified Communications

VitalPBX provides a robust and scalable platform, which will allow you to manage your PBX in an easy and intuitive way.